
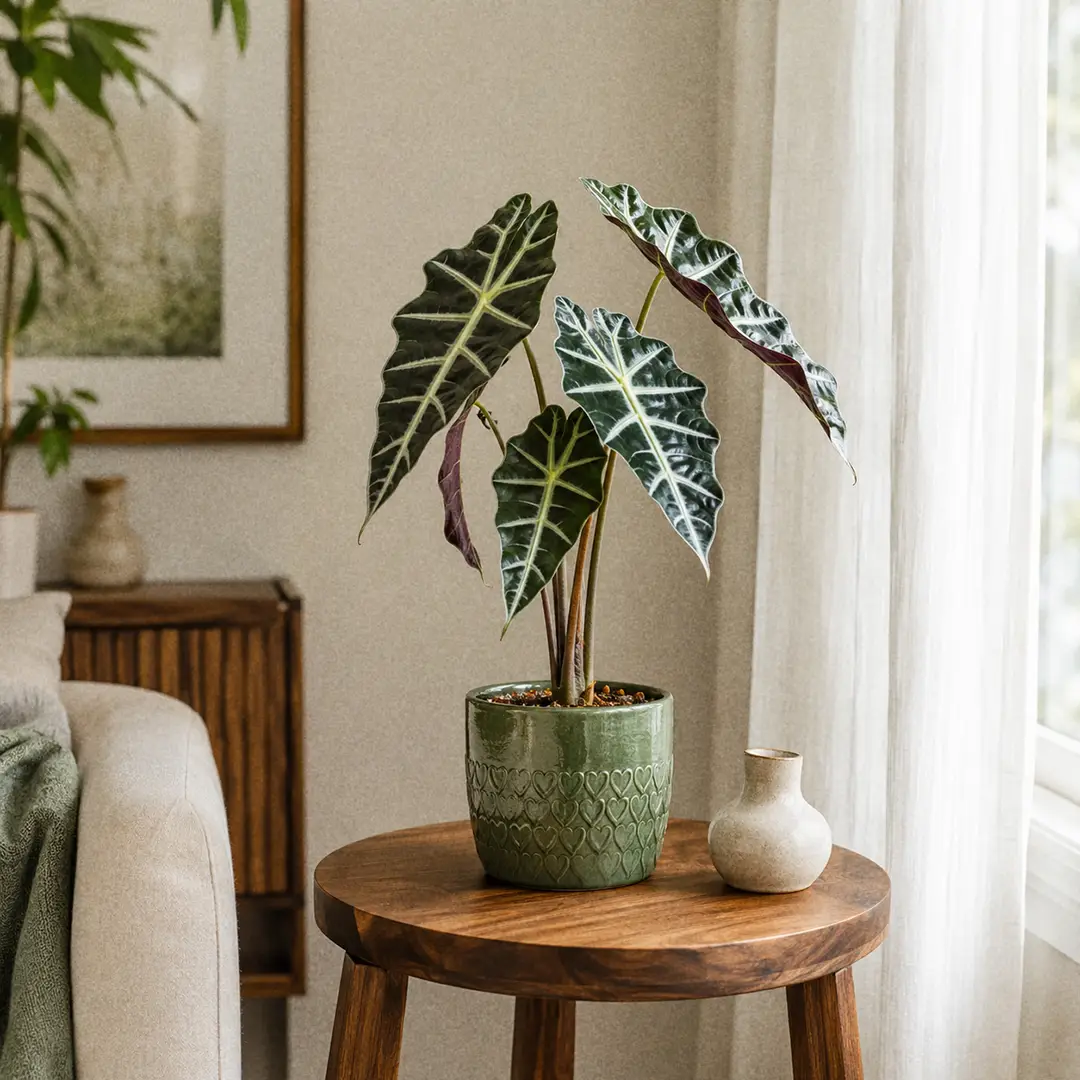
Alocasia Polly
Alocasia × amazonica 'Polly'
African Mask Plant, Amazonian Elephant Ear, Alocasia Amazonica Polly, Kris Plant


Alocasia Polly is the African Mask Plant, a compact hybrid with glossy black-green arrow leaves and thick white veins that look painted on. Learn how to keep those dramatic leaves coming, and why a Polly that drops everything in winter is usually not dying.
📝 Alocasia Polly Care Notes
🌿 Care Instructions
⚠️ Common Pests
📊 Growth Information
🪴 In This Guide 🪴

☀️ Alocasia Polly Light Requirements (Bright Indirect Light)
The Sweet Spot
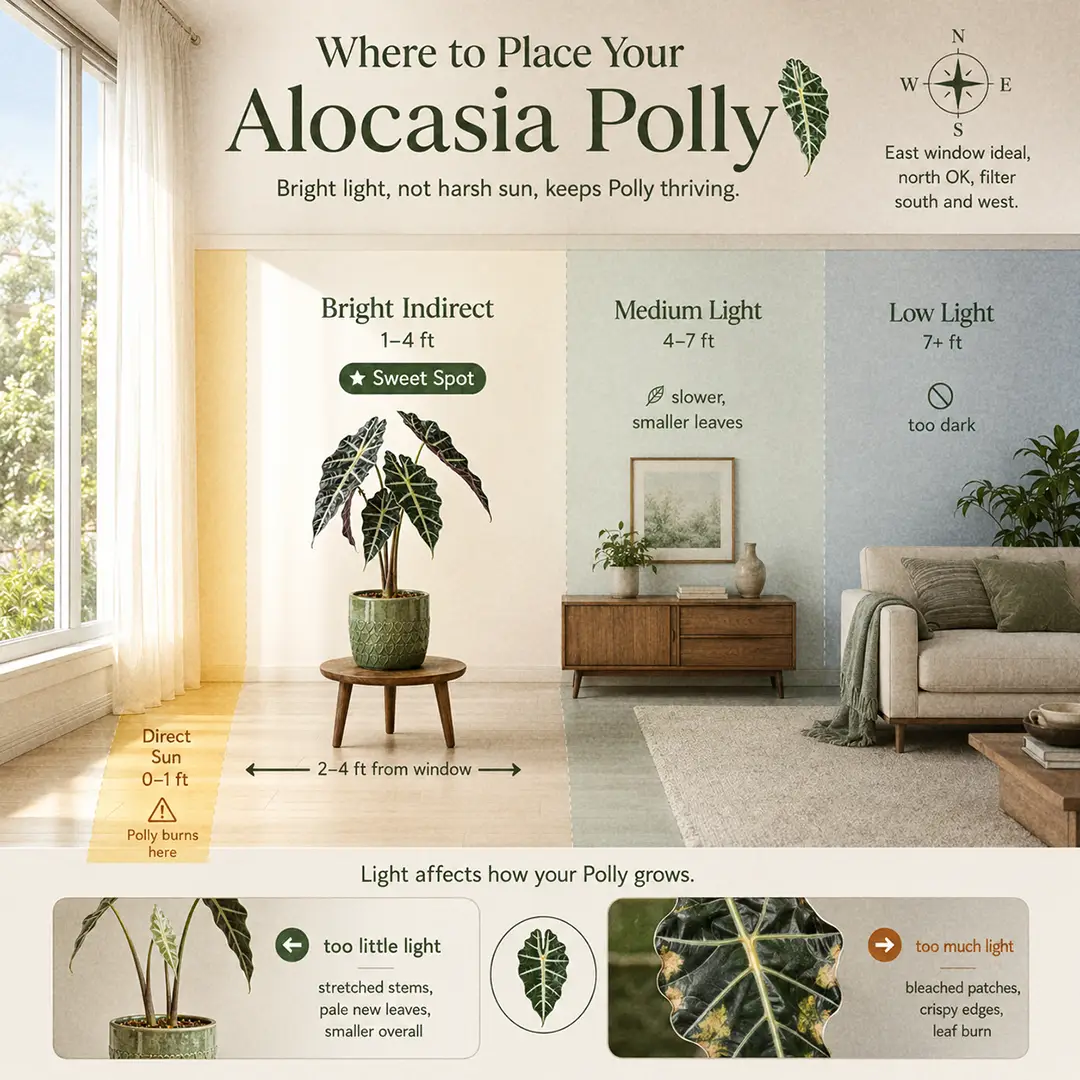
Alocasia Polly wants bright light with no hot sun landing on the leaves. An east-facing window is the easy answer: gentle morning sun, then bright light for the rest of the day. An unobstructed north window works too, as long as the plant sits right in it rather than off to one side.
South and west windows are fine if you pull the plant back two to four feet, or hang a sheer curtain between it and the glass. The rule to remember is simple. If a patch of direct sun would land on a leaf for more than an hour in the middle of the day, move the plant.
Too Little Light
This is the more common mistake, because Polly often gets sold as a low light plant and it absolutely is not. In a dim corner it does not die dramatically, it just stops. Each new leaf comes up smaller than the last, the petioles stretch and lean toward the window, and the plant slowly winds down to two or three tired leaves.
If your room genuinely has no bright spot, a cheap grow light on a timer for ten hours a day fixes it completely. Our plant light guide helps if you are not sure how to judge your window.
Too Much Light
Direct midday sun bleaches the dark green to a washed-out yellow, then burns pale dry patches into the leaf surface. That damage is sunburn and it does not heal, so the marked leaf stays scarred until it eventually yellows off on its own. Move the plant first, then judge the fix by the next new leaf rather than the damaged one.
💧 Alocasia Polly Watering Guide (Moist, Never Soggy)
Watering Frequency
The target is evenly damp soil, like a wrung-out sponge. Never wet, never bone dry. In practice that means watering when the top inch of mix has dried out, which lands around once every 5 to 8 days in spring and summer for a plant in a bright spot.
Do not water on a schedule. Stick a finger in, or use a moisture meter if you would rather not guess. Light, warmth, and pot size all shift the interval, so the same plant that drank weekly in July might want water every three weeks by October.
How to Water
Take the pot to the sink and pour slowly until water runs freely out of the drainage holes, then let it drain for a few minutes before it goes back on its saucer. Half-watering a Polly leaves dry pockets in the mix and lets salts build up at the bottom of the pot, which is exactly where crispy leaf edges start.
Polly is fussier about water quality than most houseplants. Tap water heavy in fluoride, chlorine, or dissolved minerals shows up as brown tips and margins within weeks. Filtered water, rainwater, or tap water left out overnight makes a visible difference. Our watering guide covers the general technique in more detail.
Signs of Trouble
Overwatering is the number one killer here, and it presents as yellowing lower leaves plus a plant that droops even though the soil is damp. That combination means root rot, not thirst, and adding more water makes it worse.
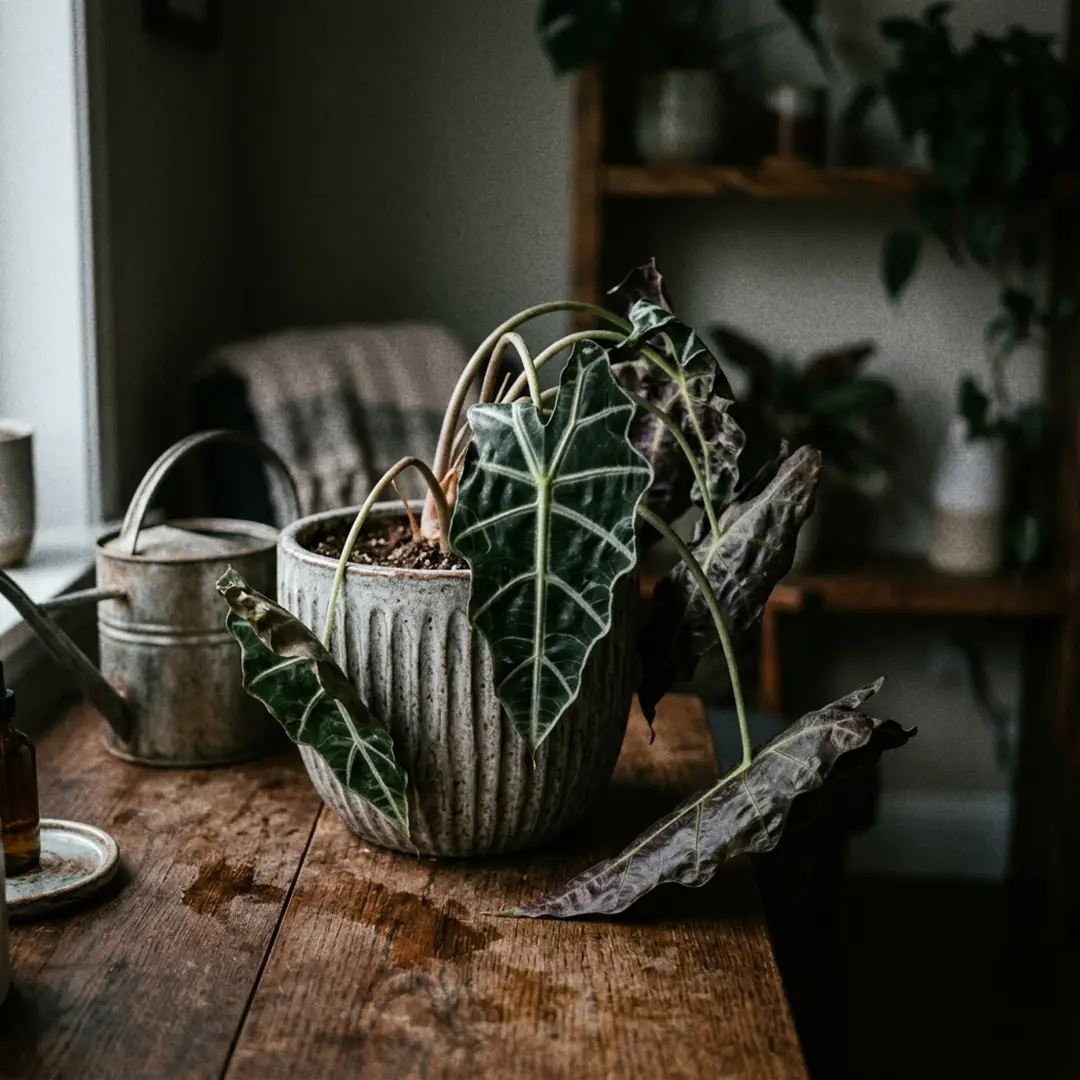
Underwatering looks different. The leaves droop and the petioles go soft and floppy, but the colour stays good and the soil is dry to the knuckle. A thorough soak usually has the plant standing back up within a few hours.
Winter Watering
From late autumn the plant slows down hard and its water needs fall off a cliff. Cut back to barely damp, perhaps once every two or three weeks. Watering a dormant Polly on a summer schedule is how most of them actually die.
🪴 Best Soil for Alocasia Polly (Chunky Aroid Mix)
What the Soil Needs
Two things at once: fast drainage and some moisture retention. Alocasia roots need air around them, so a dense peat-based potting soil that stays sodden for a week is the wrong tool. But a gritty cactus mix that dries out in two days is equally wrong, because this plant hates going fully dry.
Aim for a chunky, open mix full of air pockets that still feels slightly damp three days after watering.
DIY Soil Mix
The recipe I use, by volume:
- 2 parts orchid bark, fine or medium grade
- 2 parts coco coir or peat-based potting mix
- 1 part perlite or pumice
- A handful of horticultural charcoal, optional, but it keeps the mix sweet
Mix it dry, then moisten it before potting. This drains in seconds and still holds enough water to keep the roots happy for the better part of a week.
Pre-Made Options
Any bagged aroid mix or Monstera and philodendron mix works straight out of the bag. If all you can find is standard potting soil, cut it with roughly a third perlite and a third bark before you use it. Straight potting compost on its own is the single most common reason a healthy nursery Polly is dead by month three.
🍼 Fertilizing Alocasia Polly (Light and Seasonal)
When and How Often
Feed only while the plant is actively pushing new leaves, so roughly March through September. Once every 3 to 4 weeks is plenty, and always onto damp soil rather than dry, so the roots do not get scorched.
Stop feeding entirely once growth stalls in autumn. A dormant plant cannot use the nutrients, and they just sit in the mix as salt.
What to Use
A balanced liquid houseplant fertilizer, something near 10-10-10 or 20-20-20, at half the strength printed on the label. Alocasias are moderately hungry when growing but they burn easily at full dose. Our fertilizing guide and fertilizer roundup cover the options.
Over-Fertilizing Signs
A white crust on the soil surface or around the pot rim, plus brown tips creeping inward from the leaf margins, means salt buildup. Flush the pot: run lukewarm water through it for a full minute, let it drain completely, and skip the next two feeds.
🌡️ Alocasia Polly Temperature Range
Ideal Range
65 to 80°F (18 to 27°C) is the comfort zone, which is ordinary indoor room temperature. Warmth drives growth here, so a Polly in a warm room stays in leaf far later into the year than one in a cool hallway.
Below 60°F (15°C) the plant reads the season as over and starts shutting down. Below 50°F (10°C) you risk real cold damage to the corm, so a plant summering outdoors needs to come in well before the first cold night.
Drafts and Heat Sources
Cold draughts are the classic trigger for a sudden mid-season leaf drop. Keep it away from a door that opens onto winter, a leaky window frame, and the blast from an air conditioner.
Radiators and heating vents cause the opposite problem, drying the air around the plant until the edges crisp. A gap of a few feet from any heat source solves both.
💦 Alocasia Polly Humidity Requirements
Ideal Humidity
60 percent or higher is what this plant actually wants, and anything under 40 percent shows on the leaves as brown, papery edges. Winter heating is the danger zone, when indoor air routinely drops into the 20s.
Easy Humidity Boosters
A small humidifier running near the plant is the only method that reliably moves the number, and it is worth it for this plant specifically. Failing that, group it with other plants, stand the pot on a tray of pebbles and water with the base above the waterline, or keep it in a bright bathroom.
Misting looks helpful but the effect lasts minutes, and water sitting on cold leaves overnight invites fungal spotting. Our humidity guide has better options.
🌸 Alocasia Polly Flowers (Rare and Skippable)
What the Flowers Look Like
If your Polly ever blooms, expect a typical aroid flower: a slim pale green or cream hood, the spathe, wrapped around a short finger-like spadix, usually tucked low among the petioles rather than held up for show. There is a faint sweet scent at best. Next to the foliage it is genuinely underwhelming.
How It Happens
Blooming indoors is uncommon, and it is a maturity thing rather than something you can trigger. A well-fed plant with a fat corm, good light, and a couple of years behind it might throw one in summer. There is no watering or feeding trick that brings it on, and chasing one wastes a season.
Why to Cut It Off
Here is the counterintuitive part. Most growers remove the flower as soon as they spot it. Producing a bloom costs the plant real energy, and Polly carries a small number of leaves with no energy to spare. Snip the flower stalk off at the base with clean scissors and the plant puts that budget into a new leaf instead, which is the thing you actually bought it for.
If you want a houseplant that flowers properly indoors, a Peace Lily does the aroid flower far better.
🏷️ Alocasia Polly Types and Varieties
Alocasia Polly vs Alocasia Amazonica
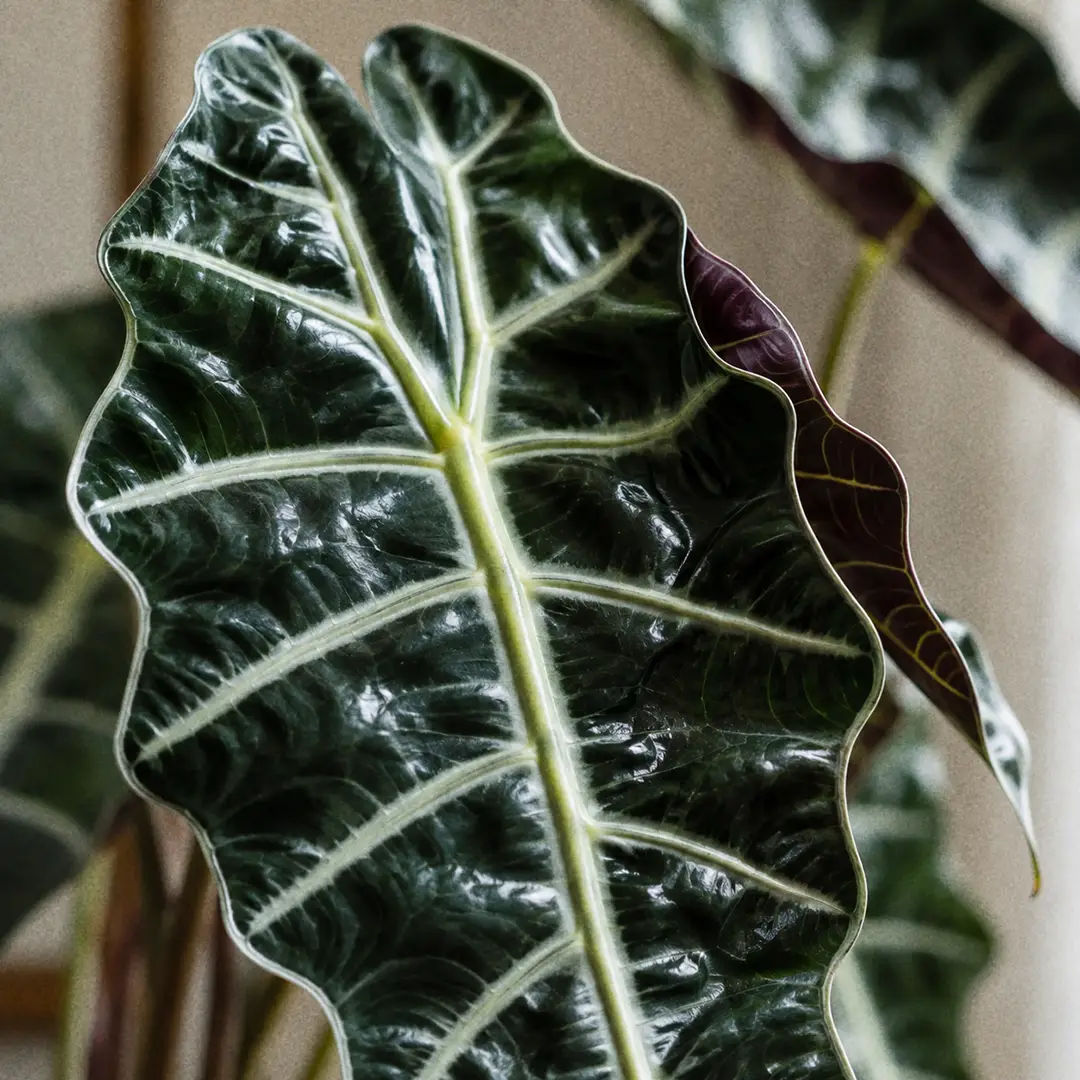
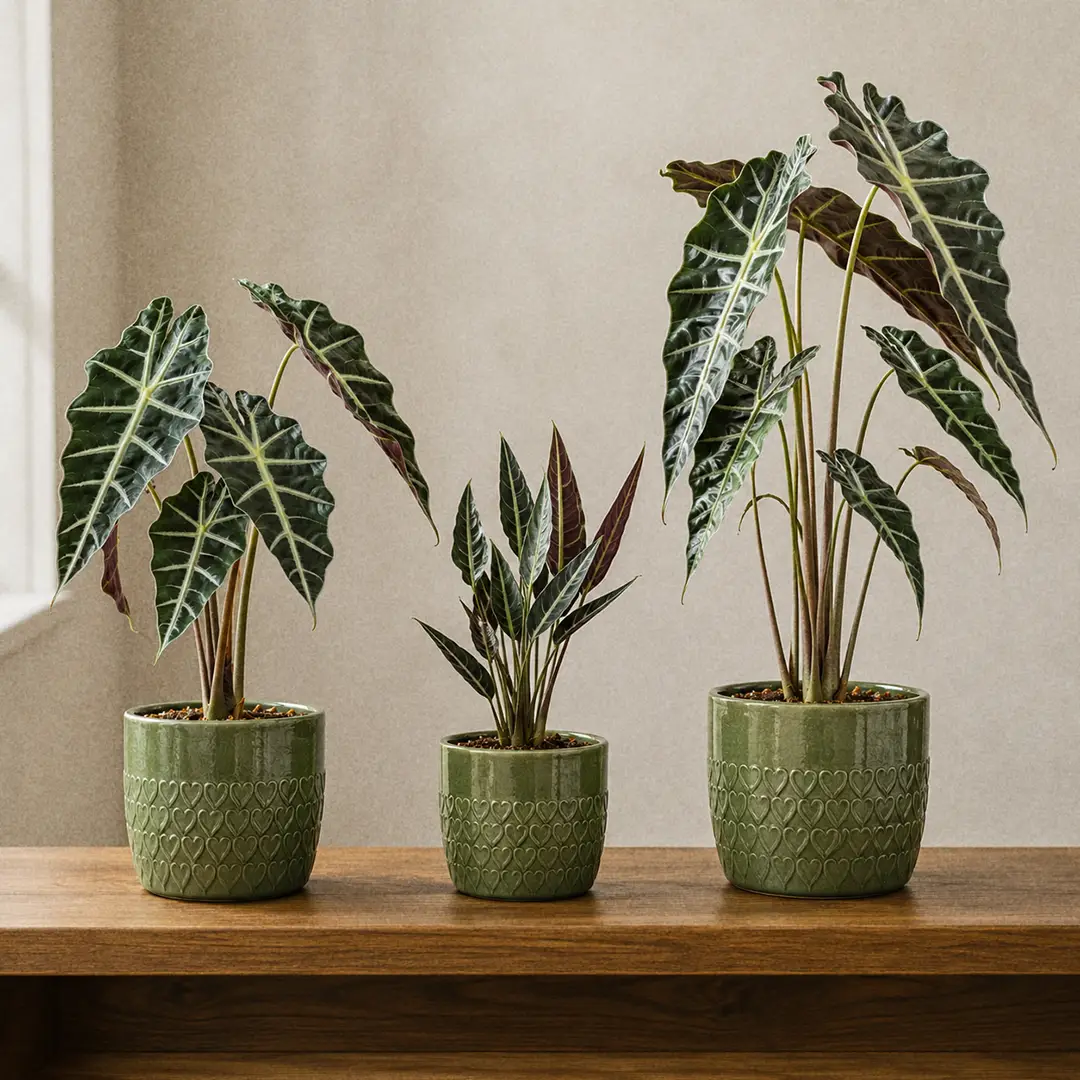
These two names get used interchangeably in shops, which causes endless confusion. They are close relatives, not the same plant. Alocasia × amazonica is the original 1950s hybrid and grows noticeably larger, with longer, more deeply lobed leaves. 'Polly' is the compact selection of it, topping out around 16 to 24 inches with broader, shorter leaves and heavier scalloping along the edges.
Care is identical for both. If a label says "Alocasia Amazonica" on a small plant in a 4 inch pot, it is almost certainly a Polly.
Alocasia 'Bambino'
The smallest of the group, staying near 12 inches. Its leaves are distinctly narrow and spear-shaped rather than the broad arrowhead of a Polly, with the same white veining and purple-tinged undersides. It is the one to pick for a genuinely small shelf, and it wants even more humidity than Polly does.
Alocasia 'Ivory Coast'
A larger hybrid with the same arrow silhouette but smoother, less wavy leaf edges, and one giveaway feature: pink-blushed, brown-streaked petioles. It grows fast and can reach three to four feet, which makes it a floor plant rather than a shelf plant.
Alocasia 'Frydek' and Silver Dragon
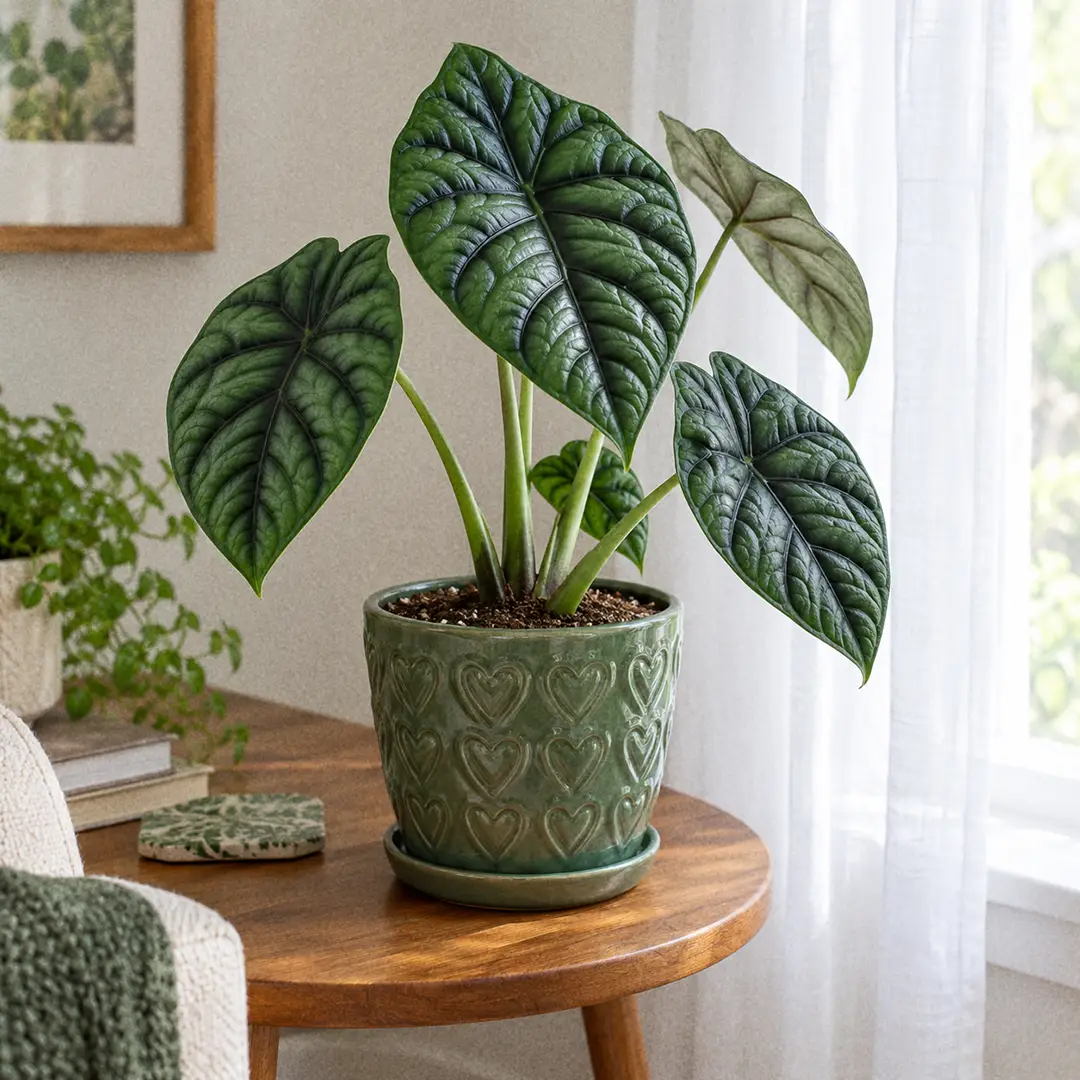
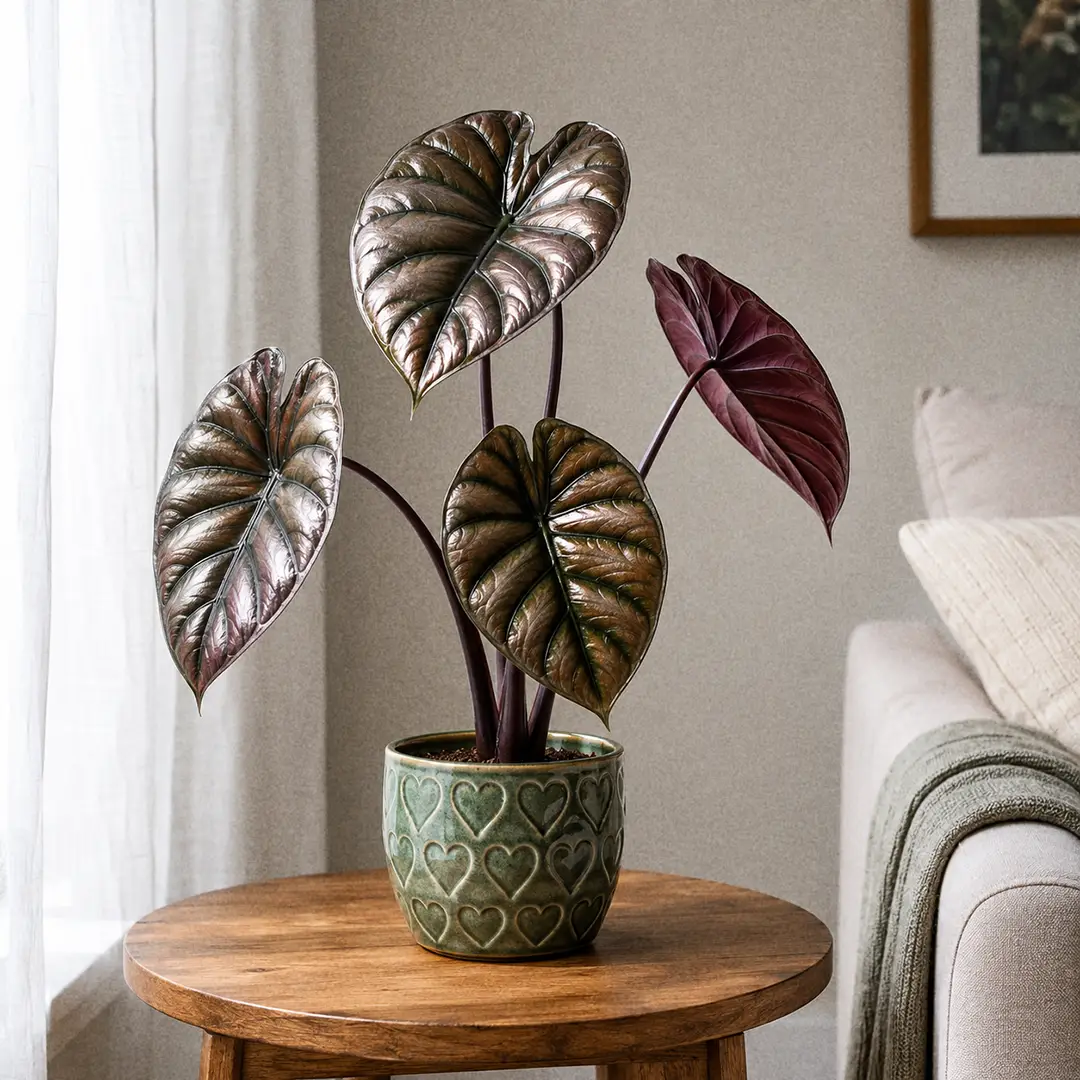
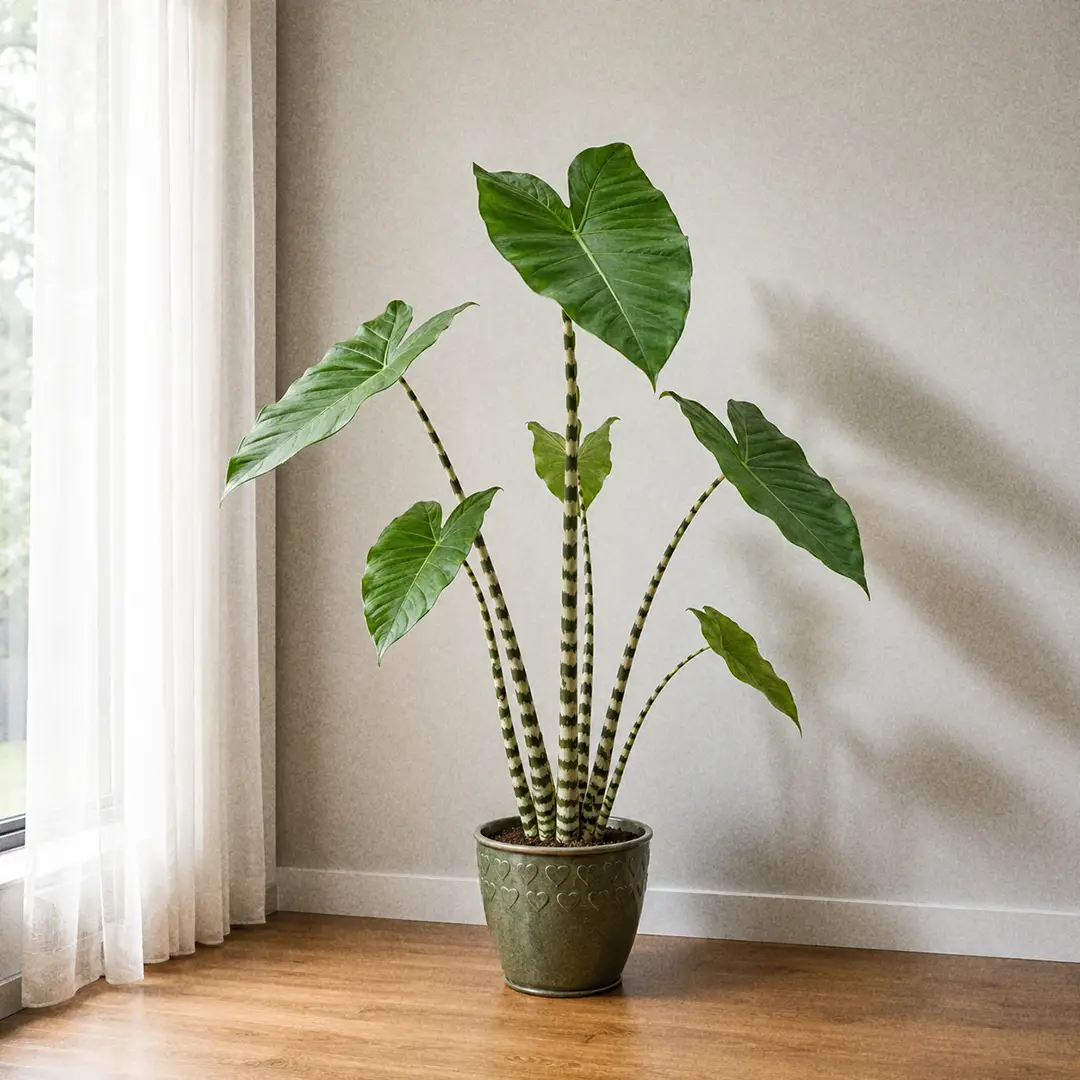
Two other easy-to-find Alocasias worth knowing. Alocasia Frydek swaps the glossy finish for deep velvet and pure white veins. Alocasia Silver Dragon has thick silvery leaves with a dark green vein network, and it forgives dry air better than Polly does. Its emerald counterpart, Alocasia Dragon Scale, is the same species with quilted, reptile-skin foliage, though it is fussier about humidity than any of these. If you are collecting, Frydek is the beauty and Silver Dragon is the tough one. Alocasia Red Secret is the showiest of the small ones, with metallic coppery leaves and a purple underside, though it wants far more humidity than Polly. For something smaller than all three, Alocasia Black Velvet stays under 18 inches with matte near-black leaves and silver veins, though it wants more humidity than Polly does. And if you want height rather than another shelf plant, Alocasia Zebrina is the odd one out of the group: plain glossy leaves, but held two to three feet up on tall petioles banded like a zebra.
🪴 Potting and Repotting Alocasia Polly
When to Repot
Every 2 years in spring is the honest answer, so less often than you might think. This plant grows from a corm and genuinely prefers being a little snug. Repot when roots circle out of the drainage holes, when water runs straight through without wetting anything, or when the plant has multiplied itself into a crowded clump.
Choosing a Pot
Go one size up only, so a 4 inch pot becomes a 6 inch pot. Oversized pots hold a reservoir of wet soil the small root system cannot use, and that is a direct path to rot.
Drainage holes are non-negotiable. Terracotta suits growers who tend to overwater, since it wicks moisture away through the walls. Plastic or glazed ceramic suits those who forget. Our guide to plant pots walks through the trade-offs.
Step-by-Step Repotting
- Water lightly the day before so the rootball slides out cleanly.
- Ease the plant out and gently tease away the old mix, keeping the corm and roots intact.
- Check the corm. It should feel firm. Anything soft, brown, or smelling sour gets cut away with a clean blade.
- Set the plant at the same depth it sat before, never deeper, and fill in around it with fresh aroid mix.
- Water lightly and put it back in its usual spot. Expect a week or two of sulking before it resumes growth.
✂️ Pruning Alocasia Polly
When to Prune
There is no shaping to do here. All the pruning a Polly needs is the removal of leaves it has already finished with, and it will finish with them regularly. Losing an old leaf while pushing a new one is normal, not a problem, and a healthy plant usually carries four to six leaves at a time.
How to Prune
Wait until the leaf is mostly yellow rather than cutting at the first hint of colour, because the plant is still pulling nutrients back out of it. Then cut the petiole off at the base with clean, sharp scissors, close to the soil but without nicking the crown.
Wear gloves or wash your hands afterward. The sap contains calcium oxalate crystals and it stings on broken skin or in your eyes.
Damaged Leaves
You can trim a brown edge or tip to tidy it up, following the natural leaf shape so the cut is not obvious. It will not regrow, but it also will not spread. If more than half the leaf is damaged, take the whole thing off and let the plant spend its energy on the next one.
🌱 How to Propagate Alocasia Polly
Why Cuttings Do Not Work
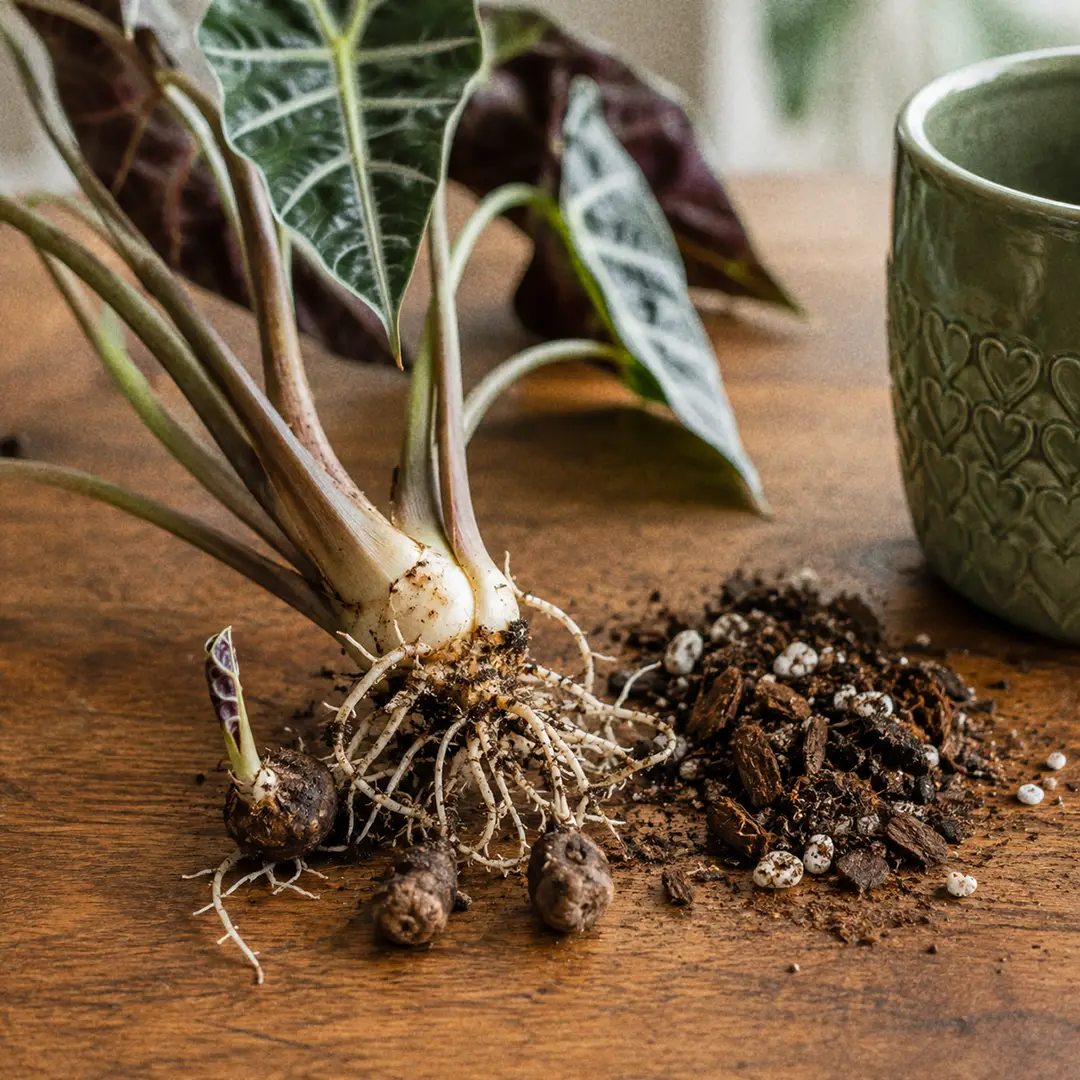
Start here, because it saves a lot of wasted effort. You cannot propagate an Alocasia Polly from a leaf or a stem cutting. There is no node on a petiole to root from. Cut a leaf off, put it in water, and it will simply rot. This is the biggest single difference between Alocasia care and the philodendron or pothos habits most of us learn first.
Division and Corms
Polly grows from a central corm, and a happy plant produces small round offset corms around its base. Those offsets are your new plants. Some are already sprouting roots and a tiny leaf by the time you find them, others are still hard brown marbles that need waking up.
Step-by-Step Division
- Do it in spring, ideally at the same time as a repot, when the plant is heading into active growth.
- Slide the plant out of its pot and wash enough soil off the base to see the corms clearly.
- Separate the offsets by hand. Ones with roots and a leaf already come away easily. Twist or cut the bare corms off with a clean blade.
- Pot any rooted division straight into a small pot of the same chunky mix and treat it as a small adult plant.
- For bare corms, peel the brown papery skin off, sit them pointy end up on damp sphagnum moss in a covered container, and keep them warm and bright.
Tips for Success
Bare corms are slow. Expect two to six weeks before a root appears, then longer before a first leaf, and keep them in that humid container the whole time. Warmth matters more than anything else, so the top of a fridge or a seedling heat mat speeds things up noticeably.
Once a sprouted corm has one full leaf and a decent root system, move it into soil. Do not fertilize a new division for the first two months. Our plant division guide covers the general technique.
🐛 Alocasia Polly Pests and Treatment
The Main Threat
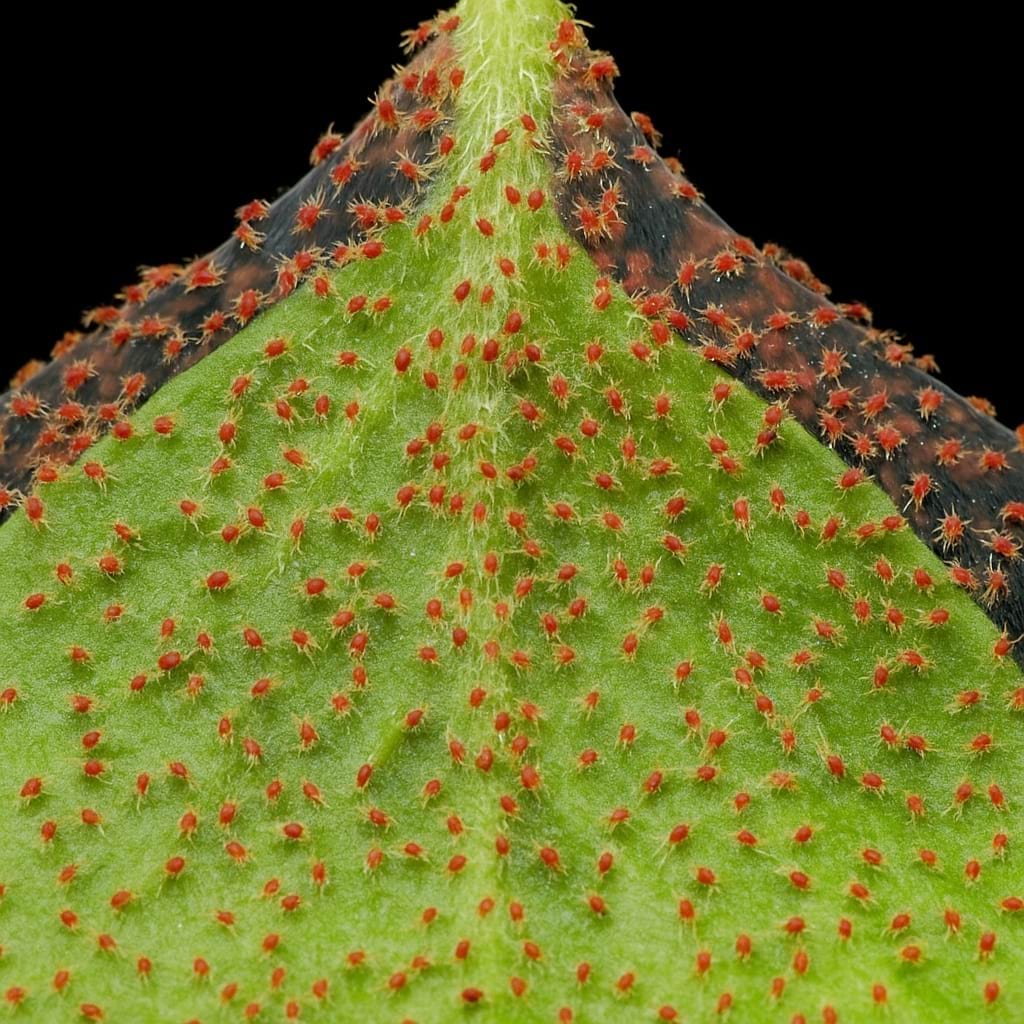
Spider mites are the pest that ruins Alocasias, and Polly is one of their favourites. Dry indoor air is exactly what they like, so the same winter conditions that crisp your leaf edges also invite an infestation. Look for fine stippled yellow dots across the leaf and faint webbing where the petiole meets the blade. Treat by rinsing every leaf surface in the shower, then applying insecticidal soap or neem weekly for three weeks.
Everything Else
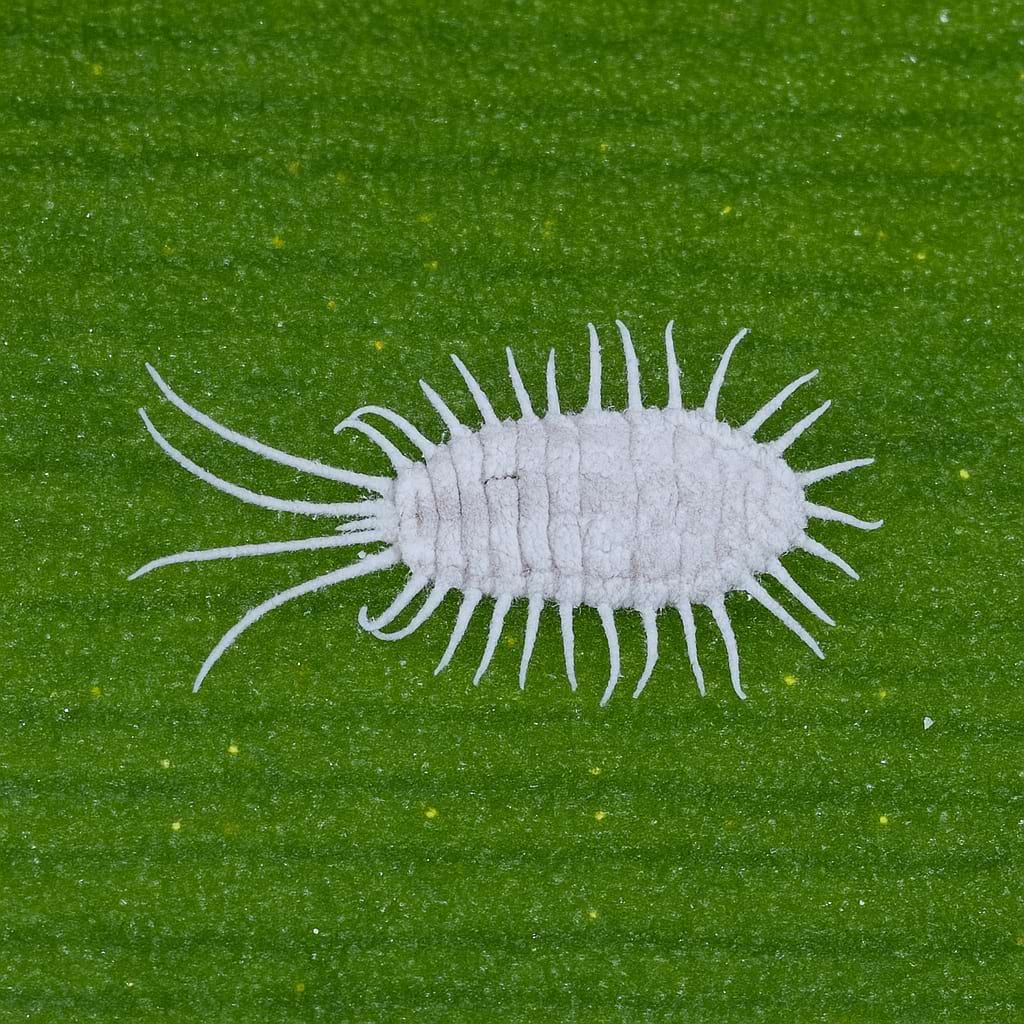
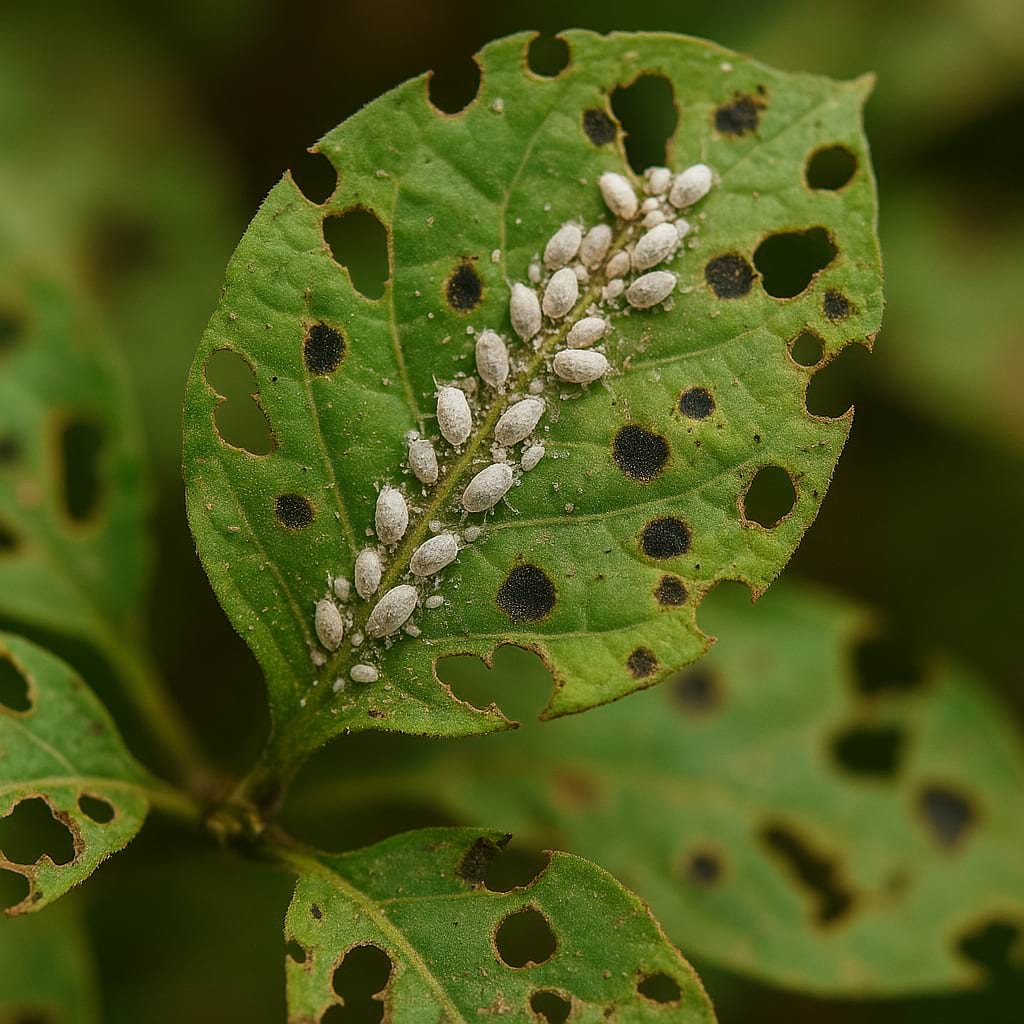
Mealybugs appear as white cottony blobs tucked into the crown and the leaf joints. Dab them with a cotton bud dipped in rubbing alcohol, then follow up weekly until they stop coming back.
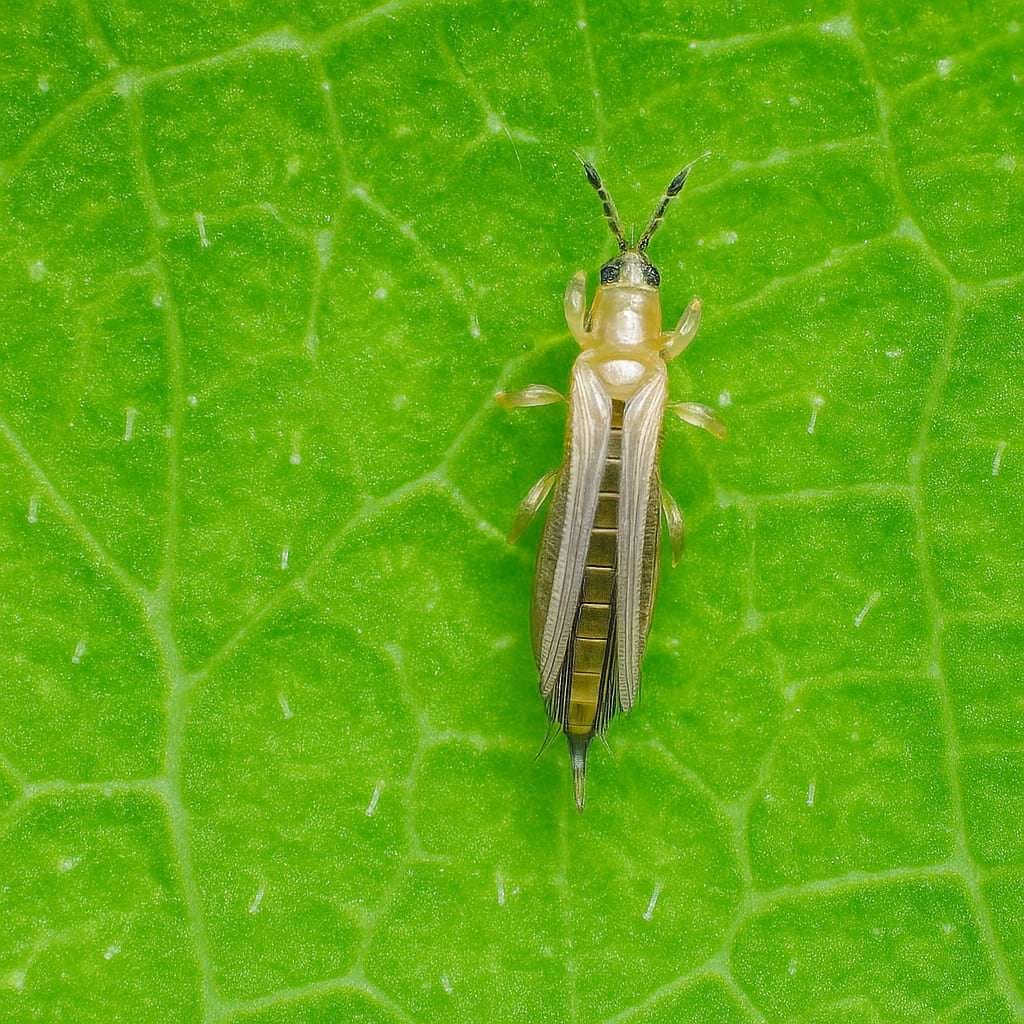
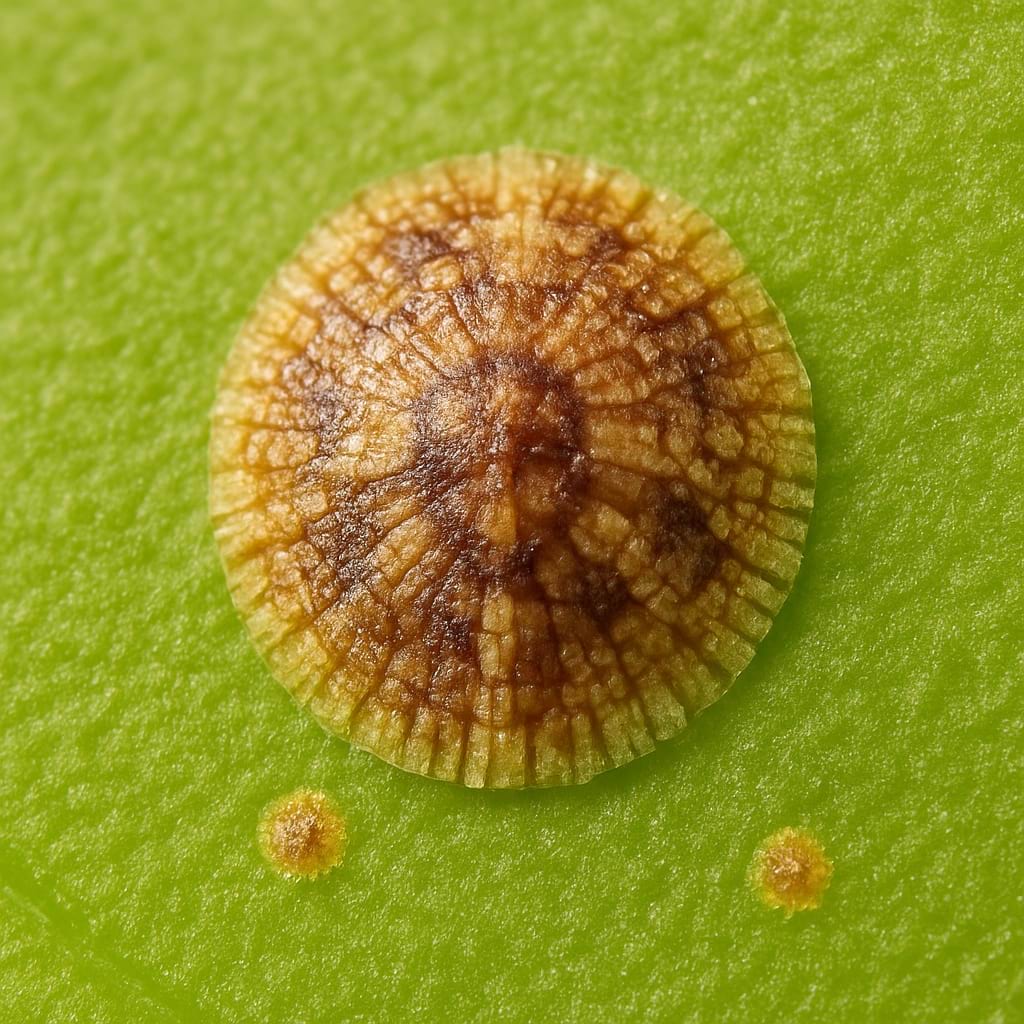
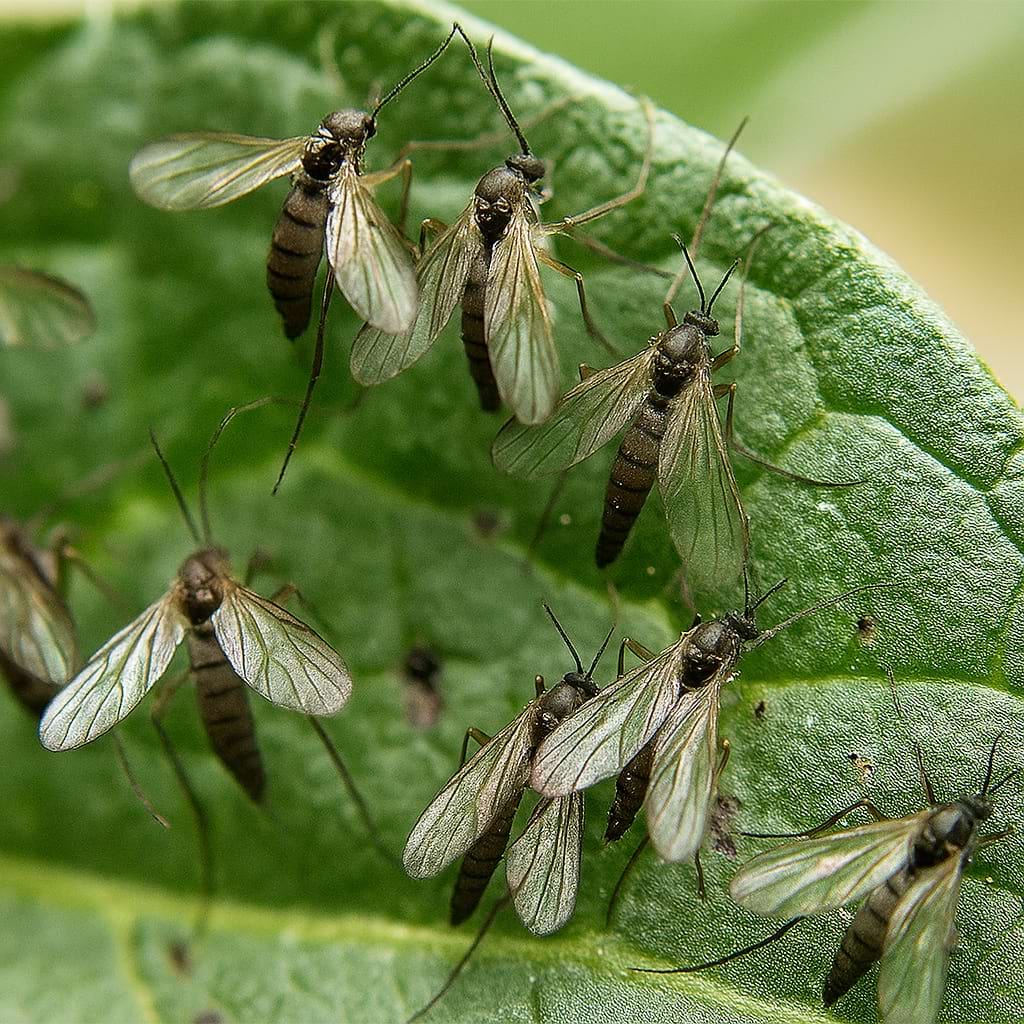
Thrips leave silvery streaks and distorted new growth, and they are stubborn enough to need repeated neem treatments plus removal of the worst leaves. Scale insects look like small brown limpets on the petioles and scrape off with a fingernail. Fungus gnats are harmless to the plant itself but they signal that you are keeping the top of the soil too wet.
Prevention
Check the undersides of the leaves every time you water. Wipe the foliage every couple of weeks. Keep the humidity up. Quarantine anything new for two weeks before it joins the shelf.
🩺 Common Alocasia Polly Problems
Dropping All Its Leaves in Winter
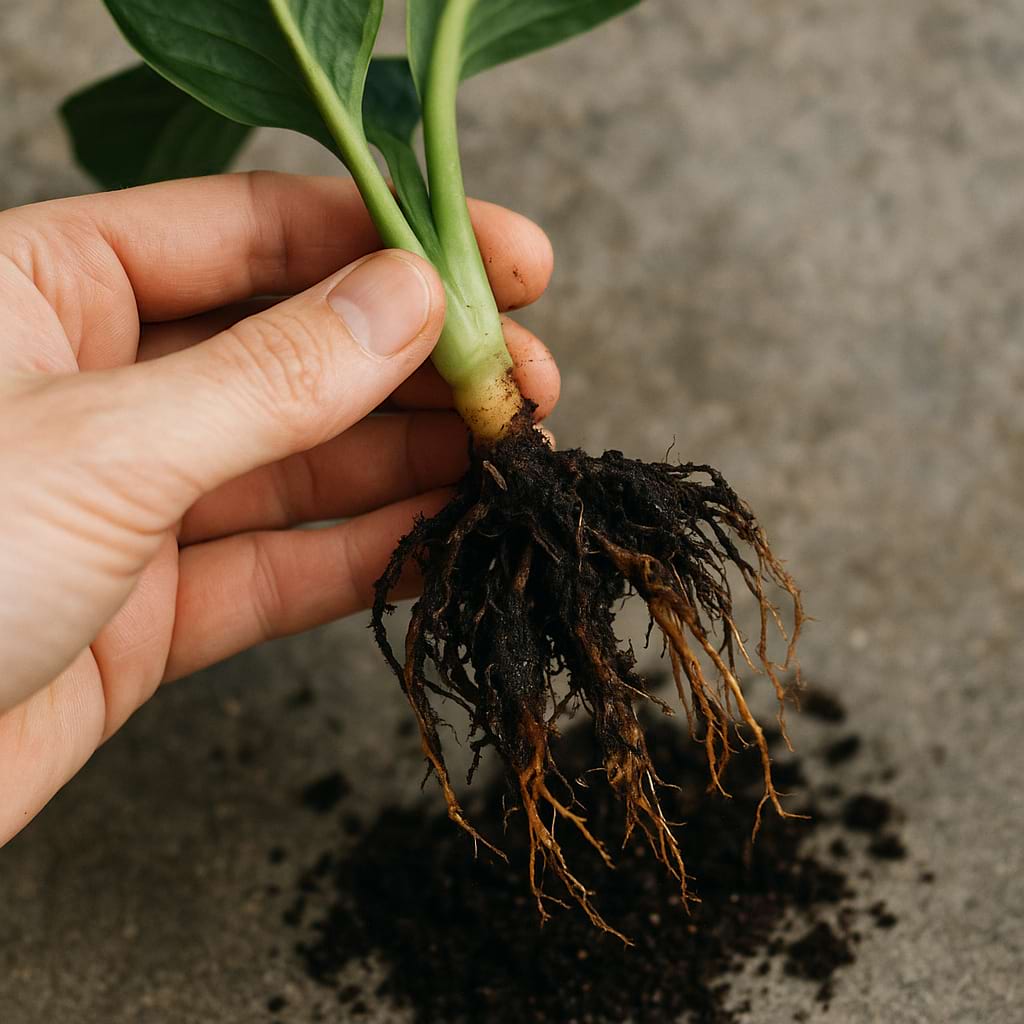
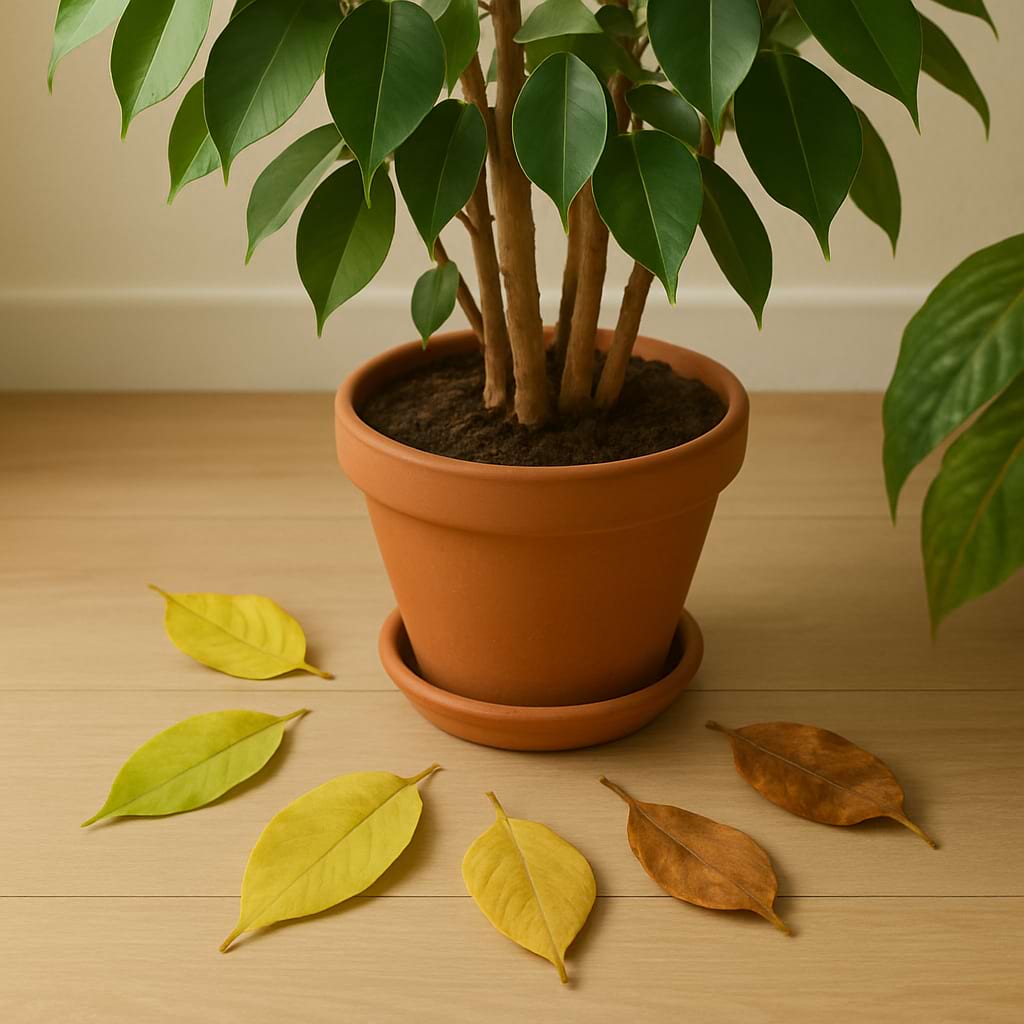
The one that panics everyone. From late autumn a Polly commonly yellows off leaf after leaf until little or nothing is left, and that is dormancy, not death. Feel the base of the plant. If the corm is firm, the plant is fine. Move it somewhere bright, cut water back to barely damp every two or three weeks, stop fertilizing, and wait. New leaves push up in spring. This is also the most common form of leaf drop on this plant.
Yellowing and Drooping
Yellowing leaves on a plant sitting in wet soil means root rot. Unpot it, cut off any black mushy roots, repot into fresh barely-damp mix, and water sparingly until it recovers. Drooping with dry soil is just thirst, and it fixes itself within hours of a proper soak.
Brown Crispy Edges
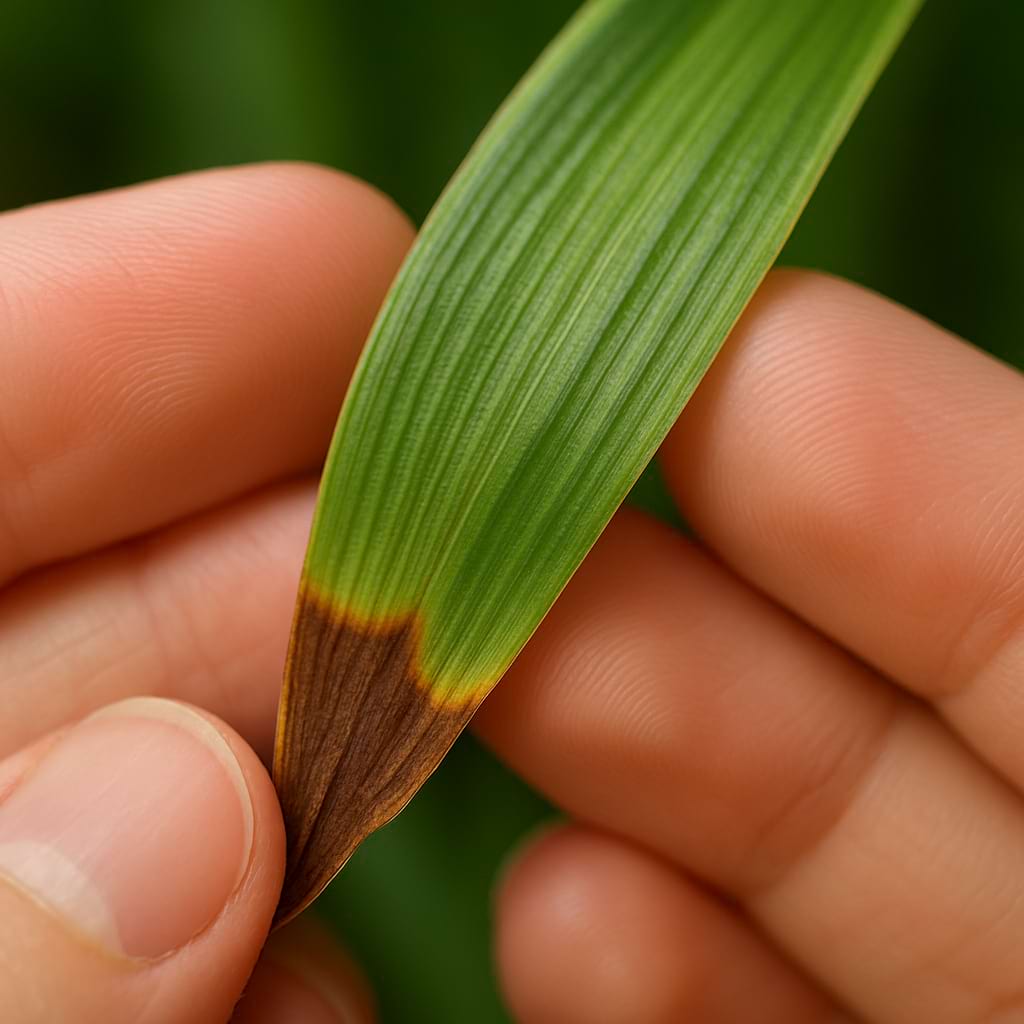
Crispy margins point at dry air, salt buildup from fertilizer, or minerals in tap water, usually some combination of the three. Raise the humidity, flush the pot, and switch to filtered water.
Small or No New Growth
New leaves smaller than the old ones means not enough light, or a plant that is dormant and simply not growing yet. Weeping droplets on the leaf tips, on the other hand, is guttation and completely harmless.

🖼️ Alocasia Polly Display and Styling Ideas
Solo Setups
Polly holds its leaves at sharp upward angles, so it looks best with air around it rather than jammed into a group. A plant stand at coffee-table height near an east window, or a bare shelf where the leaf silhouette reads clearly against a plain wall, both do it justice.
A light-coloured pot makes the dark foliage pop hard. Our green heart pot works because the contrast does the styling for you.
Grouped Arrangements
If you do group it, pair it with soft, rounded foliage so the arrow shapes stand out. A Calathea Orbifolia or a trailing pothos at a lower level makes a good foil, and grouping also lifts the local humidity, which Polly appreciates.
A bright bathroom is the best room in most homes for this plant, because the humidity comes free.
Where Not to Put It
Not on a sunny windowsill, not next to a radiator, not in a dark corner, and not anywhere a cat or a toddler can chew it. Every part of this plant is toxic. If pets roam your shelves, a Parlor Palm gives you similar height with none of the risk.
🌟 Alocasia Polly Pro Care Tips
- Rotate the pot a quarter turn each time you water. The leaves chase light hard and the plant goes lopsided fast.
- Feel the base of the plant, not just the soil. A firm corm means a living plant, whatever the leaves happen to be doing.
- Switch to filtered water before you try anything else for brown tips. It solves the problem more often than a humidifier does.
- Do not repot a dormant plant. Wait for spring and the first sign of a new leaf.
- Let it lose old leaves without panic. Four to six good leaves at a time is a healthy plant, not a struggling one.
- Check for spider mites weekly in winter. By the time you can see webbing, you are two weeks behind.
- Bottom water occasionally if the top of the mix stays wet too long. Our bottom watering guide covers the method.
- Summer it outdoors in full shade if you have the space. The growth you get back is worth the move.
❓ Frequently Asked Questions
Why is my Alocasia Polly losing all its leaves?
Almost always winter dormancy, especially if it starts in autumn as light and temperature drop. The corm stays alive underground and regrows in spring. Keep the plant bright, water sparingly, stop fertilizing, and resist the urge to repot or intervene. If the base of the plant feels mushy rather than firm, that is root rot instead and needs immediate unpotting.
Is Alocasia Polly toxic to cats and dogs?
Yes. The ASPCA lists Alocasia as toxic to cats, dogs, and horses because of insoluble calcium oxalate crystals found throughout the plant. Chewing it causes mouth pain, swelling, drooling, and vomiting. It is an irritant to people too, so wear gloves when pruning and wash your hands after.
Why does my Alocasia Polly have brown crispy edges?
Three usual suspects: dry air, fertilizer salts in the pot, and minerals in your tap water. Raise humidity above 50 percent, flush the pot with plain water for a minute to clear the salts, and switch to filtered or rainwater. Existing damage will not heal, so judge the fix by the next new leaf.
Can I propagate Alocasia Polly from a leaf cutting?
No. There is no node on the petiole, so a cut leaf just rots in water. The only method that works is dividing the corms and offsets at the base of the plant, ideally in spring during a repot.
How often should I water an Alocasia Polly?
When the top inch of soil is dry, which works out to roughly weekly in spring and summer and every two or three weeks in winter. Never water on a fixed schedule, since light and temperature change how fast the plant drinks.
Is Alocasia Polly the same as Alocasia Amazonica?
Not quite. Amazonica is the original hybrid and grows larger with longer leaves. Polly is the compact form of it, staying under about two feet. Shops use the two names interchangeably, and care is the same either way.
What are the little brown balls in the soil?
Corms, which are the plant's natural way of multiplying. Pot them up separately and each one can become a new plant. It is a sign your Polly is happy, not a problem to fix.
Does Alocasia Polly need a humidifier?
It benefits from one more than most houseplants do. Below 40 percent humidity the leaf edges brown reliably. A bathroom or a pebble tray can be enough in a mild climate, but in a centrally heated home over winter a humidifier is the single best purchase you can make for this plant.
Why are the new leaves smaller than the old ones?
The most common cause is insufficient light, so move the plant closer to a bright window or add a grow light. It can also mean the plant is depleted after dormancy and is working its way back up, in which case the leaves get bigger with each one through spring.
ℹ️ Alocasia Polly Info
Care and Maintenance
🪴 Soil Type and pH: Chunky, airy aroid mix that drains fast and holds some moisture
💧 Humidity and Misting: Wants 60 percent or more. Below 40 percent the leaf edges go brown and crisp.
✂️ Pruning: Cut yellow or spent leaves off at the base with clean scissors. Nothing else needs trimming.
🧼 Cleaning: Wipe the glossy leaves with a soft damp cloth every couple of weeks, supporting the leaf from below. Dusty leaves hide the first spider mites.
🌱 Repotting: Repot in spring every 2 years, into a pot only one size up. This plant grows better slightly snug.
🔄 Repotting Frequency: Every 2 years
❄️ Seasonal Changes in Care: Water, feed, and push growth from spring through early autumn. Then cut water back sharply and let it rest through winter.
Growing Characteristics
💥 Growth Speed: Moderate in spring and summer, dormant in winter
🔄 Life Cycle: Evergreen tropical perennial growing from a central corm
💥 Bloom Time: Rarely indoors, occasionally in summer on a mature plant. The flower is a small pale spathe hidden in the foliage.
🌡️ Hardiness Zones: 10-11
🗺️ Native Area: A nursery hybrid with no wild range. Its parents come from the Philippines and Southeast Asia.
🚘 Hibernation: Semi-dormant in winter. It often drops most or all of its leaves and regrows from the corm in spring.
Propagation and Health
📍 Suitable Locations: East windows, bright bathrooms, plant cabinets, a few feet back from a south or west window, shelves with a humidifier nearby
🪴 Propagation Methods: Divide the corms and offsets at the base in spring, or sprout loose corms in damp sphagnum moss.
🐛 Common Pests: Spider Mites, Mealybugs, Thrips, Scale Insects, Fungus Gnats
🦠 Possible Diseases: Root rot, crown rot, leaf spot from water sitting on cold leaves
Plant Details
🌿 Plant Type: Rhizomatous evergreen aroid
🍃 Foliage Type: Glossy arrow-shaped leaves with scalloped edges and thick pale veins
🎨 Color of Leaves: Blackish green above with silver-white veins, purple-green beneath
🌸 Flower Color: Pale green to cream spathe around a short spadix
🌼 Blooming: Rarely indoors, and the flower is worth cutting off to save the plant energy
🍽️ Edibility: Not edible. All parts contain calcium oxalate crystals.
📏 Mature Size: 16-24 inches tall indoors
Additional Info
🌻 General Benefits: Big dramatic foliage on a small footprint, stays compact enough for a shelf, and multiplies from corms for free plants
💊 Medical Properties: No documented medicinal uses. Treat the sap as an irritant.
🧿 Feng Shui: The upward pointing leaves are read as rising energy, so it suits an entryway or a stagnant corner that needs lifting.
⭐ Zodiac Sign Compatibility: Scorpio
🌈 Symbolism or Folklore: Drama, protection, bold self-expression
📝 Interesting Facts: Nothing about this plant is Amazonian or African. It is a hybrid bred in the 1950s by Salvadore Mauro, a Miami grower who named it after his own business, Amazon Nursery. Its parents are Alocasia sanderiana from the Philippines and Alocasia longiloba from Southeast Asia.
Buying and Usage
🛒 What to Look for When Buying: Count the leaves and check the undersides. Look for 4 or more firm, upright leaves, pale veins with good contrast, and no webbing or stippling. Skip plants with mushy stems at the soil line or a pot that feels waterlogged.
🪴 Other Uses: Statement plant for a shaded patio in summer, container centrepiece, plant cabinet specimen
Decoration and Styling
🖼️ Display Ideas: Solo on a plant stand, in a bright bathroom, grouped with soft-leaved plants for contrast, inside a glass cabinet
🧵 Styling Tips: The leaves hold themselves at eye-catching angles, so give it space rather than crowding it. A plain pot in a light colour makes the dark leaves pop.
🪴 See also 🪴
Complete Guide to Alocasia Dragon Scale Care and Growth
Complete Guide to Alocasia Red Secret Care and Growth
Complete Guide to Alocasia Zebrina Care and Growth
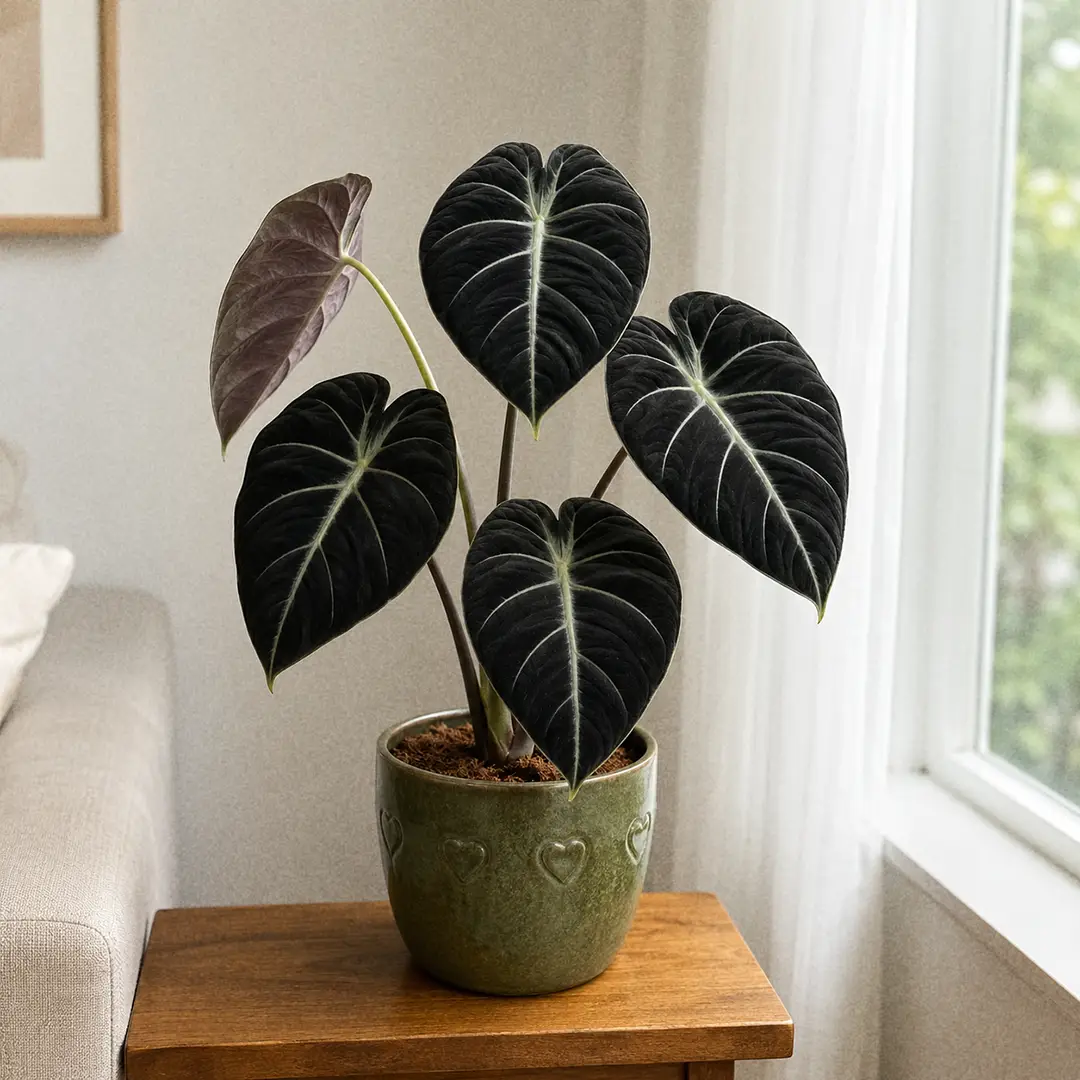
Complete Guide to Alocasia Black Velvet Care and Growth

Houseplant101 Forum
Questions & Comments
Ask a question, share your plant experience, or help other plant owners.
Comments are temporarily unavailable.
Open the Houseplant101 ForumNo comments yet
Be the first to ask a question or share your experience about this page.
Log in or create an account
Comments use your Houseplant101 Forum account, but you can stay on this page.
Create a new account