Bear's Paw Fern
Aglaomorpha meyeniana
Bear's-Paw Fern, Polypodium meyenianum, Drynaria meyeniana
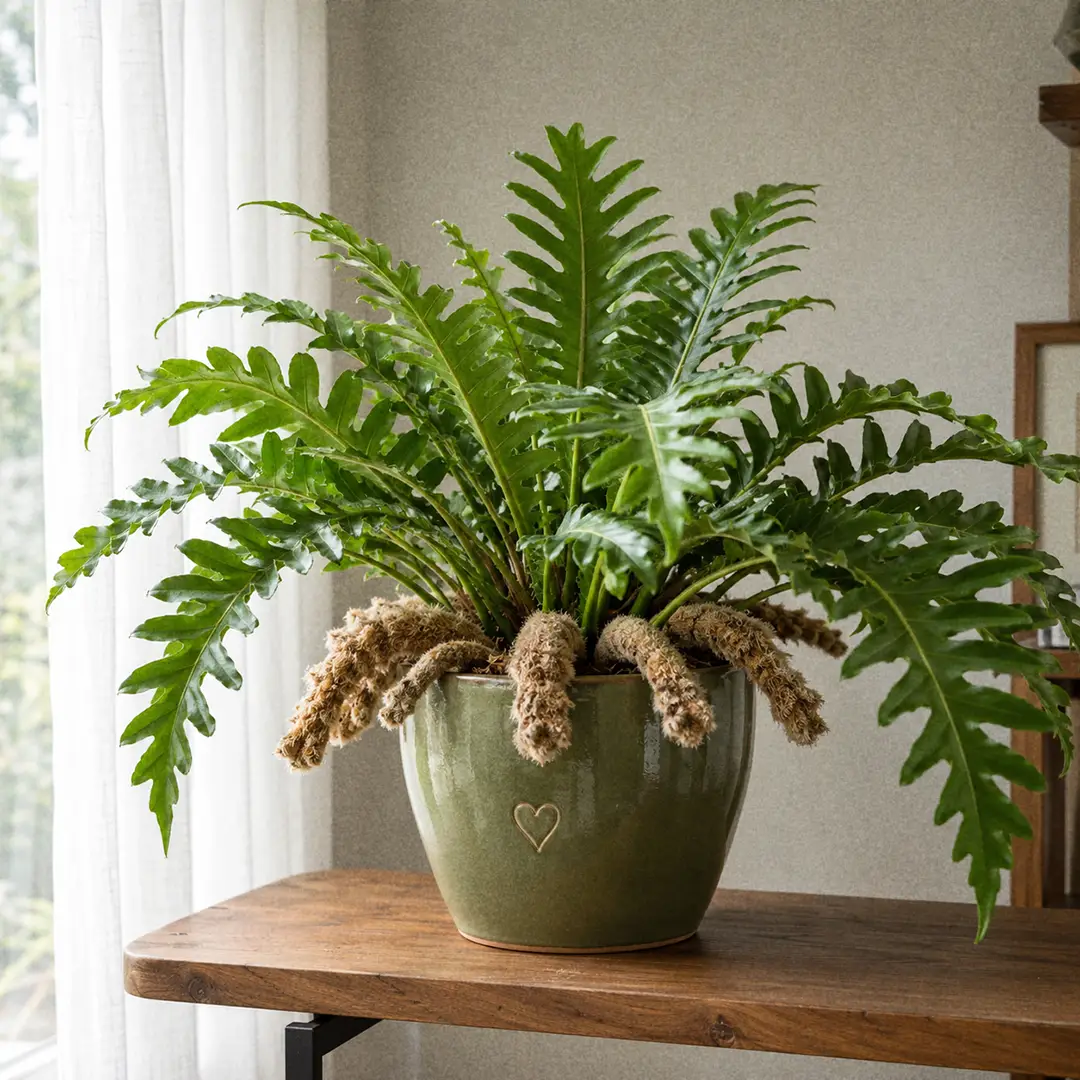
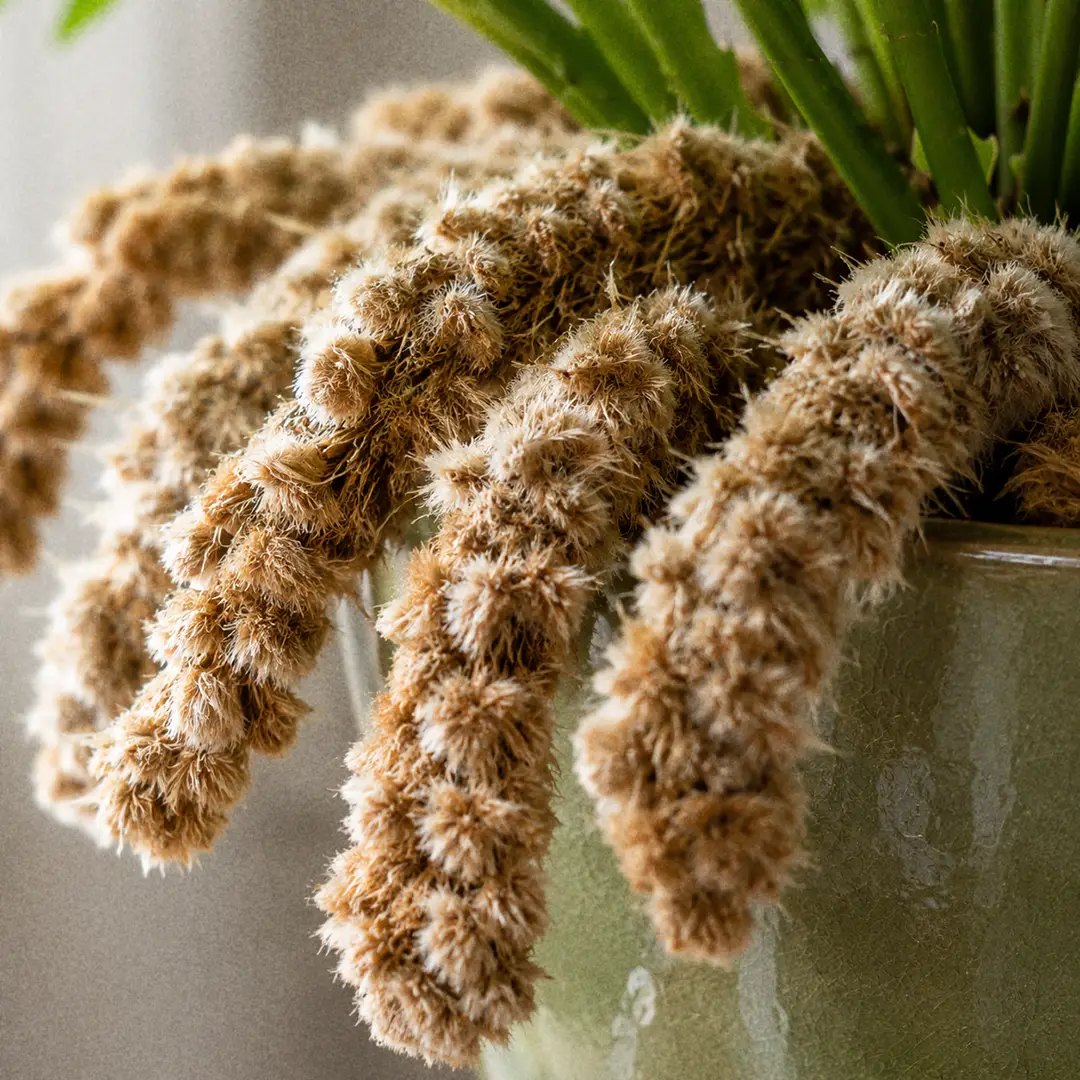
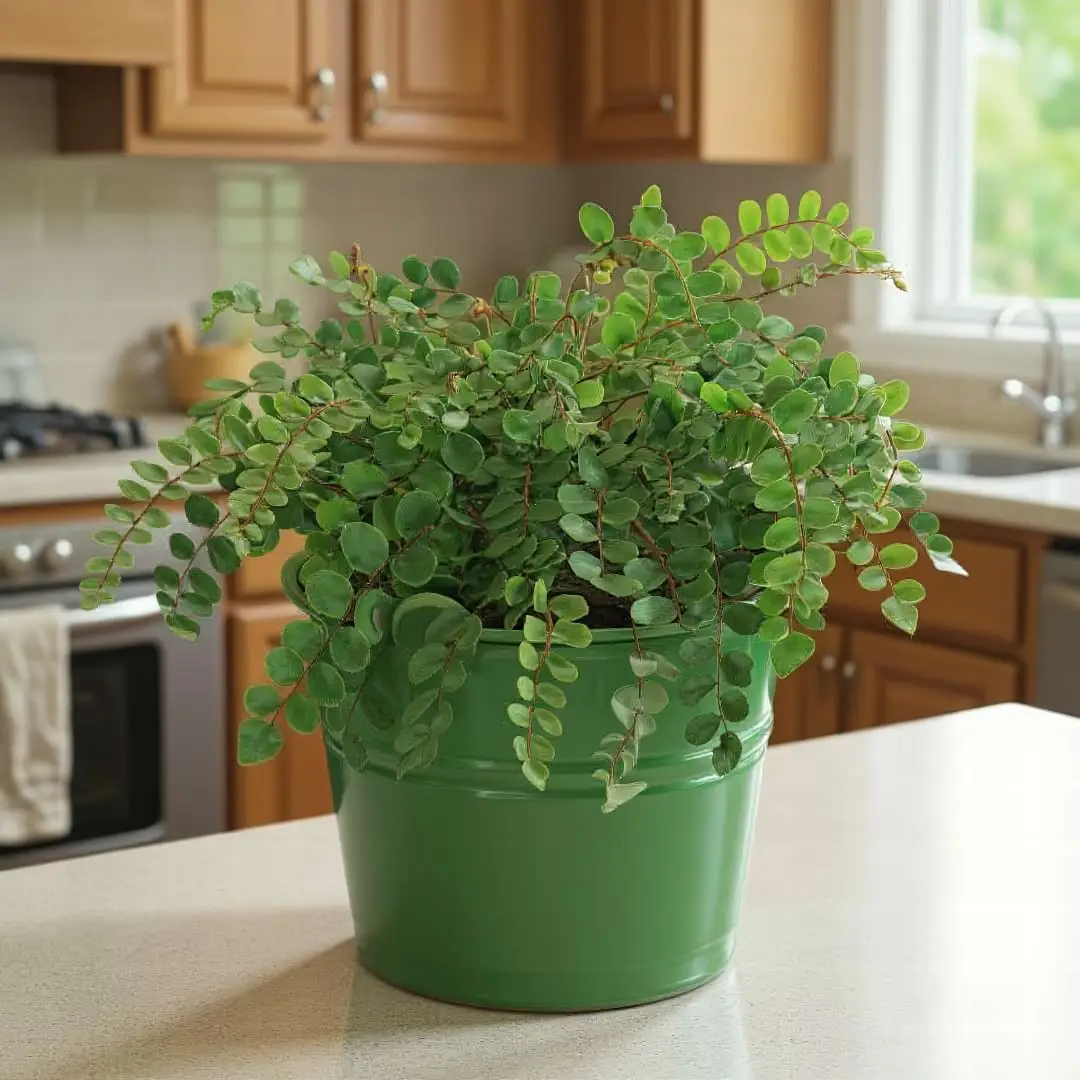
Bear's Paw Fern is the epiphytic fern people fall for because of its thick, furry, paw-shaped rhizomes that crawl over the pot edge. This guide shows you how to keep those paws firm, the leathery fronds glossy, and the whole plant thriving in normal home conditions.
📝 Bear's Paw Fern Care Notes
🌿 Care Instructions
⚠️ Common Pests
📊 Growth Information
🪴 In This Guide 🪴
☀️ Bear's Paw Fern Light Requirements (Indoor Lighting Guide)
The Sweet Spot
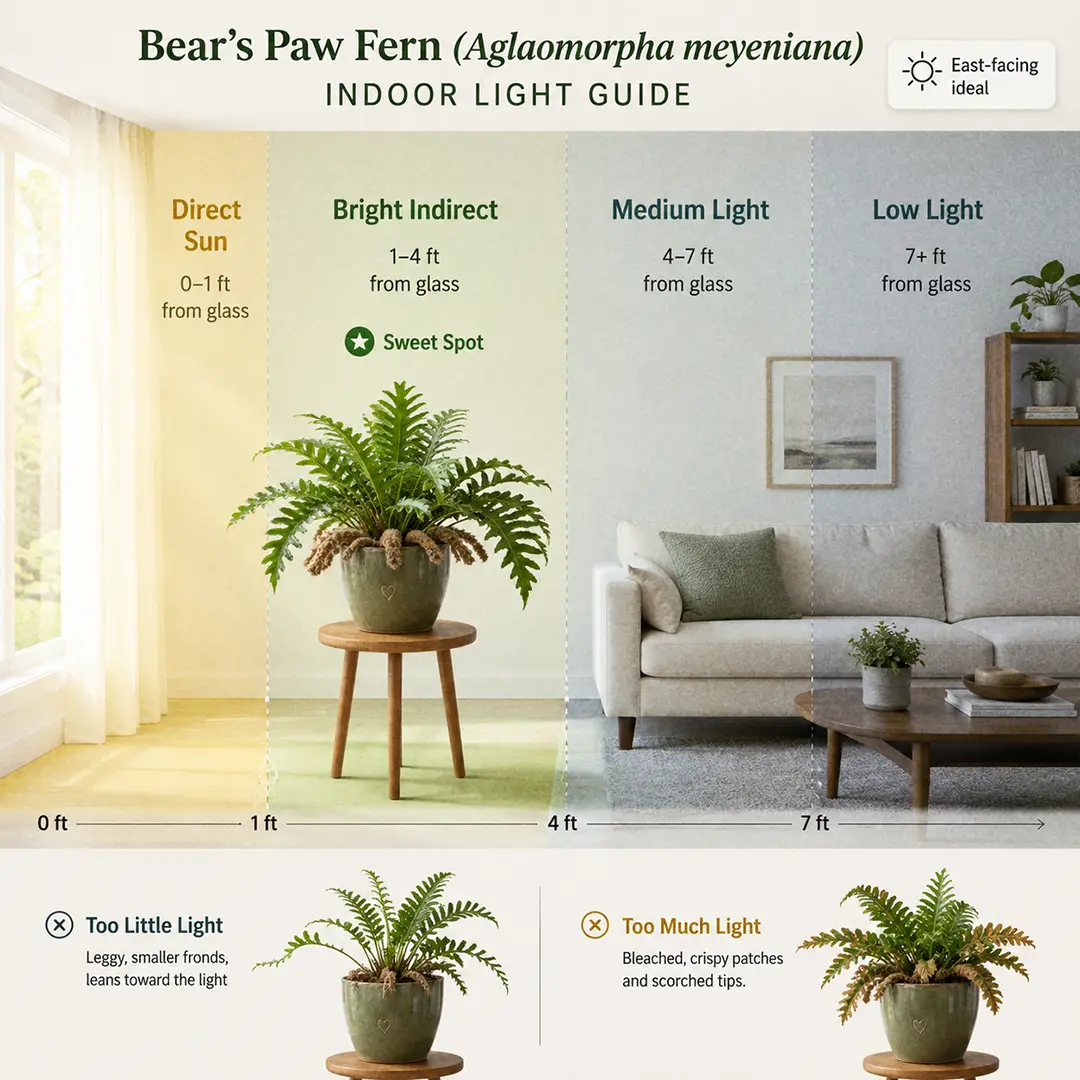
Bear's Paw Fern grows best in bright indirect light. Picture the kind of brightness that makes a room feel cheerful without a hard square of sun landing on the leaves. An east-facing window is close to perfect, and a north window with open sky works too. South or west exposures are fine as long as the plant sits back a few feet or sits behind a sheer curtain.
The fronds on this fern are thicker and more leathery than the lacy foliage on a Maidenhair Fern, so it handles a bright room with confidence. That said, bright and direct are not the same thing. The goal is plenty of soft light reaching the plant for most of the day. If your space is hard to judge, our indoor lighting guide walks through distance, window direction, and how the seasons shift things.
Too Little Light
In a dim spot, Bear's Paw Fern does not die quickly, but it stops looking good. New fronds come in smaller and spaced far apart, the plant leans toward the nearest window, and growth slows to a crawl. The paws can also stay damp longer because the slower-growing plant uses less water, which nudges the whole pot toward rot.
If your only option is a low-light room, a full-spectrum grow light set about 12-18 inches above the fronds for 10-12 hours a day keeps the plant compact and healthy.
Too Much Light
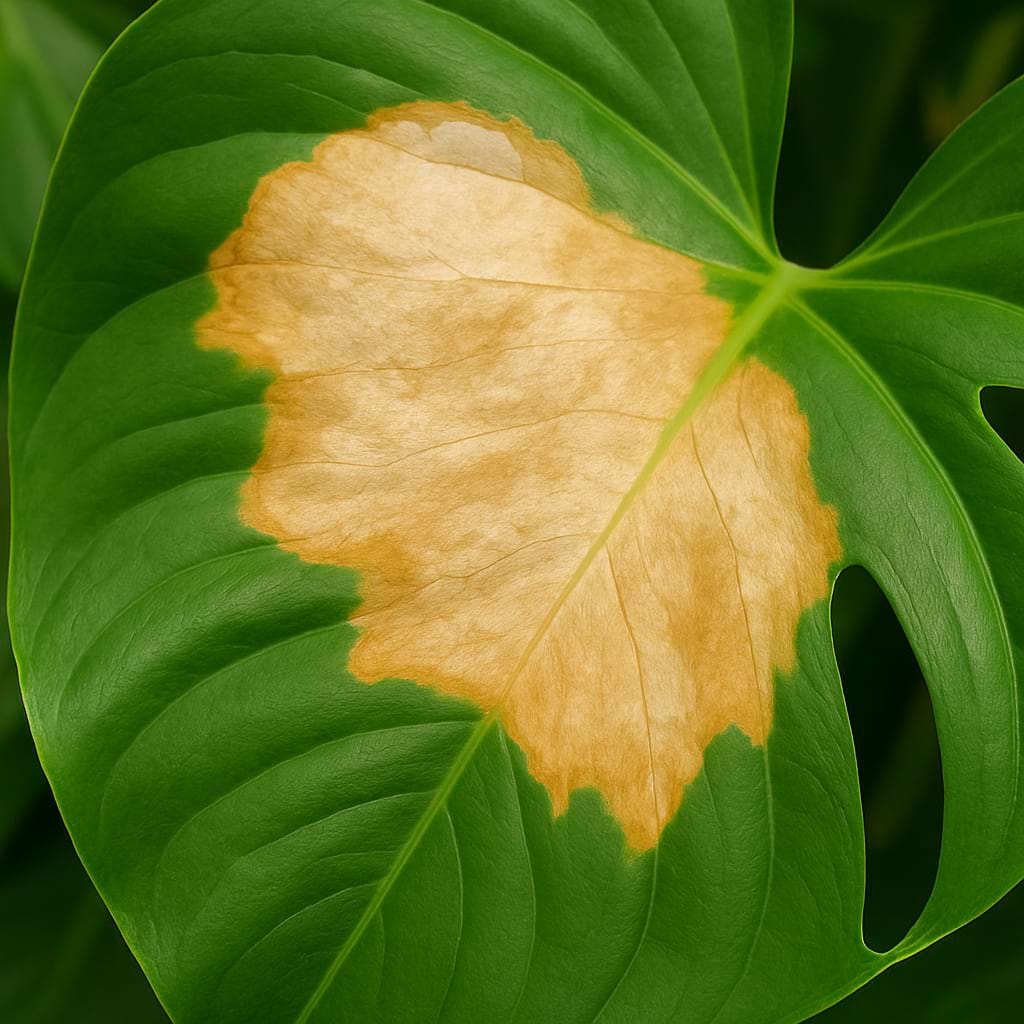
A little gentle morning sun is welcome, especially in cooler months. The trouble starts with harsh midday or afternoon sun, which bleaches the fronds and dries out the furry rhizomes. If you notice pale patches or crisp tan marks appearing soon after a sunny stretch, the light is too strong. Move the pot back or filter it with a curtain, and the new growth will recover its color.
💧 Bear's Paw Fern Watering Guide (How to Water Without Rot)
Watering Frequency
Bear's Paw Fern likes the root zone lightly moist, not soaked and not bone dry. This confuses people at first, because the furry paws sitting on top look like they should stay desert dry. The truth is split: the roots tucked into the mix want steady moisture, while the rhizomes themselves want air around them.
The reliable rhythm is to water when the top inch of mix feels just slightly dry. In a bright room during spring and summer, that often lands around every 5-7 days. In cooler months or a shadier spot, it stretches longer. Skip the calendar and check with your finger, because pot size, light, and home humidity all change the pace. Our watering guide is a good refresher if you are still building the habit.
How to Water
When you water, do it thoroughly. Pour until water runs freely from the drainage holes, then let the pot drain completely before it goes back on its saucer. Never leave the root ball sitting in standing water.
The one twist with this fern is where you aim. Direct the stream toward the root zone around the edges of the pot rather than soaking the furry paws every time. A stray splash will not hurt them, but repeated drenching invites rot in the very feature you bought the plant for. Bottom watering sidesteps the problem: set the pot in water for 15-20 minutes, then lift it out and drain fully, so the paws stay dry while the roots drink from below.
Signs of Trouble
Bear's Paw Fern usually tells you what is wrong before things turn serious.
- Too wet: Yellowing fronds, a heavy sour-smelling pot, and paws that look darkened or feel mushy instead of firm.
- Too dry: Brown crispy frond tips, foliage that feels thinner than usual, and a root ball that pulls away from the pot wall.
- Uneven watering: New growth stalls and older fronds crisp at the edges while the plant swings between droopy and soggy.
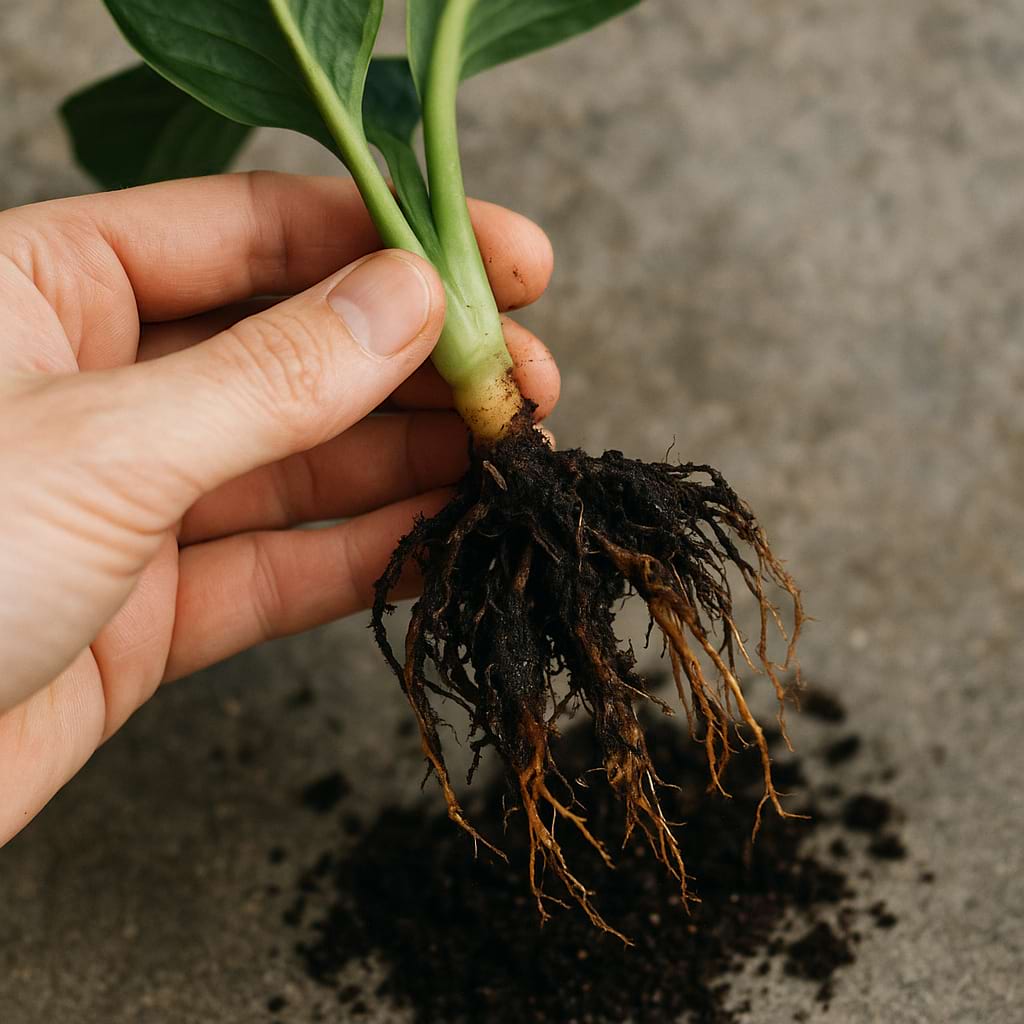
If you spot soft dark paws, treat it as urgent. That points toward root rot, and rhizome rot is much harder to reverse than a few dry tips.
🪴 Best Soil for Bear's Paw Fern (Potting Mix and Drainage)
What the Soil Needs
Bear's Paw Fern grows on trees and mossy rocks in the wild, with its roots clinging to bark and debris where water drains away fast. That habit tells you everything about its soil. Dense, peat-heavy mud holds too much water and smothers the roots. What this fern wants is a chunky, airy mix that stays lightly moist while still letting air move through it.
If your fern feels impossible to water correctly, the mix is usually the first thing to change. A nursery blend that suited fast greenhouse turnover often stays too wet in a normal living room. Our general soil guide covers the broad principles, but for this plant airflow matters more than average.
DIY Soil Mix
My go-to blend for Bear's Paw Fern is simple and forgiving:
- 2 parts quality houseplant or coco-based fern mix
- 1 part fine orchid bark
- 1 part perlite or pumice
- A small handful of worm castings if you want a touch more richness
That combination gives you moisture retention, plenty of air, and enough texture for the rhizomes to rest on comfortably. If you tend to overwater, lean heavier on the bark and perlite. If your home runs hot and dry, keep the base mix slightly more moisture-retentive.
Pre-Made Options
If you would rather buy than mix, an orchid-fern blend works well straight from the bag. You can also start with a standard aroid or houseplant mix and stir in extra bark and perlite to loosen it. Our potting soil guide helps you compare ingredients quickly. Whatever you choose, the test is the same: water should pass through readily, and the mix should never feel like packed mud a day later.
🍼 Fertilizing Bear's Paw Fern
When and How Often
Bear's Paw Fern is a light feeder. It grows steadily through the warm months but never wants a heavy diet. A balanced liquid fertilizer diluted to half strength every 4-6 weeks through spring and summer covers it for most homes. In bright light with lots of new fronds unfurling, feed on the more frequent end. In medium light with slower growth, less is better.
Stop feeding in late autumn and winter when growth naturally slows. Pushing food at a resting plant just leaves salts in the mix. Our fertilizing guide covers the broader pattern, but with this fern restraint wins.
What to Use
A standard balanced houseplant fertilizer is fine, and so is a diluted fish or seaweed feed if you prefer something gentle. Water the pot lightly first if the mix is very dry, then apply the diluted feed. Keep concentrated fertilizer off the furry paws, since salts can irritate the rhizomes directly.
Over-Fertilizing Signs
With ferns, too much food shows up as crispy brown frond tips, a crusty white residue on the mix or pot rim, and foliage that looks rough rather than glossy. If you see any of that, flush the pot with plain water a couple of times and skip the next feeding or two. When tap water in your area is mineral-heavy, be even gentler, because brown tips on this fern are usually a stack of small irritations rather than one big mistake.
🌡️ Bear's Paw Fern Temperature Range
Ideal Range
Bear's Paw Fern is happiest in the same range most people find comfortable, roughly 60-80°F (16-27°C). It comes from warm tropical forests, so it has no need for a cold rest period and no tolerance for frost. Warm rooms suit it well as long as watering and humidity stay balanced. Once temperatures drop below about 55°F (13°C), growth stalls and the fronds start to look stressed.
Drafts and Heat Sources
The real temperature problems are rarely dramatic cold snaps. They are ordinary indoor spots people overlook: a shelf right above a heating vent that bakes the fronds dry all day, the path of an air conditioner, or a leaf pressed against cold winter glass. Frequently opened exterior doors in winter cause the same trouble. If you move the plant outdoors to a shaded spot for summer, bring it back inside before nights turn cool. This fern prefers steady warmth over any kind of extreme.
💦 Bear's Paw Fern Humidity Requirements
Ideal Humidity
Bear's Paw Fern looks its best at around 50-70% humidity. The good news is that its thicker, more leathery fronds make it noticeably tougher than a thin-leaved Boston Fern or a touchy Maidenhair. In a decent airy mix with steady watering, it can live in average household humidity without much fuss.
What drops first in dry air is the finish. Instead of broad glossy fronds, you start seeing rough tips, tired edges, and smaller new growth. The plant survives, but it stops looking lush. If humidity is a recurring battle in your home, our humidity guide sorts the methods that actually help from the ones that just feel nice.
Easy Humidity Boosters
A few approaches genuinely move the needle:
- Humidifier: The most dependable option, especially if several plants share the room. A small room humidifier is the fast fix.
- Plant grouping: Clustering ferns together raises the local moisture and looks great too.
- Bright bathroom placement: If the room has enough light, the steady humidity often suits this fern beautifully.
- Pebble tray: Mild but helpful as a background measure.
Misting gets a lot of attention, but it is short-lived. I treat it as dust control and a small comfort, not as the real humidity plan.
🌸 Bear's Paw Fern Flowers, Spores, and Sori
What the Spore Structures Look Like
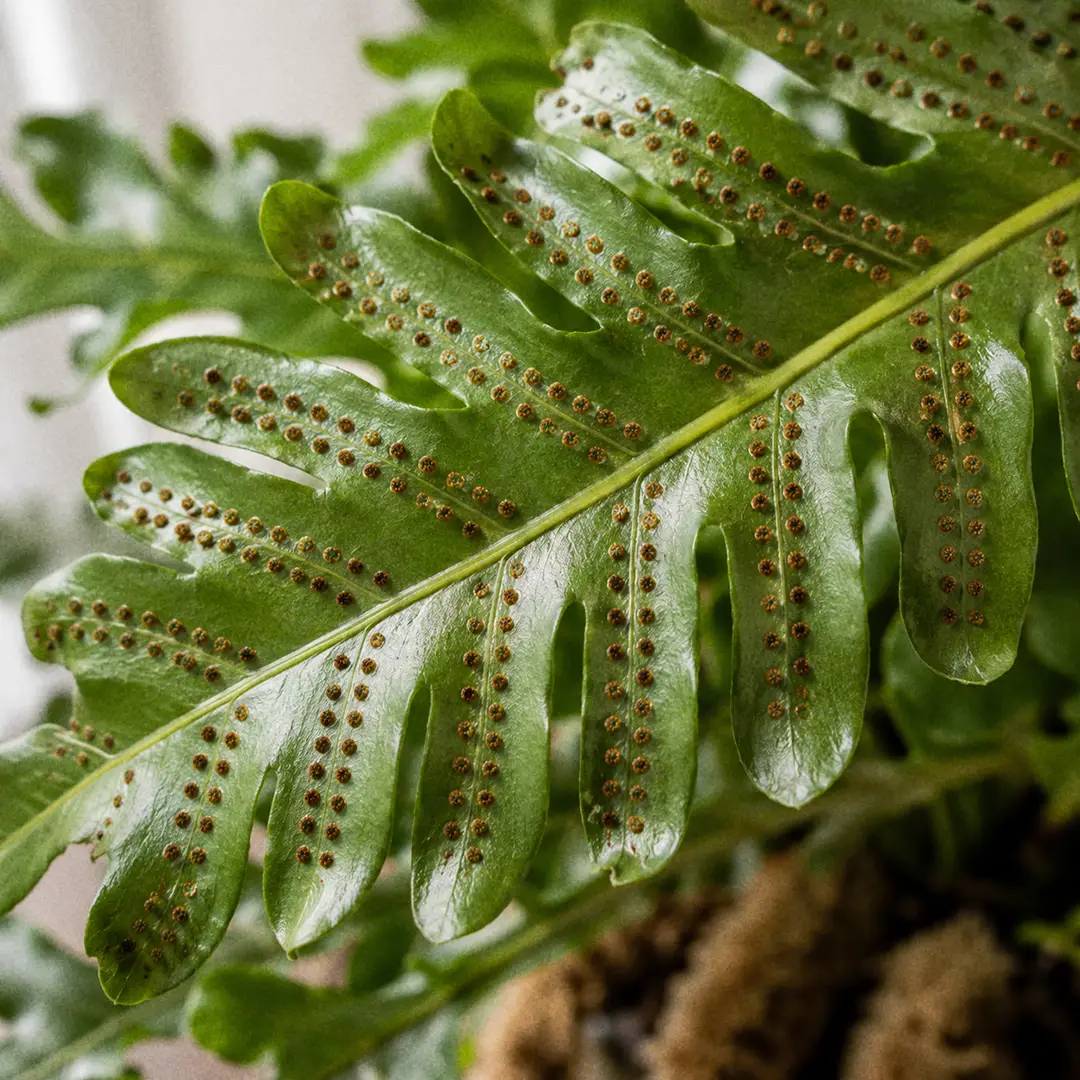
Bear's Paw Fern does not flower, because it is a true fern rather than a flowering plant. There are no blooms to wait for and no trick that suddenly produces them. The show is entirely in the furry paws and the glossy arching fronds. Instead of seeds, the plant reproduces through spores, which form in small structures called sori on the undersides of mature fronds.
Brown Dots Are Usually Normal
This is one of the classic moments of fern panic. A grower flips a frond, sees rows of brown dots, and assumes pests or disease arrived overnight. Almost always, those dots are sori and they are completely healthy. Sori are neat, repeated, and limited to the underside of mature fronds, while pests and disease look messier and often appear on the top surface too. If the dots are organized, dry, and tucked under older fronds, your fern is simply being a fern.
🏷️ Bear's Paw Fern Types and Lookalikes
The Plant Behind the Name
"Bear's Paw Fern" is a common name that gets attached to a few different furry-rhizome ferns, so it helps to know which one you have. The classic Bear's Paw Fern is Aglaomorpha meyeniana (you may also see it sold under the older names Polypodium meyenianum or Drynaria meyeniana). It has thick, plump, densely furred rhizomes and large, leathery, deeply lobed fronds.
Bear's Paw Fern vs Rabbit's Foot and Blue Star Fern
If you are choosing among the furry-rhizome ferns, the differences are easy to spot once you know them:
- Bear's Paw Fern (Aglaomorpha meyeniana): Chunky, thick paws and large leathery, deeply cut fronds. The boldest and most substantial of this group.
- Rabbit's Foot Fern: Thinner, lighter rhizomes and delicate, lacy, finely dissected fronds. A softer, airier look overall. (Note that the name "Bear's Paw" is sometimes loosely used for Humata tyermannii sold alongside Rabbit's Foot Ferns, which adds to the confusion.)
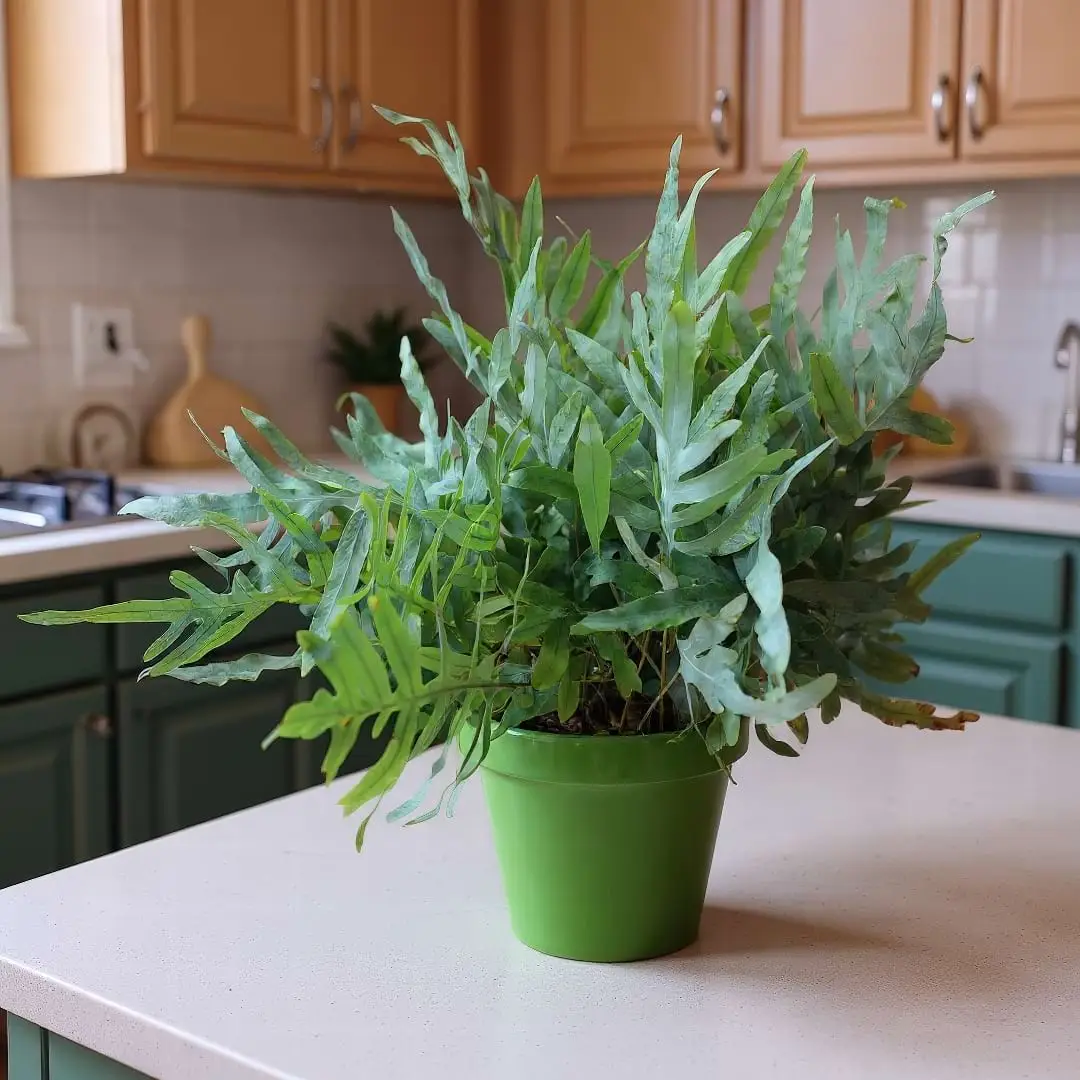
- Blue Star Fern: Creeping rhizomes too, but with broad blue-green lobed fronds and that famous dusty bloom.
Bear's Paw Fern vs Kangaroo Fern
The Kangaroo Fern is another close comparison. It also runs surface rhizomes and has leathery lobed fronds, but its foliage is usually a brighter green and its rhizomes are slimmer and greener than the heavy tan paws on a Bear's Paw Fern. If you want the most dramatic, sculptural paws of the group, Bear's Paw Fern is the one to reach for. If you prefer a lighter, lacier plant, Rabbit's Foot Fern is the better match.
🪴 Potting and Repotting Bear's Paw Fern
When to Repot
Bear's Paw Fern does not need frequent upsizing, and it actually looks better a little snug, with the paws wandering over the rim. Repot when one of these happens: the rhizomes have fully claimed the surface and are circling the edge, water runs straight through because the mix has broken down, the center of the root ball smells stale or sour, or growth has slowed even though light and watering look right. For most indoor plants that works out to every 2-3 years.
Choosing a Pot
This fern usually does best in a wide, shallower pot rather than a deep one, because the rhizomes crawl outward more than the roots dig down. A low, broad container shows off the paws and dries more evenly. Terracotta is great if you tend to overwater, since it breathes and dries a little faster. Plastic is fine in dry homes as long as it has drainage holes. Our plant pots guide helps if you are weighing a decorative cachepot against planting directly.
Step-by-Step Repotting
Repot in spring or early summer so the plant has warm months to settle.
- Water the day before so the root ball lifts out cleanly.
- Choose a pot only 1-2 inches wider, ideally wide rather than deep.
- Tip the plant out gently and inspect the roots and paws.
- Trim away any black mushy roots or clearly dead pieces.
- Set fresh mix in the new pot and position the root ball so the rhizomes rest on top, never buried.
- Fill around the root zone without packing the mix down hard.
- Water thoroughly once, drain fully, and return the plant to bright indirect light.
Afterward, keep the mix lightly moist, hold off on fertilizer for a month, and give it good humidity. If the plant feels unstable, top-dress with a little bark around the root ball rather than covering the paws. Our repotting guide has a visual refresher if you want one.
✂️ Pruning Bear's Paw Fern
When to Prune
Pruning Bear's Paw Fern is mostly cleanup, not shaping. Remove fronds that are fully yellow, badly torn, or mostly brown, and otherwise leave the plant be. A few small marks on a frond are not a crisis, and trimming every slightly imperfect leaf will thin the plant out more than you intended. The best time for tidying is spring, when fresh growth quickly fills any gaps.
How to Prune
Cut spent fronds as close to the base as you can without nicking new growth or the rhizomes, using clean sharp scissors or pruners. The single most important rule is to leave the furry paws alone. Do not trim them just because they wander over the rim, since that wandering is the whole charm of the plant. Only cut a rhizome when you are deliberately dividing the fern or removing a clearly rotten section.
Cleaning the Fronds
The leathery fronds shed dust well and can be rinsed under lukewarm water or wiped gently with a soft cloth. Skip leaf shine products, which clog the surface. Most importantly, do not scrub the rhizomes. The fuzzy scales protect them, and rough handling damages both the look and the health of the paws.
🌱 How to Propagate Bear's Paw Fern
Best Method
Rhizome division is by far the easiest way to multiply Bear's Paw Fern, and it is far more reliable than trying to raise plants from spores. Because the plant grows by creeping rhizomes rather than one tight crown, you can split a healthy specimen into sections that each carry their own roots and fronds. Spring, usually at repotting time, is the moment to do it. Our plant division guide is worth a look for the general approach.
Step-by-Step
- Lift the plant from its pot and shake away enough mix to see the rhizomes clearly.
- Find a natural point where a rhizome branch already has its own roots and at least 2-3 healthy fronds.
- Cut the section free with clean, sharp pruners.
- Pot each division into a small, wide pot with fresh airy mix, resting the rhizome on top.
- Keep the mix lightly moist and humidity a little higher than usual for the first few weeks.
Tips for Success
Medium-sized divisions establish much faster than tiny scraps. A piece with only one frond and a few roots may live, but it tends to sulk for a long time before it grows. Keep new divisions out of direct sun while they settle, and resist the urge to overwater. A division that is rooting wants steady moisture and patience, not a soggy pot.
🐛 Bear's Paw Fern Pests and Treatment
Common Pests
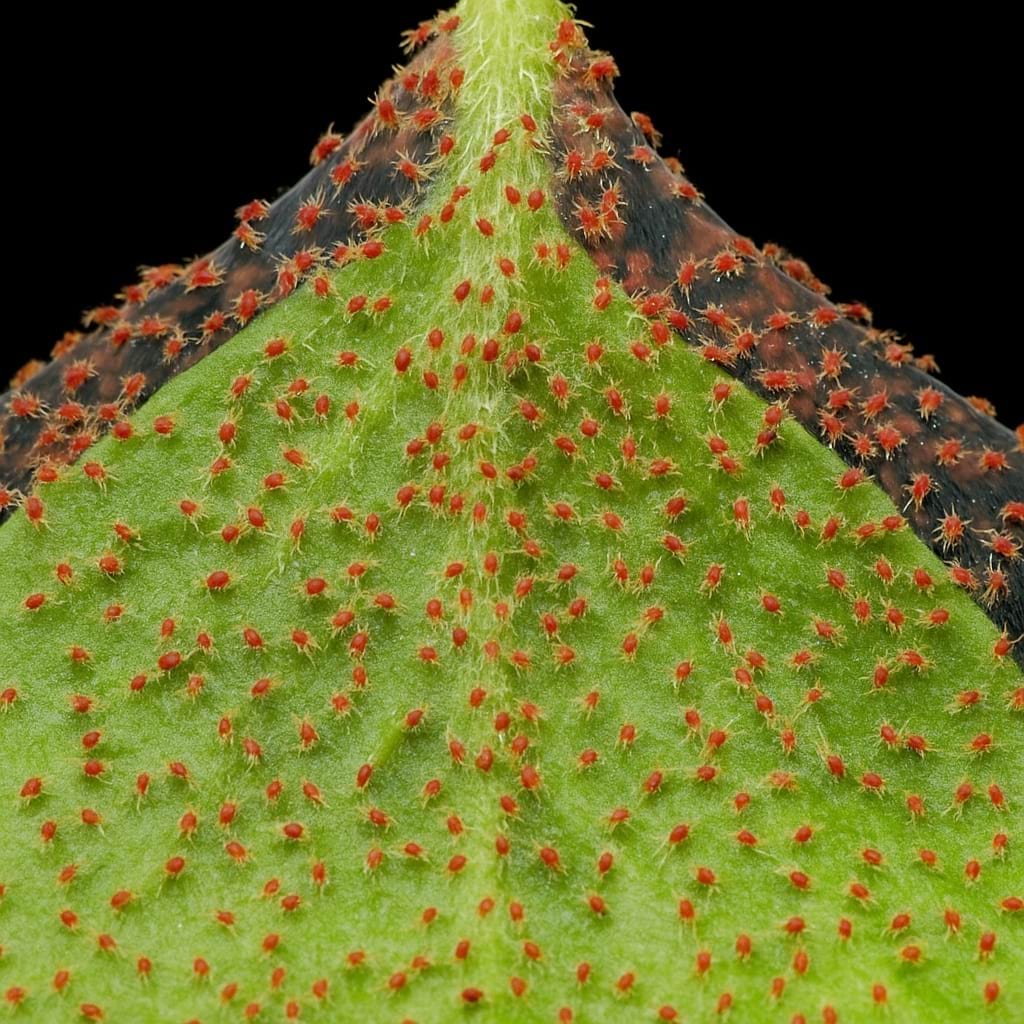
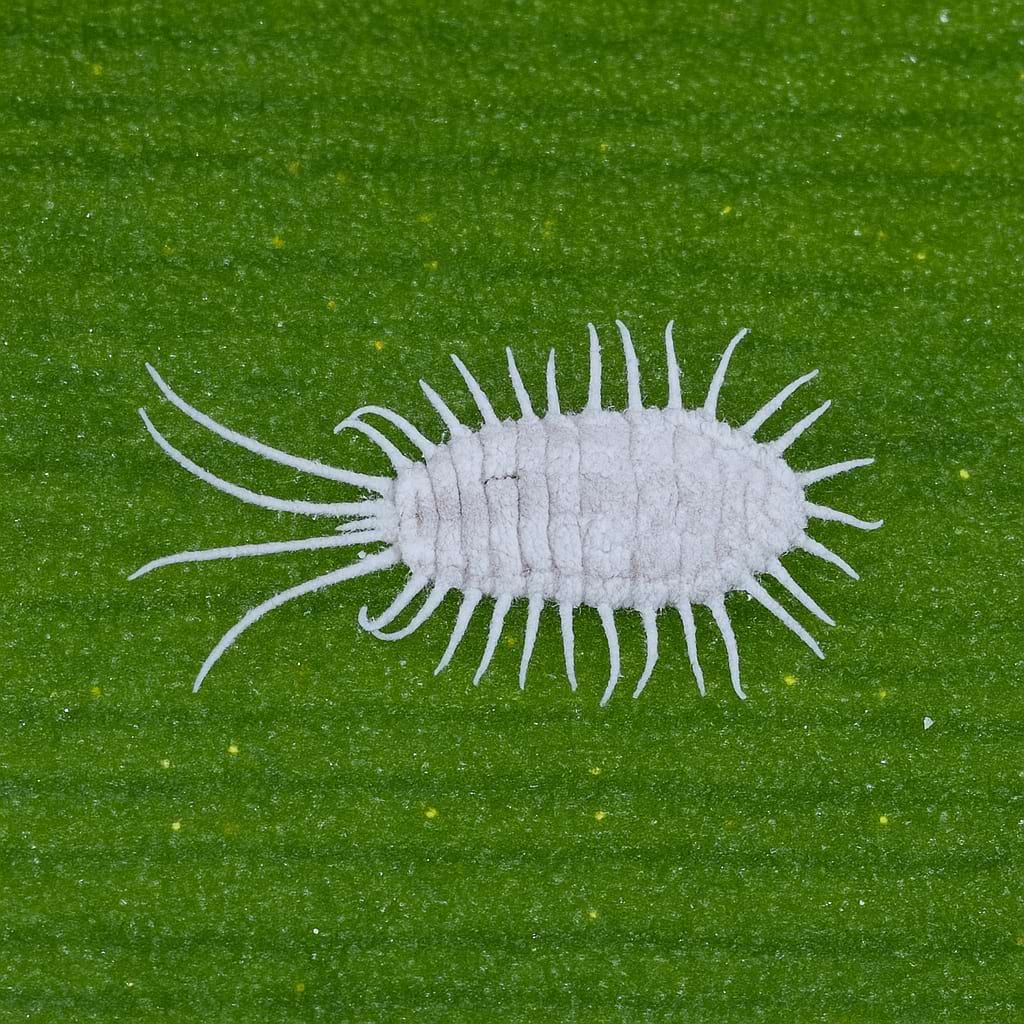
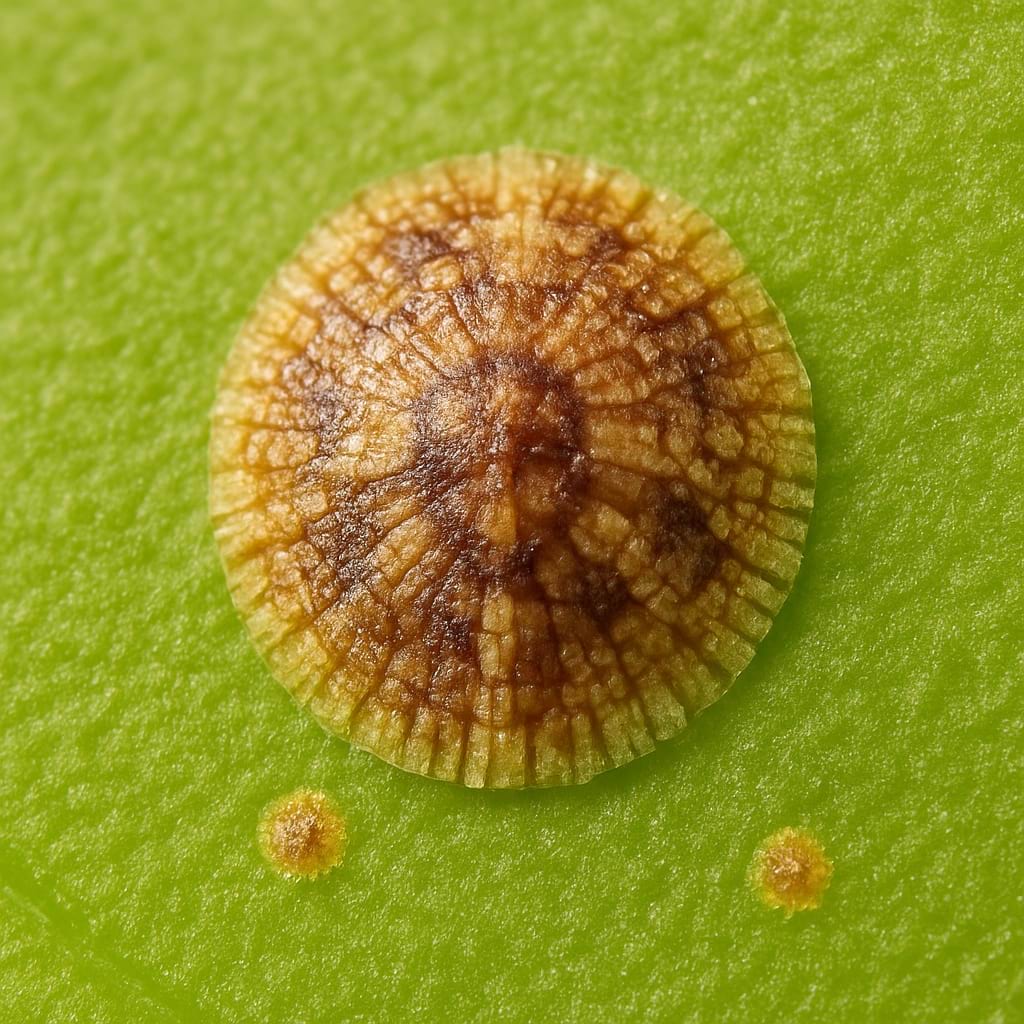
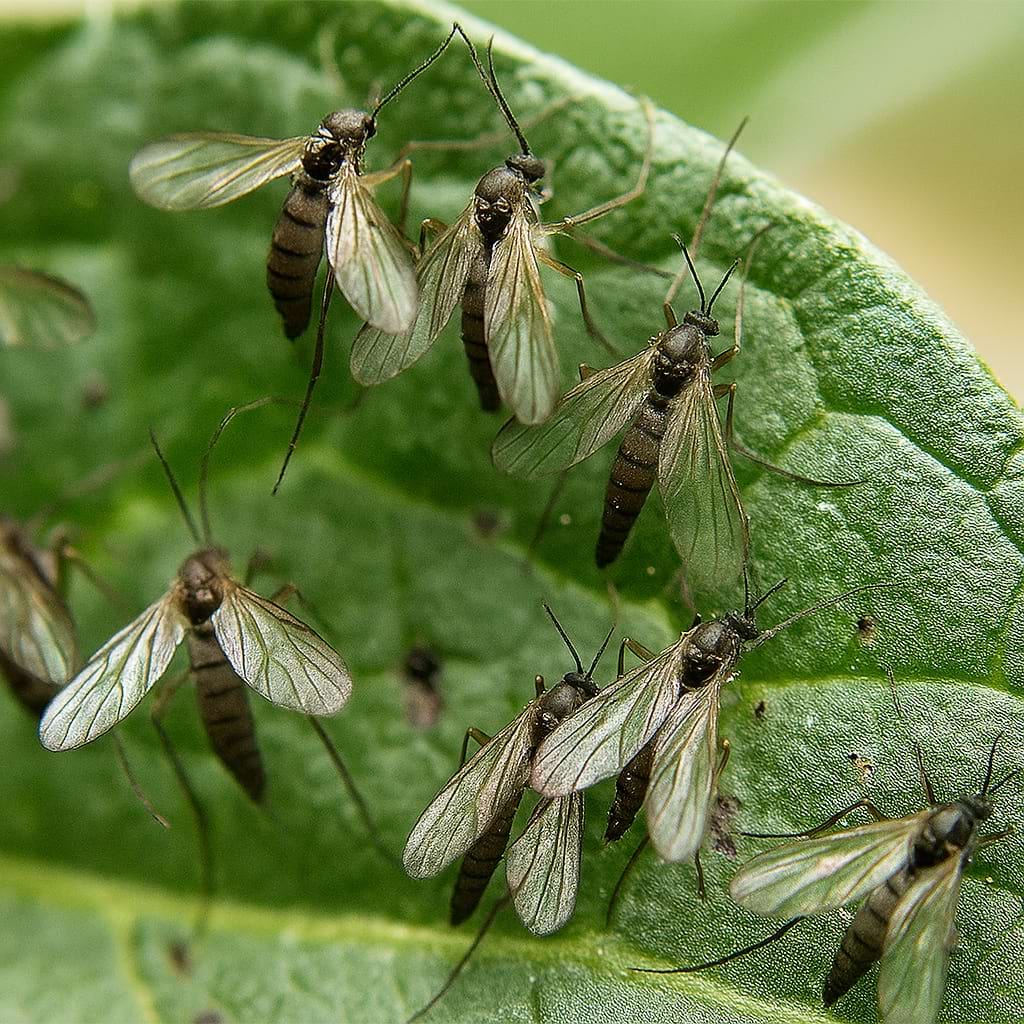
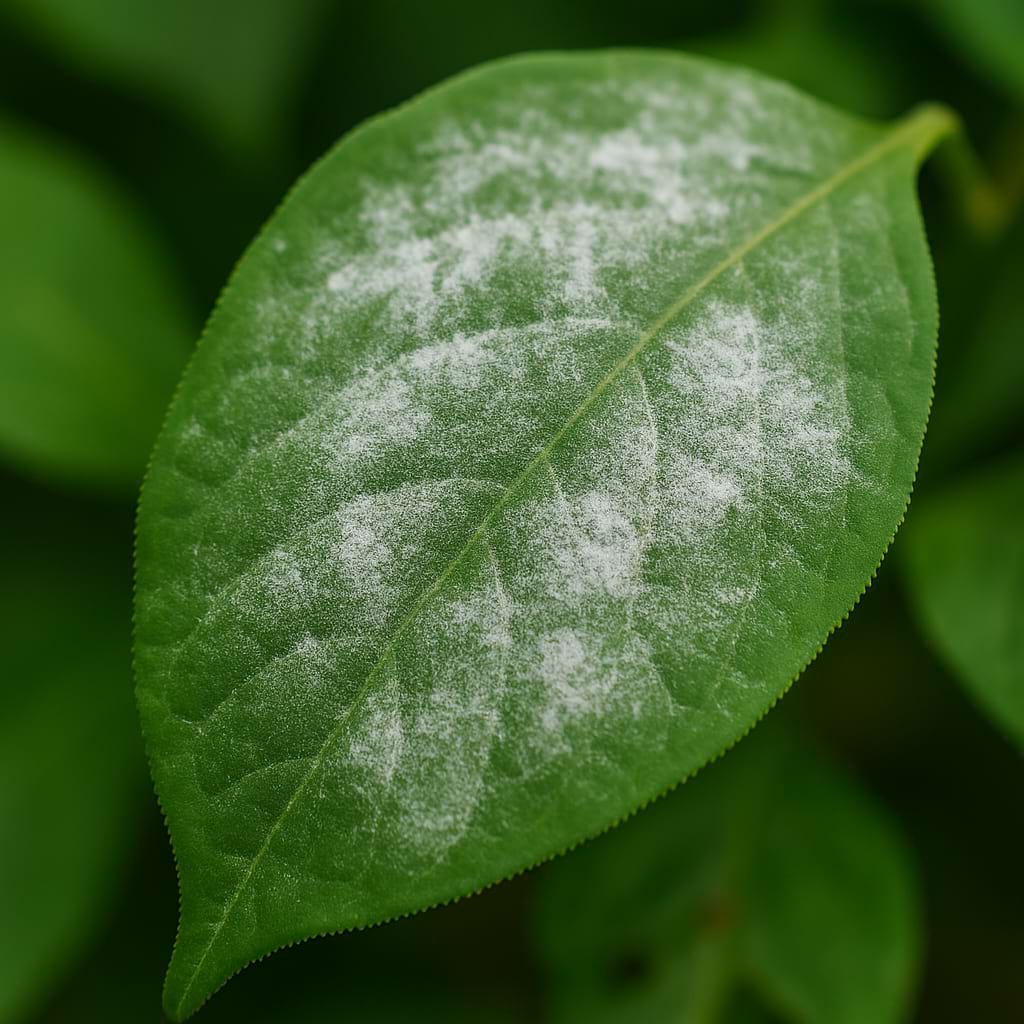
Bear's Paw Fern is fairly resilient, but a stressed plant can still draw the usual indoor pests. Spider mites are the main dry-air threat, leaving fine stippling, dull fronds, and faint webbing. Mealybugs like to hide where fronds meet the rhizomes, tucked into protected creases. Scale insects appear as small stuck-on bumps along the frond undersides. Fungus gnats are less about the fern itself and more a sign the mix is staying wet too long.
How to Treat Them Safely
Start by isolating the plant so nothing spreads. Then rinse the fronds, inspect the rhizomes closely, and pick the gentlest treatment that fits the pest. A cotton swab dipped in rubbing alcohol handles mealybugs and small scale patches. Insecticidal soap works for spider mites and broader infestations. Yellow sticky traps plus a drier soil surface clear up fungus gnats. Better humidity helps any mite-prone plant. Be gentle around the paws while you work, since the point is to remove pests, not to bruise the rhizomes.
🩺 Common Bear's Paw Fern Problems
Troubleshooting Your Fern
Most Bear's Paw Fern trouble traces back to three things: light that is too dim, a mix that is too dense, or paws that are being kept too wet. Catch the problem early and recovery is usually simple.
- Root rot: The biggest risk, almost always from a deep pot, compact soil, or buried rhizomes. Look for soft dark roots, blackened mushy paws, and a sour smell.
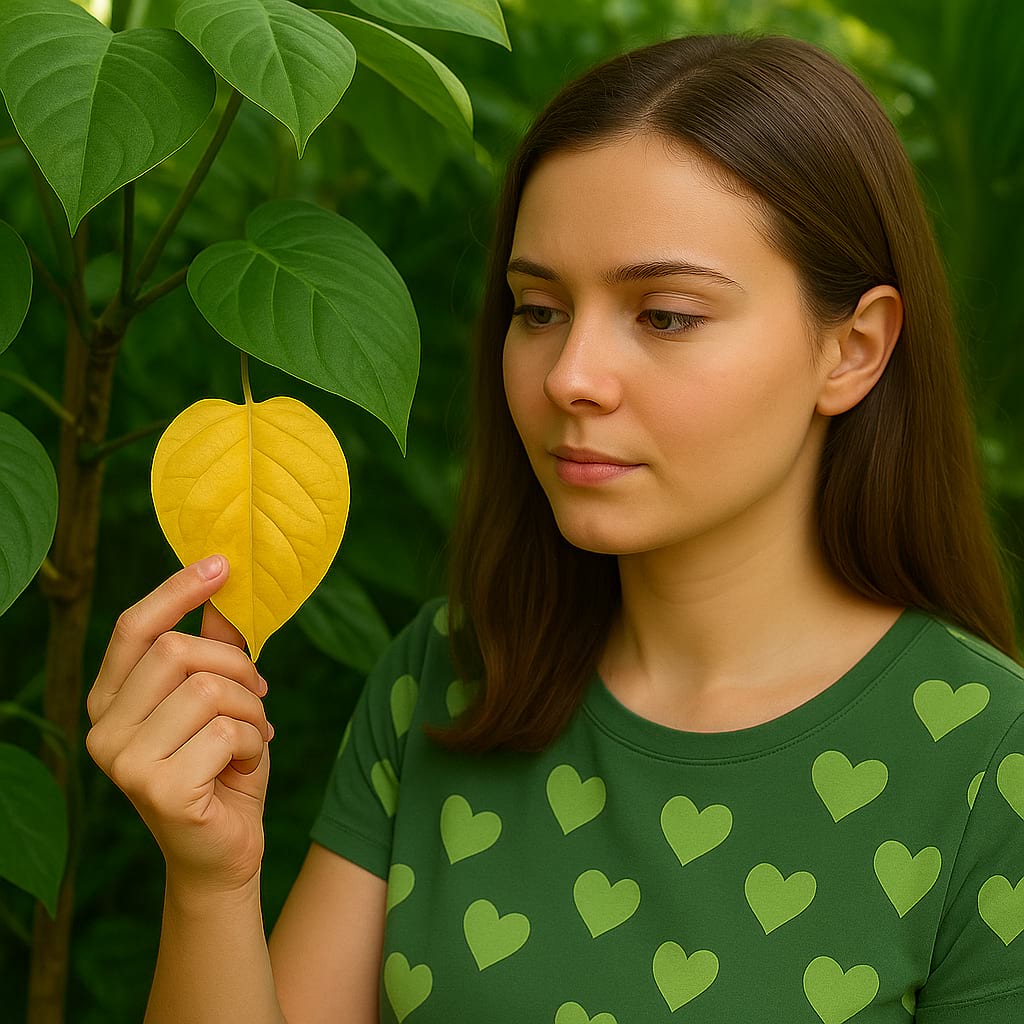
- Yellowing leaves: Usually overwatering, though a fully parched plant can yellow too. Check the root ball before guessing.
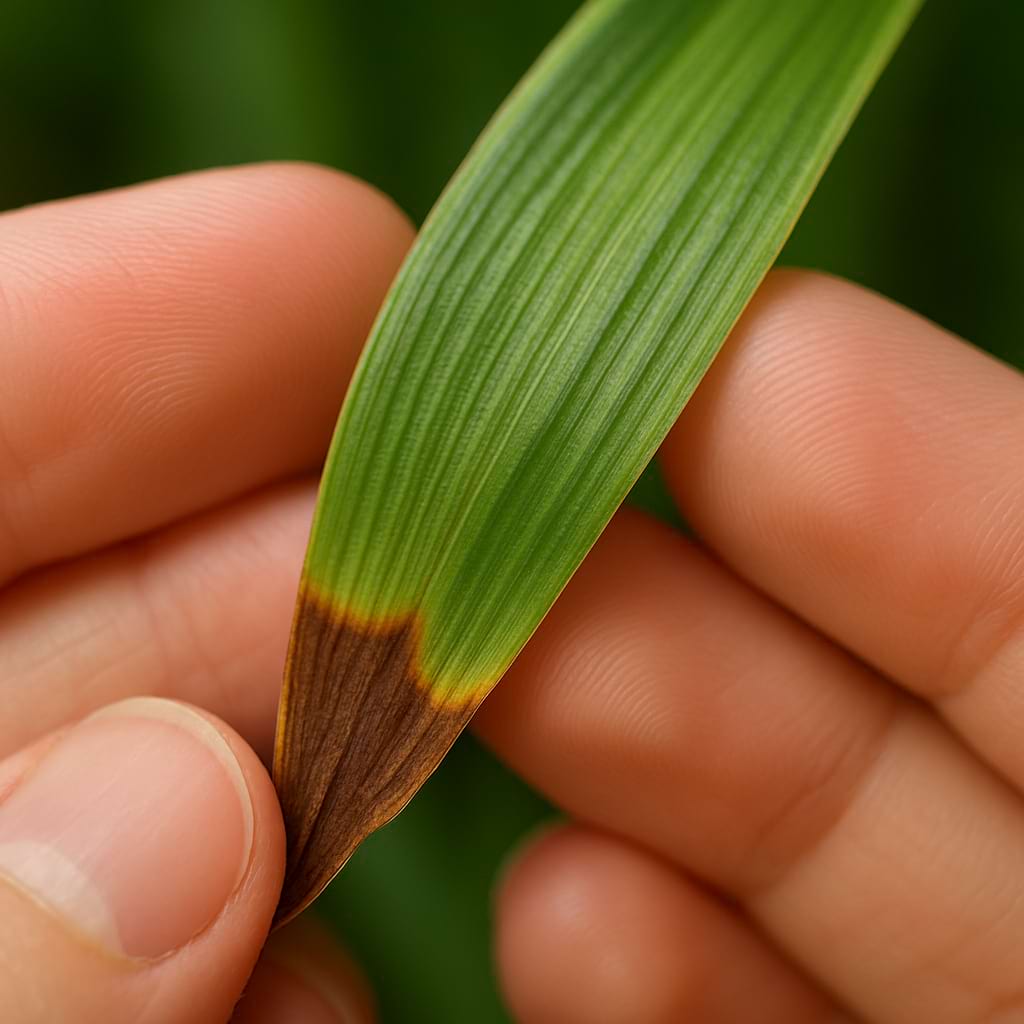
- Brown crispy edges: Typically dry air, uneven watering, or mineral buildup from hard water and fertilizer salts.
- Pale faded leaves: Common when the plant sits too far from a window and is not getting enough light.
- Sunburn: Bleached or tan dry patches after too much direct sun.
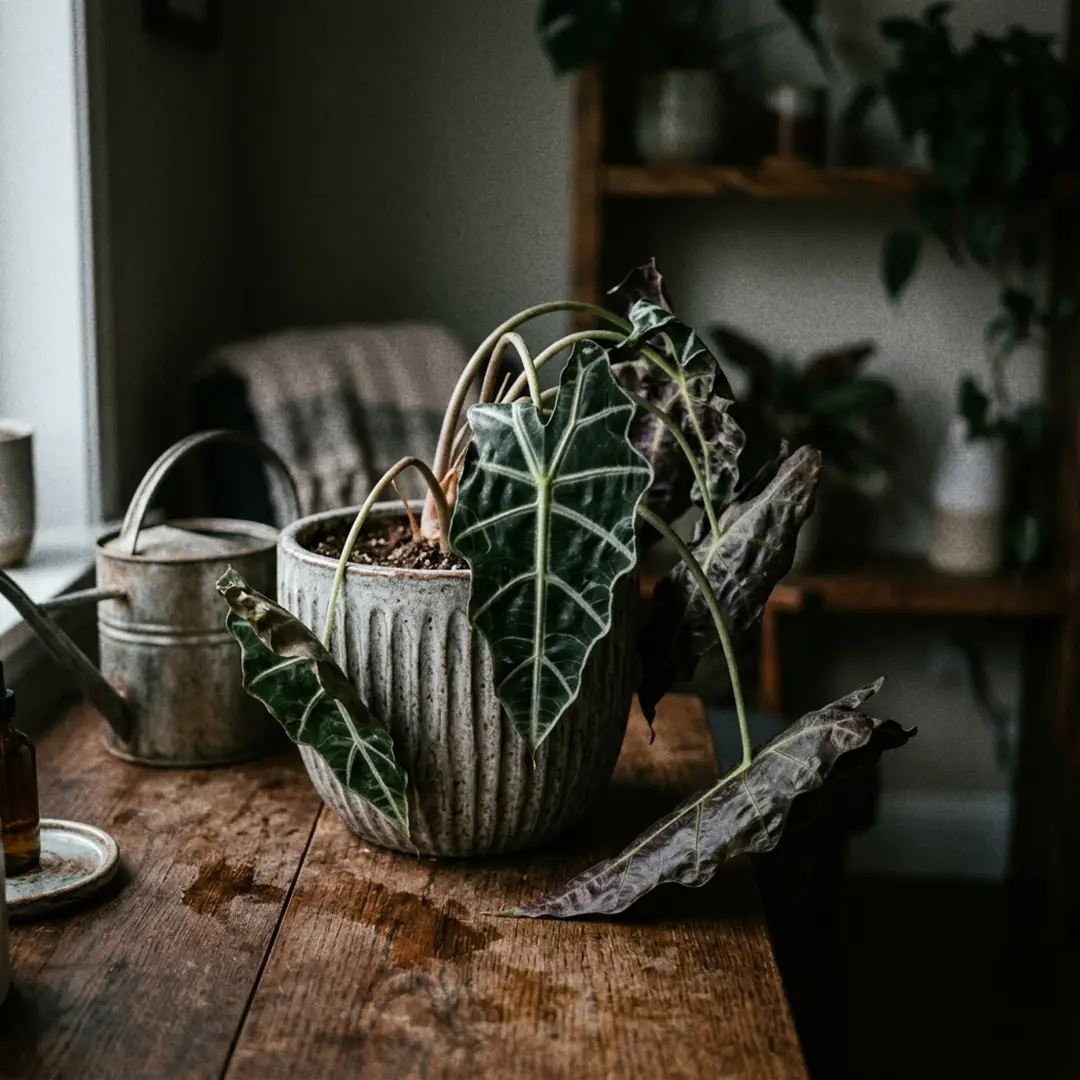
- Wilting or drooping: Can mean thirst, but wet soil plus droopy fronds usually points back to rot damaging the roots.
- Stunted growth: Often tired mix, an overcrowded pot, or too long in low light.
The reassuring part is that this fern gives warnings. If you act at the yellow-tip stage instead of the black-paw stage, it almost always bounces back.

🖼️ Bear's Paw Fern Display and Styling Ideas
Solo Setups
Bear's Paw Fern looks more expensive than it is, because the furry paws give it character that ordinary green plants lack. The best displays show off both the fronds and the wandering rhizomes. A wide shallow bowl is probably the ideal, letting the paws creep naturally across the surface. A pedestal planter raises the pot to eye level so the fronds arch outward. A hanging basket is excellent too, since the rhizomes spill over the edge and the fronds cascade.
Grouped Arrangements
This fern slots beautifully into a humidity-loving green corner. Group it with a Blue Star Fern and a Rabbit's Foot Fern for a furry-rhizome trio, or mix in a Bird's Nest Fern for an upright contrast. A mounted Staghorn Fern nearby plays nicely with the epiphytic theme. For browsing more options, the Ferns hub is a useful next stop.
Where Not to Put It
Resist the urge to stuff it into a dark corner just because it is a fern. Low light dulls the plant and slows it down, and the paws are too good to hide. Keep it away from heating vents, cold winter glass, and the direct blast of an air conditioner, all of which dry the fronds and stress the rhizomes.
👍 Bear's Paw Fern Pro Care Tips
✅ Keep the paws on top of the mix. If you remember one thing, remember this.
✅ Use a wide pot, not a deep one. This fern crawls outward more than it digs down.
✅ Water the roots, not the rhizomes. Aim the stream around the pot edge to keep the paws dry.
✅ Bright filtered light keeps the fronds glossy. Dim rooms make the plant flat and slow.
✅ Do not let the mix go bone dry for long. This fern is airy, not drought-tough.
✅ Humidity improves the finish. Even when it survives dry air, it looks better with more moisture.
✅ Leave the fuzz alone. Scrubbing the paws damages the scales that protect them.
✅ Repot because the mix is tired, not just because the plant looks big. Old compact soil causes more trouble than a snug pot.
✅ Divide in spring for easy new plants. Each piece needs its own roots and a couple of fronds.
✅ Check the root zone first when the plant declines. With this fern, problems usually start below the fronds.
❓ Frequently Asked Questions
Is Bear's Paw Fern safe for cats and dogs?
Yes. Bear's Paw Fern is considered non-toxic to cats, dogs, and people, which makes it a good pet-safe choice. As with any plant, a curious pet that chews a lot of foliage may get a mild stomach upset, but the fern itself is not poisonous.
Should I bury the furry paws of my Bear's Paw Fern?
No. The fuzzy rhizomes are meant to rest on top of the potting mix, not under it. If you bury them, they stay too wet and often rot. Let the roots tuck into the soil and keep the paws visible on the surface.
Why are the tips of my Bear's Paw Fern turning brown?
Brown tips usually point to dry air, inconsistent watering, or mineral-heavy tap water. Check humidity first, then look at how evenly the root ball is drying out between waterings. Filtered or rainwater can help if your tap water is hard.
Why are the paws on my Bear's Paw Fern going soft and dark?
Soft, darkening rhizomes are a sign of rot, almost always from overwatering, buried paws, or a dense soggy mix. Ease off watering, improve the airflow in the soil, and make sure the rhizomes sit on top. Catch it early, because rhizome rot is hard to reverse once it spreads.
How often should I water a Bear's Paw Fern?
Water when the top inch of mix feels slightly dry, which often lands around every 5-7 days in spring and summer and less in winter. Check with your finger rather than following a fixed schedule, since light, pot size, and home humidity all change the pace.
Can Bear's Paw Fern live in a bathroom?
Yes, as long as the bathroom has a bright window or a reliable grow light. The steady humidity of a bathroom often suits this fern very well and keeps the fronds looking lush.
What is the easiest way to propagate Bear's Paw Fern?
Rhizome division in spring is the simplest method. Split a healthy plant into sections that each have their own roots and a couple of fronds, then pot them in fresh airy mix and keep them lightly moist while they establish.
Does Bear's Paw Fern flower?
No. Like all true ferns, it does not produce flowers or seeds. It reproduces through spores that form in neat brown sori on the undersides of mature fronds, which are perfectly normal and not a sign of pests.
ℹ️ Bear's Paw Fern Info
Care and Maintenance
🪴 Soil Type and pH: Loose, airy, slightly acidic epiphytic fern mix
💧 Humidity and Misting: Happiest at 50-70% humidity, though it copes with average indoor air better than thin-fronded ferns.
✂️ Pruning: Trim spent or torn fronds at the base and leave the paws untouched.
🧼 Cleaning: Rinse or gently dust the fronds. Leave the furry rhizomes alone, since scrubbing damages the protective fuzz.
🌱 Repotting: Every 2-3 years, or when the paws have crawled over the rim.
🔄 Repotting Frequency: Every 2-3 years
❄️ Seasonal Changes in Care: Keep the mix a touch drier in winter, raise humidity during heating season, and protect the plant from cold drafts.
Growing Characteristics
💥 Growth Speed: Moderate
🔄 Life Cycle: Perennial
💥 Bloom Time: Does not bloom; produces spores on mature fronds
🌡️ Hardiness Zones: 10-12 outdoors, usually grown indoors
🗺️ Native Area: The Philippines, Taiwan, and nearby parts of tropical Asia
🚘 Hibernation: No
Propagation and Health
📍 Suitable Locations: Bright bathrooms, east windows, shaded warm patios, wide tabletop planters, hanging baskets, mounted boards
🪴 Propagation Methods: Divide a branching rhizome in spring, making sure each piece has roots and a couple of fronds.
🐛 Common Pests: Spider Mites, Mealybugs, Scale Insects, Fungus Gnats
🦠 Possible Diseases: Root rot, rhizome rot, and leaf spot when the mix stays wet and stale
Plant Details
🌿 Plant Type: Epiphytic fern
🍃 Foliage Type: Evergreen
🎨 Color of Leaves: Glossy mid to dark green
🌸 Flower Color: N/A
🌼 Blooming: Non-flowering fern
🍽️ Edibility: Not edible
📏 Mature Size: 1-2 feet indoors
Additional Info
🌻 General Benefits: Pet-safe foliage, an unusual furry rhizome feature, forgiving growth, and easy spring division
💊 Medical Properties: No common household use
🧿 Feng Shui: Adds soft, grounding green energy to a room
⭐ Zodiac Sign Compatibility: Cancer
🌈 Symbolism or Folklore: Resilience, shelter, quiet strength
📝 Interesting Facts: The fuzzy paws are creeping rhizomes covered in dense scales, and they are meant to crawl across the surface rather than burrow into the soil.
Buying and Usage
🛒 What to Look for When Buying: Look for firm plump rhizomes with intact fuzz, glossy upright fronds, and no black mushy spots on the paws.
🪴 Other Uses: Great mounted on bark, in shallow bowls, and in tropical shelf groupings.
Decoration and Styling
🖼️ Display Ideas: Wide pots, hanging baskets, mounted boards, pedestal planters, and mixed fern displays.
🧵 Styling Tips: The furry paws and leathery fronds look especially good against warm wood, matte stoneware, and pale walls.
🪴 See also 🪴
Complete Guide to Blue Star Fern Care and Growth
Houseplant101 Forum
Questions & Comments
Ask a question, share your plant experience, or help other plant owners.
Comments are temporarily unavailable.
Open the Houseplant101 ForumNo comments yet
Be the first to ask a question or share your experience about this page.
Log in or create an account
Comments use your Houseplant101 Forum account, but you can stay on this page.
Create a new account