Polka Dot Plant
Hypoestes phyllostachya
Freckle Face Plant, Measles Plant, Flamingo Plant
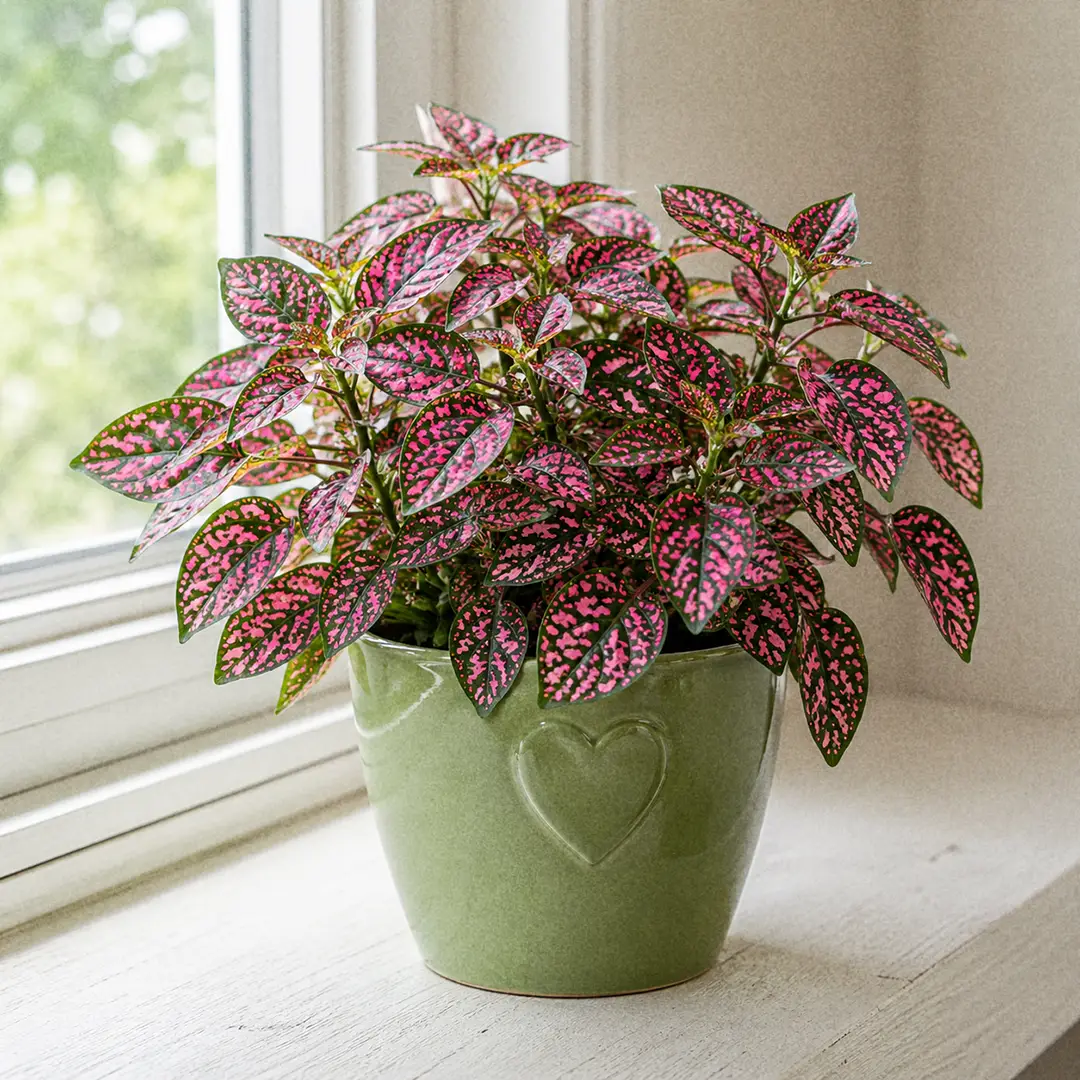
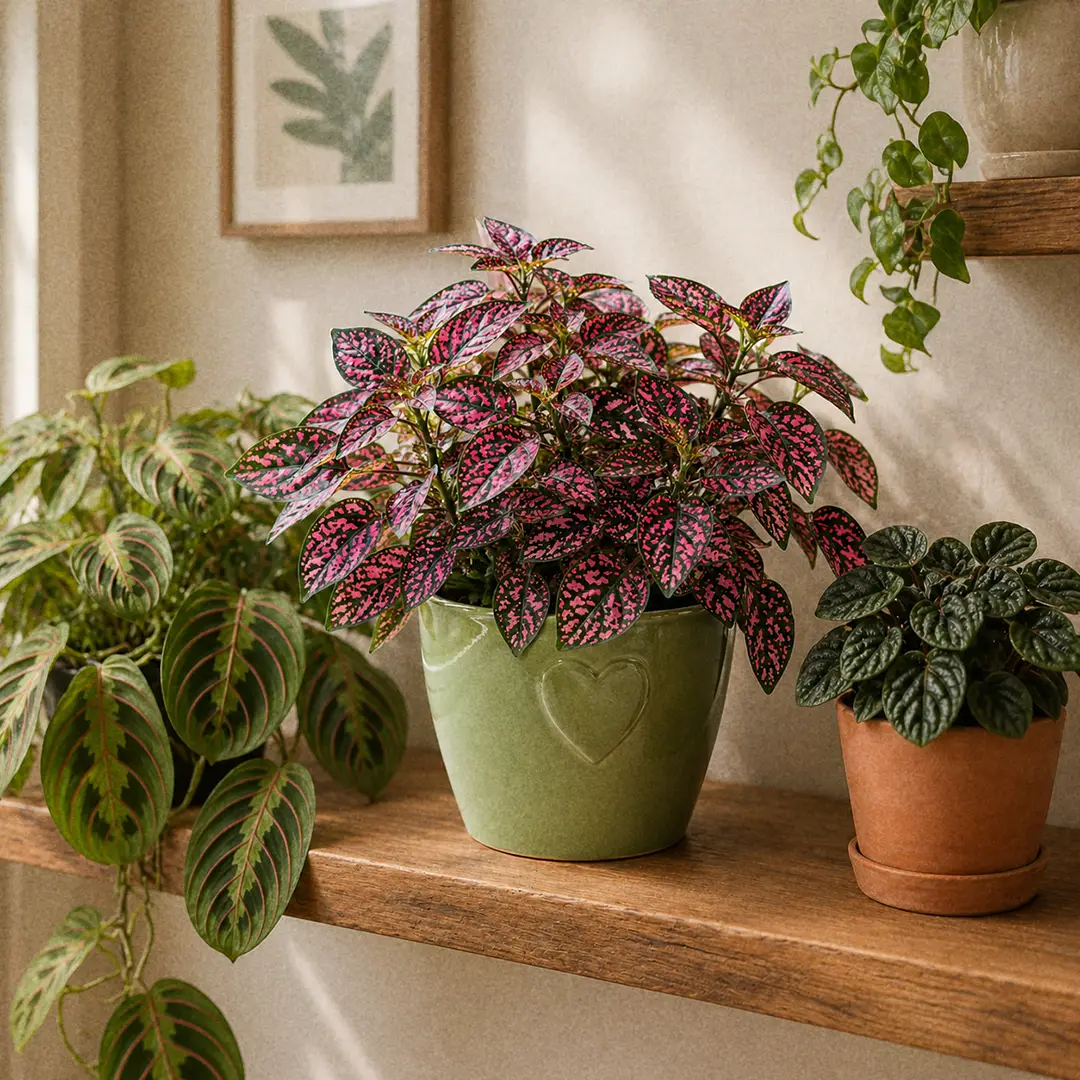
Polka Dot Plant (Hypoestes phyllostachya) is a vivid little tropical beloved for its spotted leaves splashed in pink, red, or white against deep green. Easy to grow and fast to reward, it thrives indoors with bright light and regular pinching to keep it bushy rather than leggy.
📝 Polka Dot Plant Care Notes
🌿 Care Instructions
⚠️ Common Pests
📊 Growth Information
🪴 In This Guide 🪴
☀️ Polka Dot Plant Light Requirements (How Much Light It Really Needs)
Best Light for Polka Dot Plant
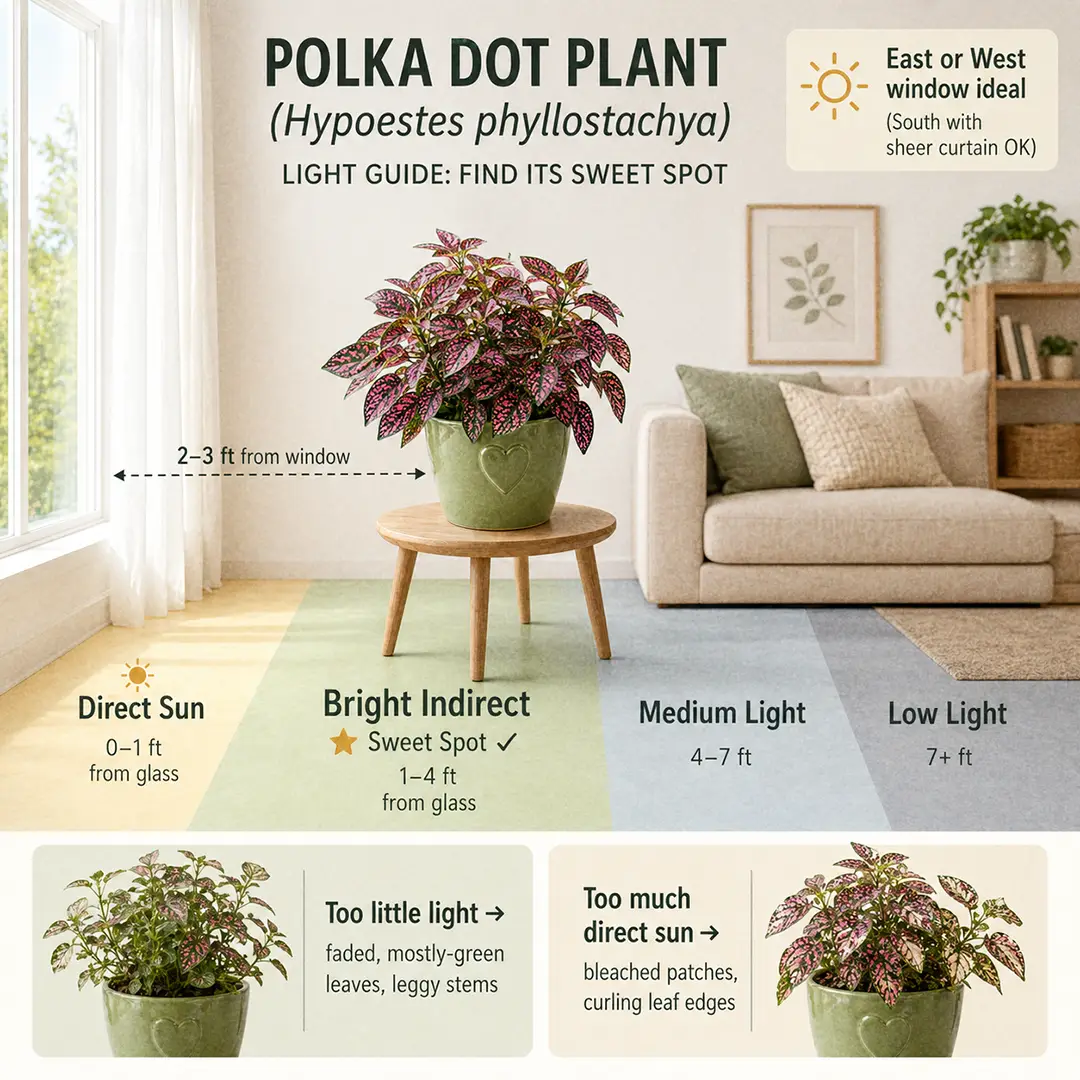
Polka Dot Plant needs bright indirect light to maintain its vivid leaf color. This is probably the most important thing to understand about this plant: the color intensity is almost entirely light-dependent. A well-lit Polka Dot Plant has leaves that look painted. A low-light Polka Dot Plant looks washed out, pale, and mostly green within a few weeks.
The ideal placement is within two to four feet of an east or west-facing window. A south-facing window with a sheer curtain works beautifully. A north-facing window is generally not enough, though the plant will survive there in a diminished, slower-growing form.
Direct morning sun (from an east window) is perfectly fine and actually helpful. It is the harsh afternoon sun of a west or south window without any filter that can scorch the leaves, causing bleached patches or curling edges.
A useful rule of thumb: if you can read a paperback comfortably where the plant sits, you have enough light for survival. If the light is bright enough to cast a soft shadow from your hand, you have enough for vivid color and healthy growth. Anything dimmer and the spots start fading within the month.
Signs of Incorrect Light
Too little light: The spots and splashes fade, leaves go mostly green, the plant becomes leggy and stretches toward the nearest light source. Growth slows noticeably.
Too much direct sun: Leaves curl inward along the edges, bleached or papery patches appear (especially on the pink areas), and the overall color washes out. Move the plant back from the window or add a sheer curtain.
💧 Polka Dot Plant Watering Guide (How to Water)
How Often to Water Polka Dot Plant
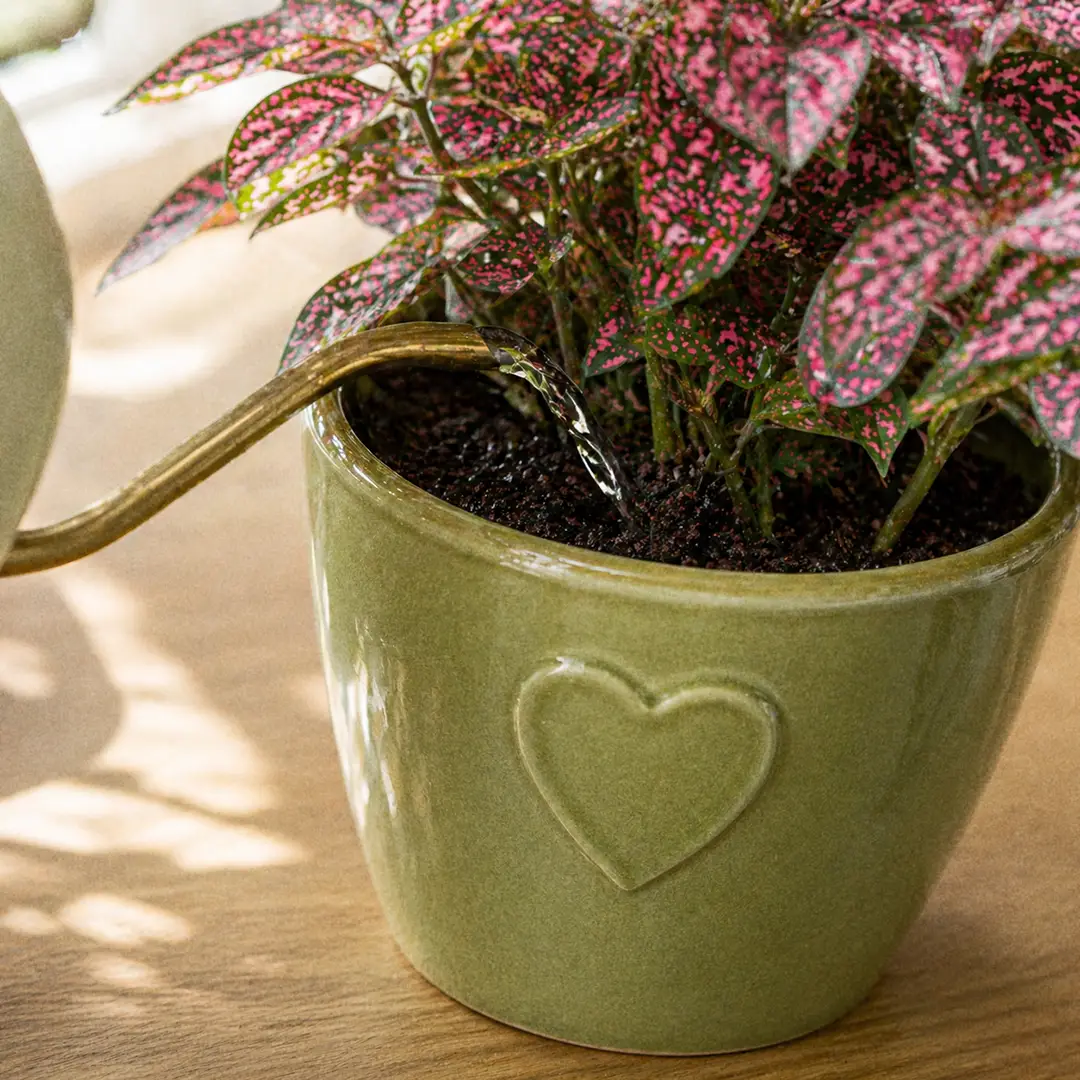
Polka Dot Plants like consistently moist soil but are quite sensitive to overwatering. The correct rhythm is to water when the top inch of soil has dried out. In most homes during the growing season, that means watering every five to seven days. In winter or in a cooler room, it might stretch to every ten days.
The easiest check: push your finger an inch into the soil. If it feels dry at that depth, water thoroughly. If it still feels damp, wait another day or two. Resist the urge to water on a fixed calendar, the plant's environment changes with the seasons, and a schedule that works in August may be wrong in January.
How to Water Polka Dot Plant Correctly
Water from the top, pouring slowly until water drains from the pot's bottom holes. Let it drain fully and do not let the pot sit in standing water in its saucer. Root rot is one of the main ways Polka Dot Plants fail, and it almost always comes from water pooling at the bottom.
You can also use bottom watering, which works well for plants in peat-based mixes. Set the pot in a shallow tray of water for 20-30 minutes, let it absorb from below, then lift it out and let it drain fully. This is particularly useful in summer when the soil dries unevenly from the top.
Signs of Watering Problems
Overwatering: Lower leaves turn yellow and soft. The base of stems may feel mushy. Soil smells sour. These are early signs of root rot developing.
Underwatering: The plant wilts visibly, leaves feel soft and slightly papery, and the soil may have pulled away from the edges of the pot. Unlike the dramatic-but-forgiving Nerve Plant, a severely underwatered Polka Dot Plant can take a full day to recover. Address it promptly.
🪴 Best Soil for Polka Dot Plant (Potting Mix and Drainage)
Recommended Potting Mix for Polka Dot Plant
Polka Dot Plant needs soil that stays evenly moist but drains well enough to prevent water from sitting around the roots. A standard peat or coco-coir based potting mix works well, but it benefits from amendment.
A good mix:
- 60% regular peat or coco-coir potting mix
- 30% perlite for aeration and drainage
- 10% worm castings or compost for gentle nutrients
You can buy a general-purpose houseplant potting mix and simply add a generous handful of perlite. The perlite is the key ingredient, it keeps the medium light and prevents the compaction that leads to waterlogging over time.
What Soil to Avoid
Heavy garden soil or soil labeled for outdoor use compacts too quickly, holds too much water for an indoor pot, and almost guarantees root rot. Cactus and succulent mixes drain too fast and dry out too quickly for a plant that prefers consistent moisture.
Drainage is Non-Negotiable
Always use a pot with drainage holes. No workarounds with gravel at the bottom, that does not improve drainage in any meaningful way. A draining pot plus a well-amended mix is the foundation everything else depends on.
🍼 Fertilizing Polka Dot Plant (Feed Schedule and Type)
Best Fertilizer for Polka Dot Plant
A balanced liquid fertilizer with a roughly equal N-P-K ratio like 10-10-10 or 20-20-20 works well. The nitrogen component supports leaf color and lush growth, which is exactly what you want here. Organic options like liquid fish emulsion or kelp work too, though the smell may put some people off for an indoor plant.
How Often to Fertilize
During the growing season (spring through early autumn), fertilize every two to four weeks at half the label's recommended dose. Half strength is important: Polka Dot Plants are sensitive to fertilizer salt buildup, which causes brown leaf edges or stunted growth when overdone.
Stop fertilizing entirely from October through February. The plant's growth slows dramatically in winter, and fertilizing during this rest period pushes weak, etiolated new growth and accumulates salts in the soil.
Signs of Fertilizer Problems
Brown, crispy leaf tips after regular feeding suggest salt buildup, flush the soil with plain water two or three times to clear it. Very slow growth and pale leaves even in good light may indicate the plant needs feeding after a long unfed period.
🌡️ Polka Dot Plant Temperature Range (What Temperatures Work)
Ideal Temperature for Polka Dot Plant
Polka Dot Plant is a true tropical. It thrives in temperatures between 65-80°F (18-27°C), which conveniently overlaps with most human comfort zones. If you are comfortable, the plant is comfortable.
What to avoid: temperatures below 55°F (13°C), even briefly. Cold drafts from winter windows, air conditioning vents, or proximity to an exterior door are all problematic. The plant will not recover gracefully from frost or prolonged cold, leaves become soft and dark and the plant can collapse rapidly.
Seasonal Temperature Considerations
In summer, if you move the plant to a porch or patio, choose a spot with shelter from direct afternoon sun and protection from evening temperatures below 60°F. It loves warm, humid outdoor air but needs to come back inside before autumn chill sets in.
In winter, keep it away from windows that frost at the edges. A cold window frame even a few inches from the leaves can cause localized cold damage on the glass-facing side of the plant.
💦 Polka Dot Plant Humidity Requirements (Tropical Moisture Levels)
Ideal Humidity for Polka Dot Plant
Polka Dot Plants come from the humid forests of Madagascar and feel most at home with humidity between 50-60% or higher. Most modern homes run around 30-40% indoor humidity, which is technically survivable but tends to produce brown leaf tips and increased pest susceptibility over time.
This is especially true in winter, when forced air heating strips indoor moisture rapidly. Supplementing humidity is worthwhile if you want the plant looking its best.
How to Increase Humidity Around Polka Dot Plant
Pebble tray: Fill a shallow tray with pebbles, add water to just below the surface of the pebbles, and set the pot on top. As the water evaporates, it raises local humidity around the plant. Refill as needed.
Group plants together: Placing your Polka Dot Plant near other moisture-loving plants like Maranta Leuconeura or Nerve Plant creates a microclimate of slightly higher humidity as they all transpire together.
Humidifier: The most reliable option, especially in winter. A small humidifier running near your plant collection keeps humidity consistent without guesswork. Every high-humidity lover in your collection benefits simultaneously.
Bathroom placement: If your bathroom gets decent indirect light, it is a genuinely good location. The steam from showers creates naturally elevated humidity that Hypoestes appreciates. You can read more about plants that love humidity if you want to build a whole high-humidity corner.
Avoid misting directly on the leaves in a low-air-circulation room, sitting water on the leaf surface encourages fungal issues like powdery mildew.
🌸 Polka Dot Plant Flowers (Blooming and What to Do)
Does Polka Dot Plant Flower?
Yes, Polka Dot Plants flower, usually in late summer or early autumn when day length shortens. The flowers are small, tubular, and lavender-pink in color, arranged on upright spikes. They are genuinely pretty up close but are not the reason most people grow this plant.
The complication with blooming is what comes after. Flowering signals the plant entering a reproductive phase, and once it completes a bloom cycle, it typically begins to decline. The foliage thins, stems get woodier, and the plant starts looking tired. Many growers treat this as the natural end of the plant's indoor life cycle.
Should You Remove Polka Dot Plant Flowers?
If you want to maximize the foliage's life, pinch off flower spikes as soon as you notice them forming. This diverts the plant's energy back into leaf production and can extend the plant's attractive phase by several months.
If you let it bloom, collect seeds from the spent flowers. Polka Dot Plants grow readily from seed, and starting fresh young plants gives you compact, vividly colored replacements quickly. Seeds germinate within one to two weeks in warm, moist conditions.
🏷️ Polka Dot Plant Types and Varieties
Most Popular Polka Dot Plant Varieties
Polka Dot Plants have been bred into a range of color forms. All share the same care requirements, so choosing comes down to aesthetics and what you can find locally.
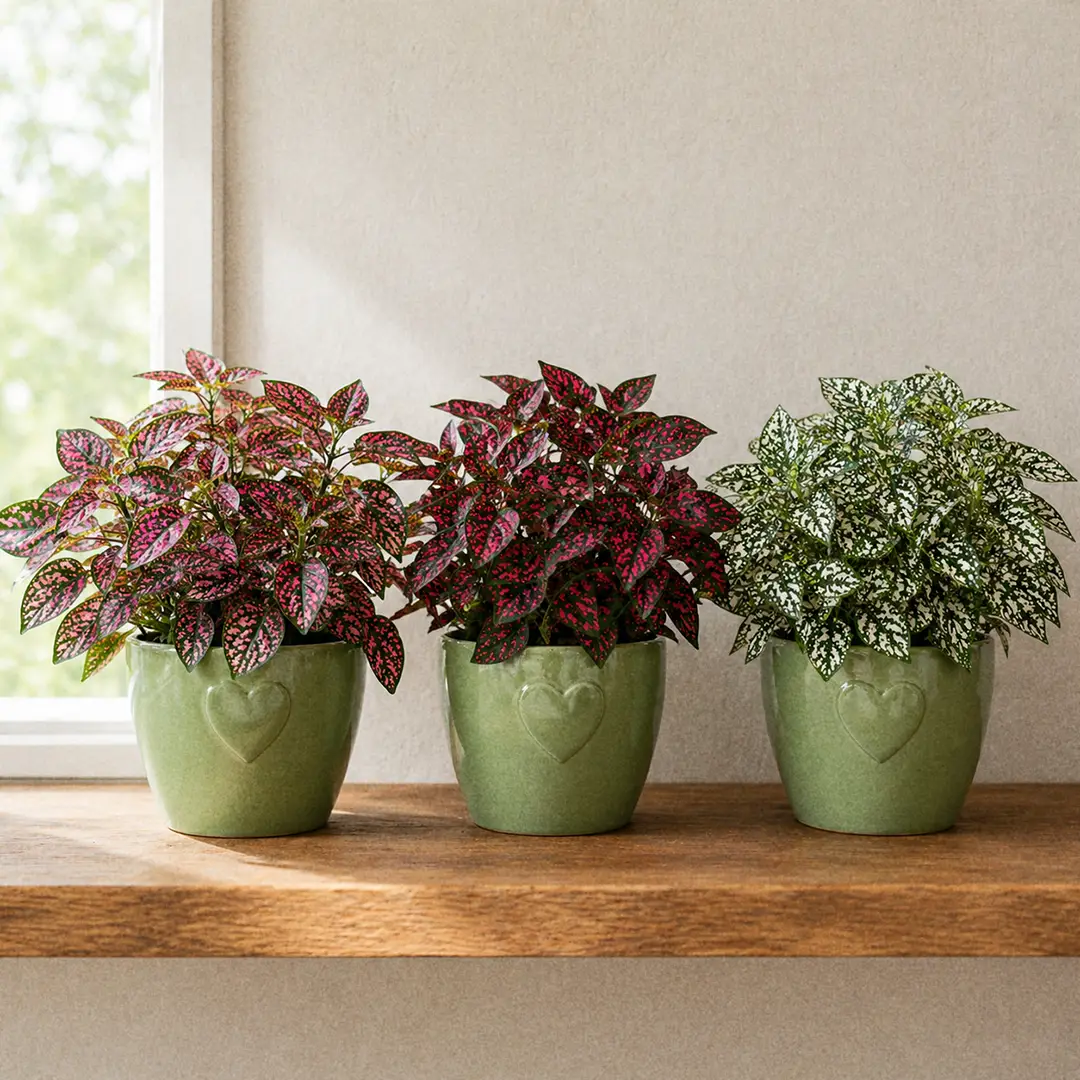
Pink Splash: The most widely available variety, with deep green leaves heavily marked with pink spots and splashes. Color intensity ranges from soft blush to vivid magenta depending on the individual plant and its light conditions. This is the classic.
Red Splash / Carmina: Deep red to burgundy markings rather than pink, often with more of a wash or flush over the leaf than defined spots. Has a darker, moodier quality than the pink forms. Grows at the same pace and responds well to pinching.
White Splash / Alba: Crisp white spots on dark green. Creates the most graphic, high-contrast look in the Hypoestes range. The white areas look almost luminous in bright light. Slightly more sensitive to overwatering than the pink forms, but not dramatically so.
Confetti Series: A group of compact, heavily spotted varieties bred for retail, available in pink, red, white, and rose. Confetti plants tend to stay shorter and branch more freely without as much pinching, making them particularly beginner-friendly choices.
Wit: A variety with predominantly white leaves edged in green rather than the typical spotted pattern. More unusual and harder to find, but striking in a more subdued way.
Choosing the Right Variety
For beginners, the standard Pink Splash or any Confetti series variety are the most forgiving. For a dramatic display, pairing a red and a white variety in adjacent pots creates a striking visual combination without fighting each other. All varieties grow at a similar rate and need the same care.
🪴 Potting and Repotting Polka Dot Plant
When to Repot Polka Dot Plant
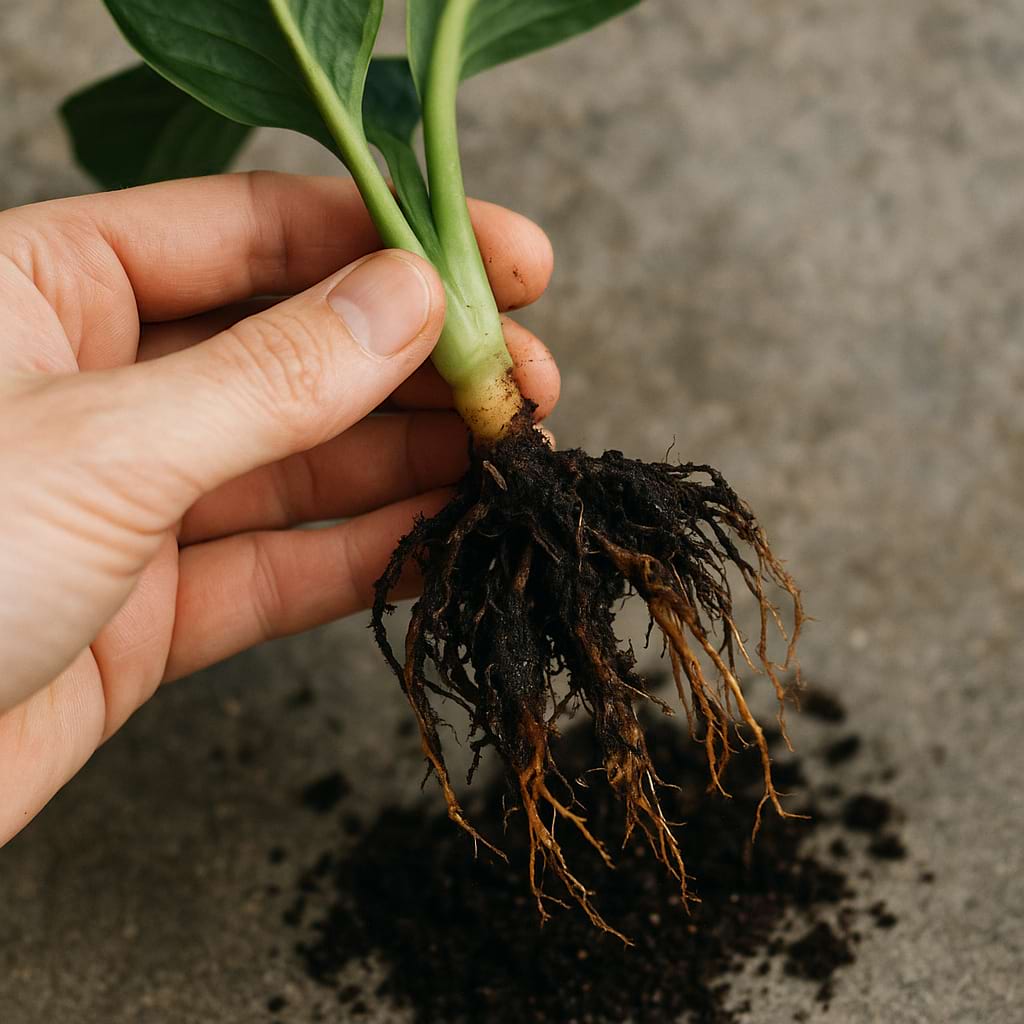
Polka Dot Plants grow fast enough to need repotting every one to two years. The clearest signals: roots emerging from the drainage holes, roots circling visibly at the soil surface, or the plant wilting very soon after watering despite adequate moisture (which suggests roots have taken up most of the pot volume and there is very little soil holding water).
Spring is the best time, as the plant is entering its active growth phase and settles into a new pot quickly.
How to Repot Polka Dot Plant
- Water the plant 24 hours before repotting to reduce transplant stress.
- Choose a new pot only one to two inches wider in diameter than the current one. Going too large leads to excess soil staying wet far too long, which increases root rot risk.
- Add fresh potting mix to the bottom of the new pot.
- Gently remove the plant, loosen any tightly circling roots, and set it in the new pot at the same depth as before.
- Fill in around the roots with fresh mix and tamp lightly.
- Water thoroughly, let it drain, and return the plant to its usual spot.
Choosing a Pot for Polka Dot Plant
Terracotta pots work well because they allow moisture to evaporate through the walls, helping prevent overwatering. Plastic or glazed ceramic pots retain moisture longer, which is fine but requires slightly more careful watering judgment.
Whatever material you choose, the drainage hole is mandatory. Use decorative pots without holes as cachepots (outer layer only), with a plain nursery pot inside.
✂️ Pruning Polka Dot Plant (How to Keep It Bushy)
Why Pruning Polka Dot Plant Is Essential
This is the one non-negotiable care task for Polka Dot Plants. Without regular pinching, the plant prioritizes upward growth and becomes tall, lanky, and open, with leaves spaced far apart and a generally scraggly appearance. With regular pinching, it stays compact, bushy, and full.
The good news: pinching is genuinely quick and simple. No tools required, though you can use clean scissors or pruning snips if you prefer.
How to Pinch Polka Dot Plant
Pinch (or snip) just above a leaf node, the point where a leaf attaches to the stem. Removing the top one to two inches of each stem tip redirects the plant's energy into the lower buds, which then sprout two new stems. Over a few weeks, a well-pinched plant becomes noticeably fuller.
Do this every one to two weeks during the growing season. It sounds like a lot, but it takes under a minute and dramatically extends the life and appearance of the plant.
If the plant has already become leggy, cut it back more aggressively, removing up to half the plant's height at once. It looks drastic, but healthy Polka Dot Plants regenerate quickly. Within two to three weeks, new growth emerges from the lower nodes and fills back in.
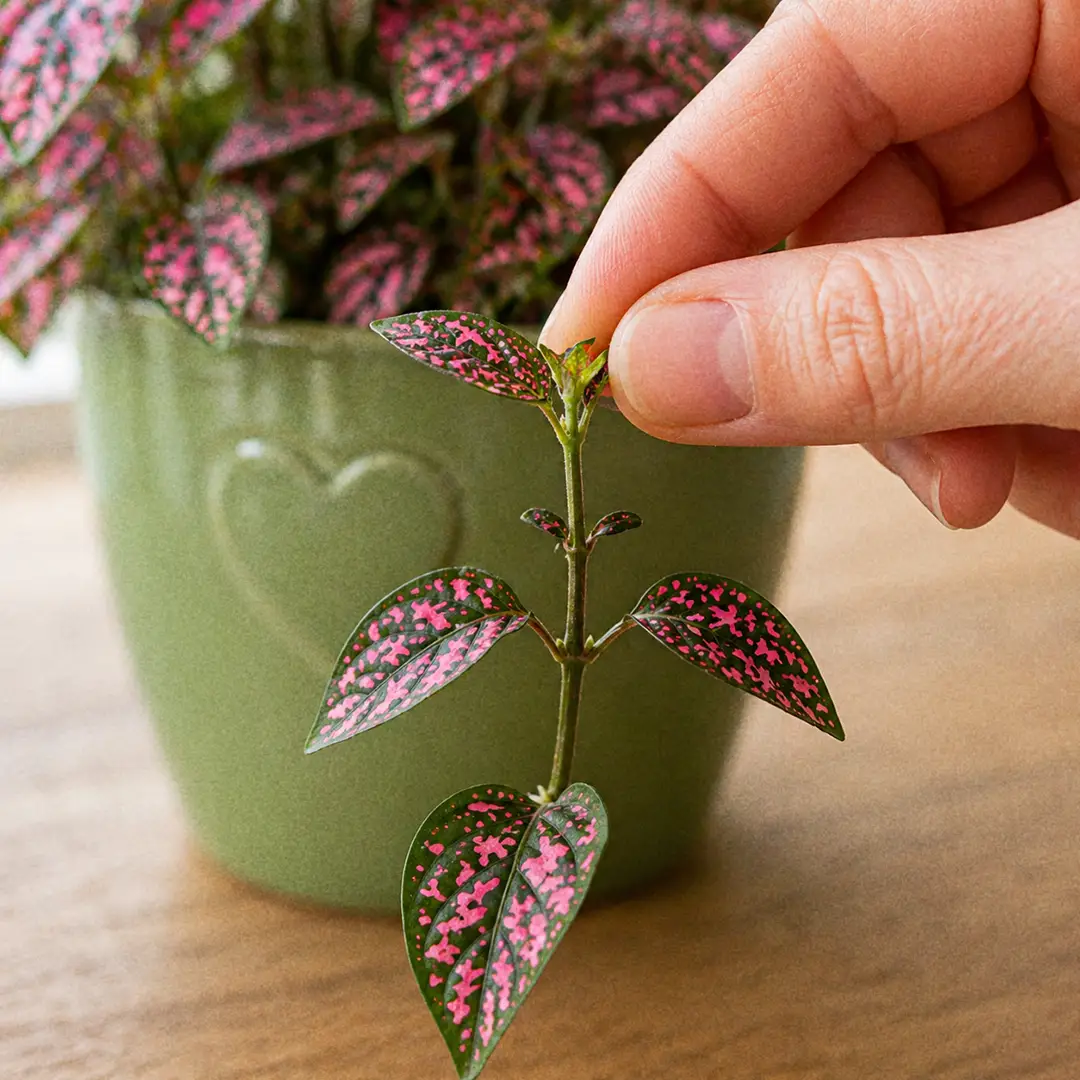
What to Do With Pruned Cuttings
Do not throw them away. Polka Dot Plant cuttings root very easily in water, which means every pruning session doubles as a propagation opportunity. See the next section for how to do this.
🌱 How to Propagate Polka Dot Plant (Water and Soil Methods)
Stem Cutting Propagation in Water (Easiest Method)
Water propagation is the easiest and most rewarding method for Polka Dot Plants. It is also highly visual, you can watch the roots develop day by day, which makes it a great project for kids or anyone new to propagation.
Step 1: Take a cutting of 3-4 inches from a healthy stem. Cut just below a leaf node using clean scissors. Remove the lower leaves so only the bare stem will be submerged, leaving two or three leaves at the tip.
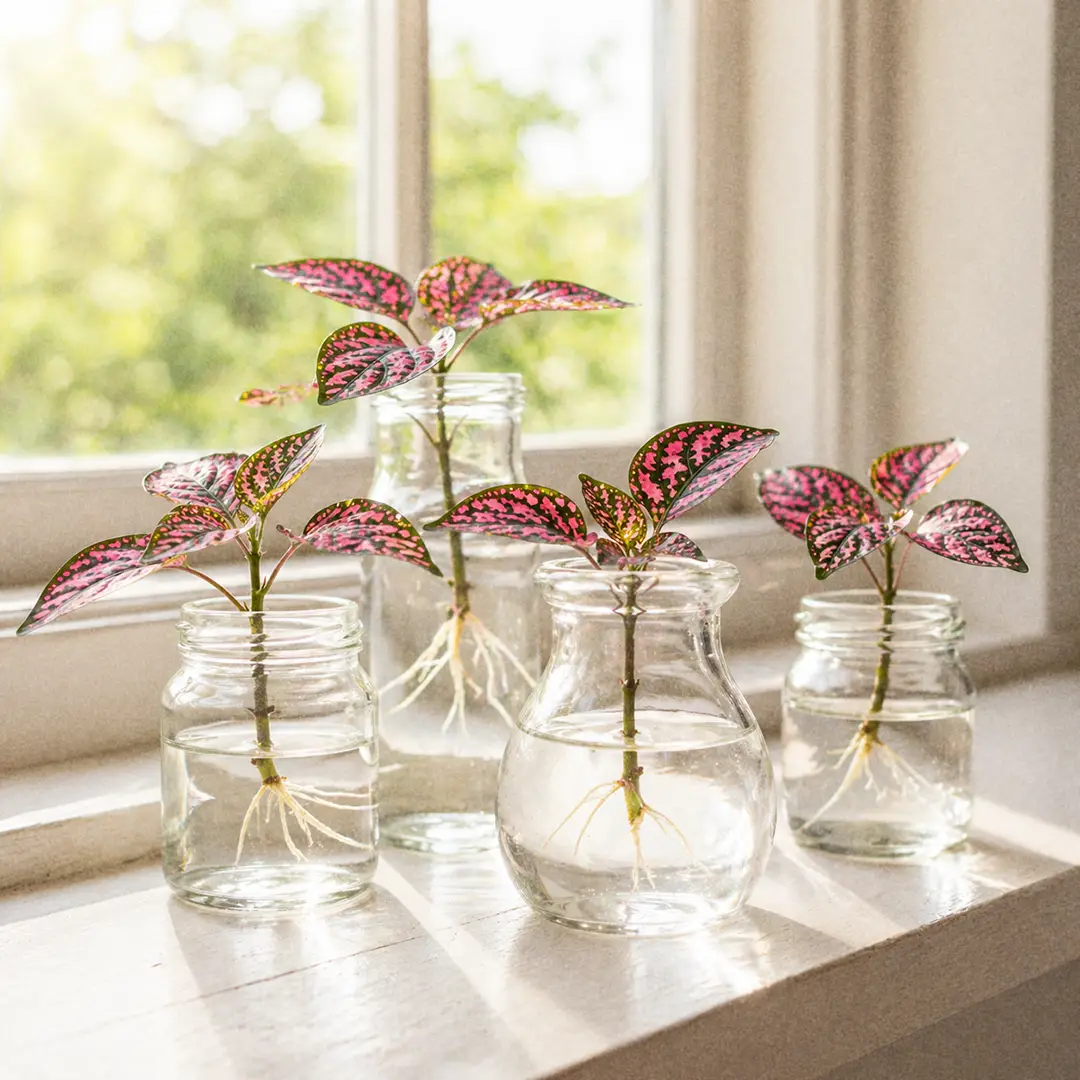
Step 2: Place the cutting in a small glass or jar of room-temperature water. Make sure no leaves are submerged, submerged leaves rot and cloud the water quickly.
Step 3: Place the jar in bright indirect light (a windowsill is ideal). Change the water every three to four days to keep it fresh and oxygenated.
Step 4: White roots begin to appear within one to two weeks. Wait until the roots are at least half an inch to an inch long before transferring to soil.
Step 5: Plant in a small pot with fresh potting mix and water well. Keep the soil consistently moist for the first week as the cutting adjusts from water to soil.
Soil Cutting Propagation
If you prefer going straight to soil, dip the cut end in rooting hormone (optional but helpful) and insert the cutting into a small pot of moist perlite or a 50/50 perlite and potting mix blend. Cover the pot with a clear plastic bag to maintain humidity, removing it briefly each day to prevent mold. Roots develop within two to four weeks.
Seed Propagation
Polka Dot Plants also grow easily from seed if you collect them from a bloomed plant. Sow on the surface of moist potting mix without covering (seeds need light to germinate), keep warm at 70°F or above, and germination typically occurs within one to two weeks. Seedlings are tiny at first but grow quickly once established.
🐛 Polka Dot Plant Pests and Treatment
Common Pests on Polka Dot Plant
Polka Dot Plants are not particularly pest-prone, but like any tropical houseplant in a warm indoor setting, they can attract a few common visitors.
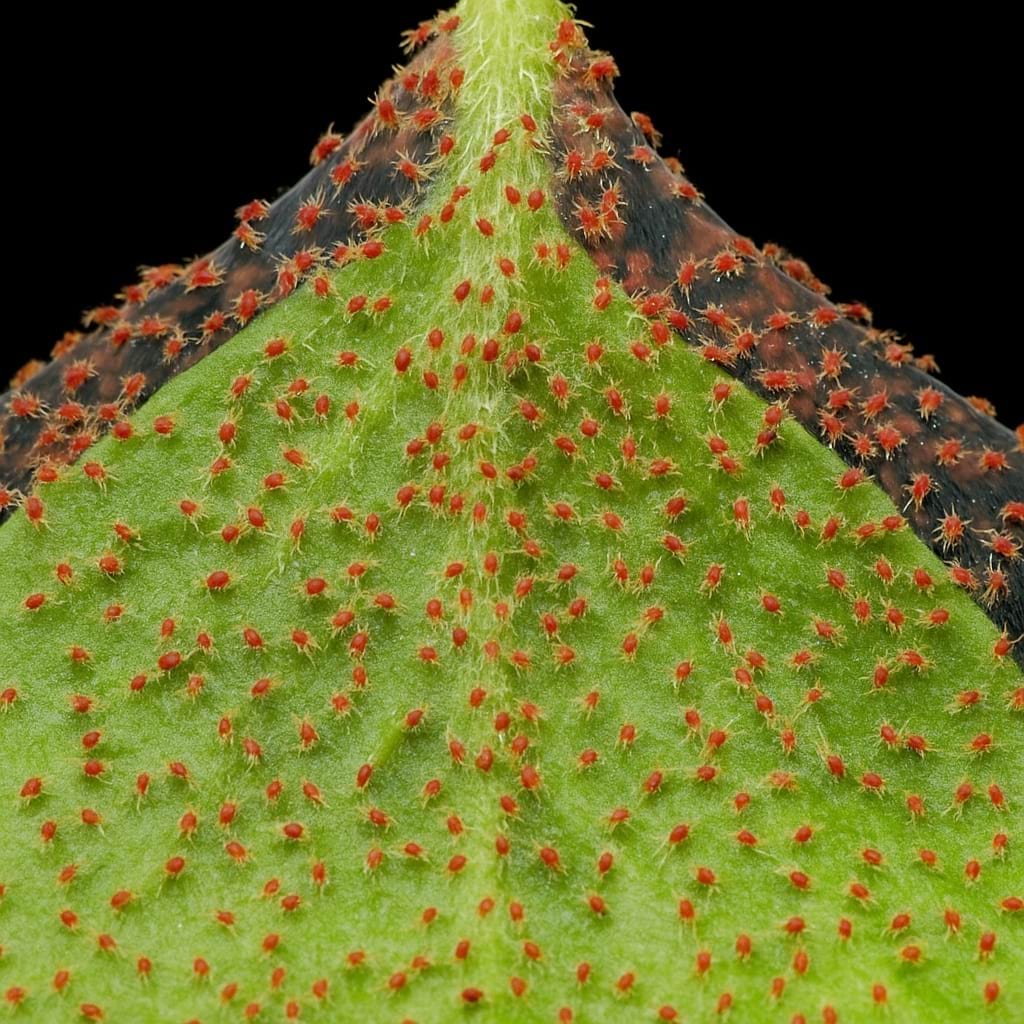
Spider mites are the most frequent issue, especially in dry conditions. They live on the undersides of leaves and leave fine webbing and tiny pale stippling marks on the foliage. Increase humidity, wipe down leaves with a damp cloth, and apply insecticidal soap or diluted neem oil spray weekly until clear.
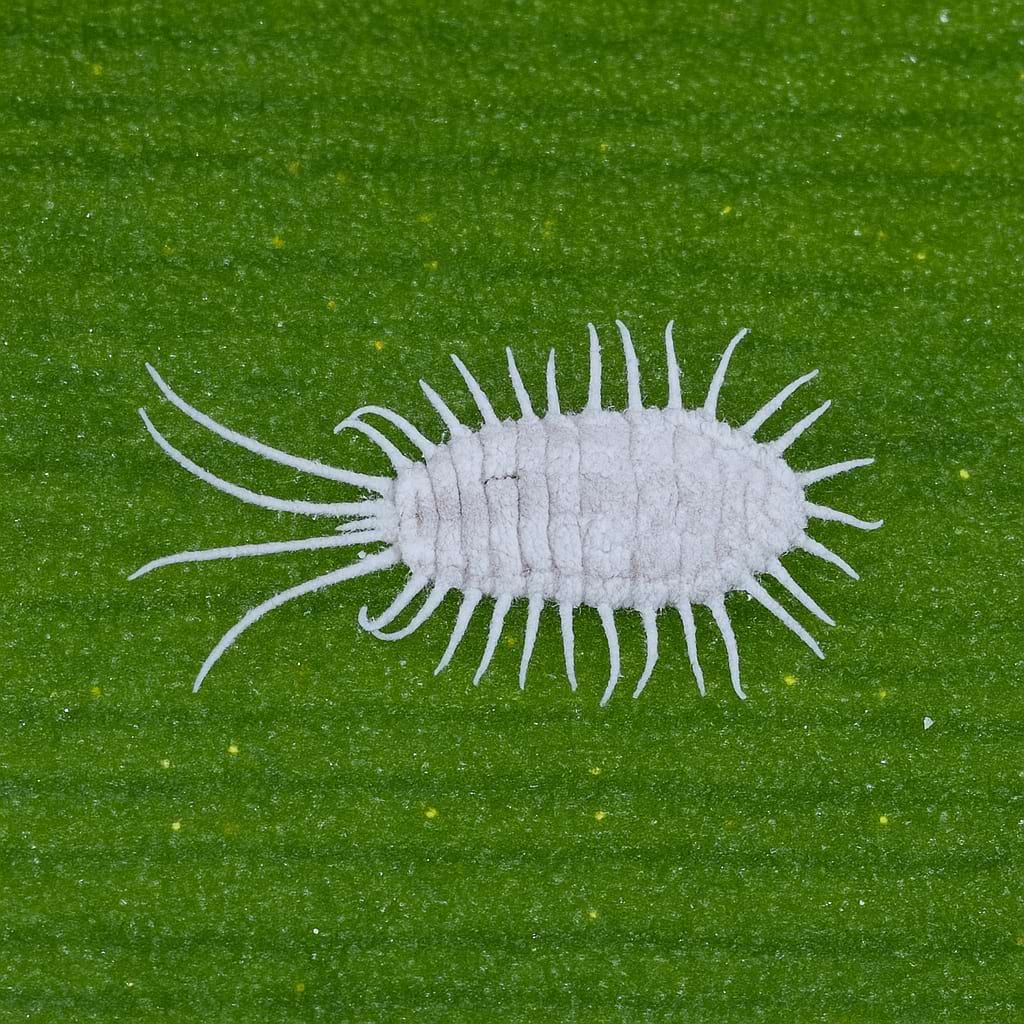
Mealybugs appear as white cottony clumps in the leaf joints and along stems. Remove them manually with a cotton swab dipped in rubbing alcohol, then follow up with a neem oil spray. Repeat every five to seven days for a few weeks to catch any new hatchlings.
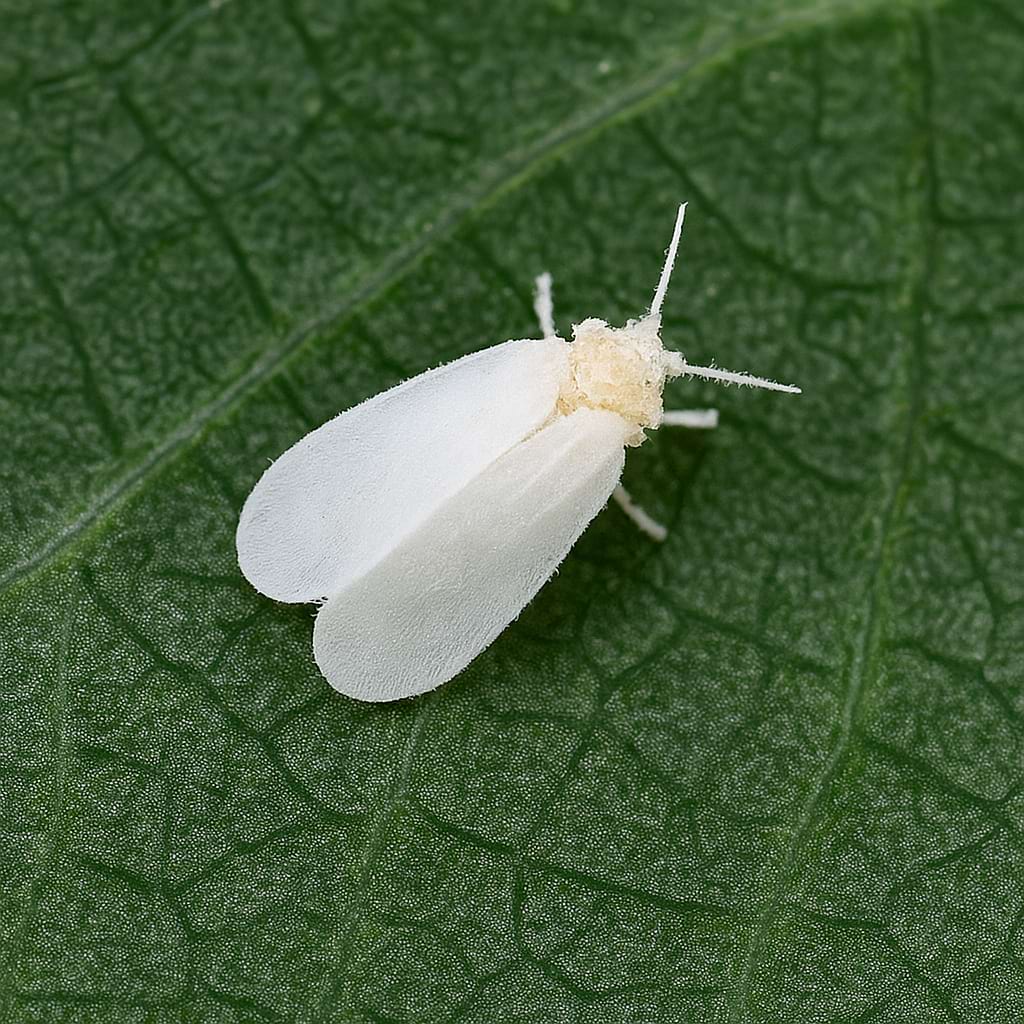
Whiteflies tend to cluster on the undersides of leaves and fly up in a cloud when the plant is disturbed. Yellow sticky traps help reduce adult populations; insecticidal soap applied to the undersides of leaves handles active infestations directly.
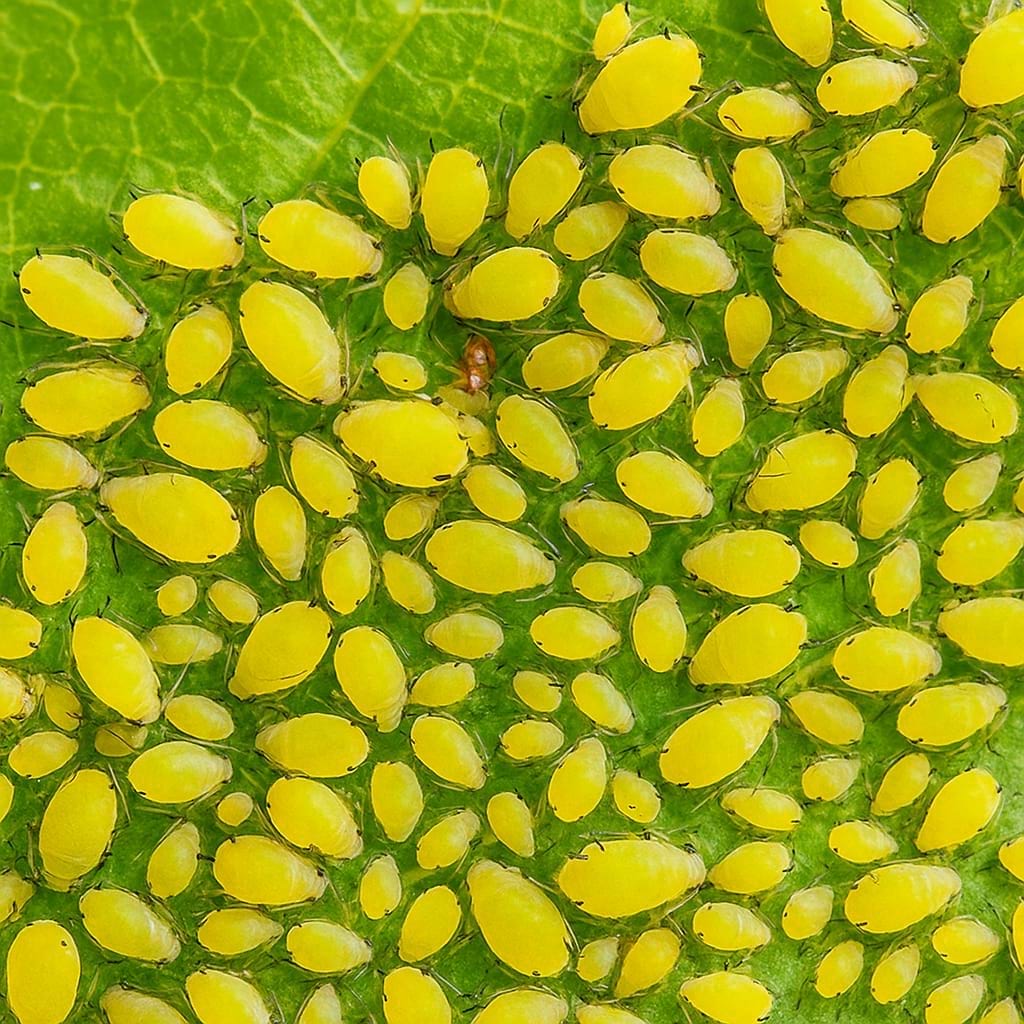
Aphids cluster on new growth, particularly soft young stems and leaf tips. A strong stream of water can knock most of them off. Neem oil or insecticidal soap applied to affected areas clears established colonies within a week or two of consistent treatment.
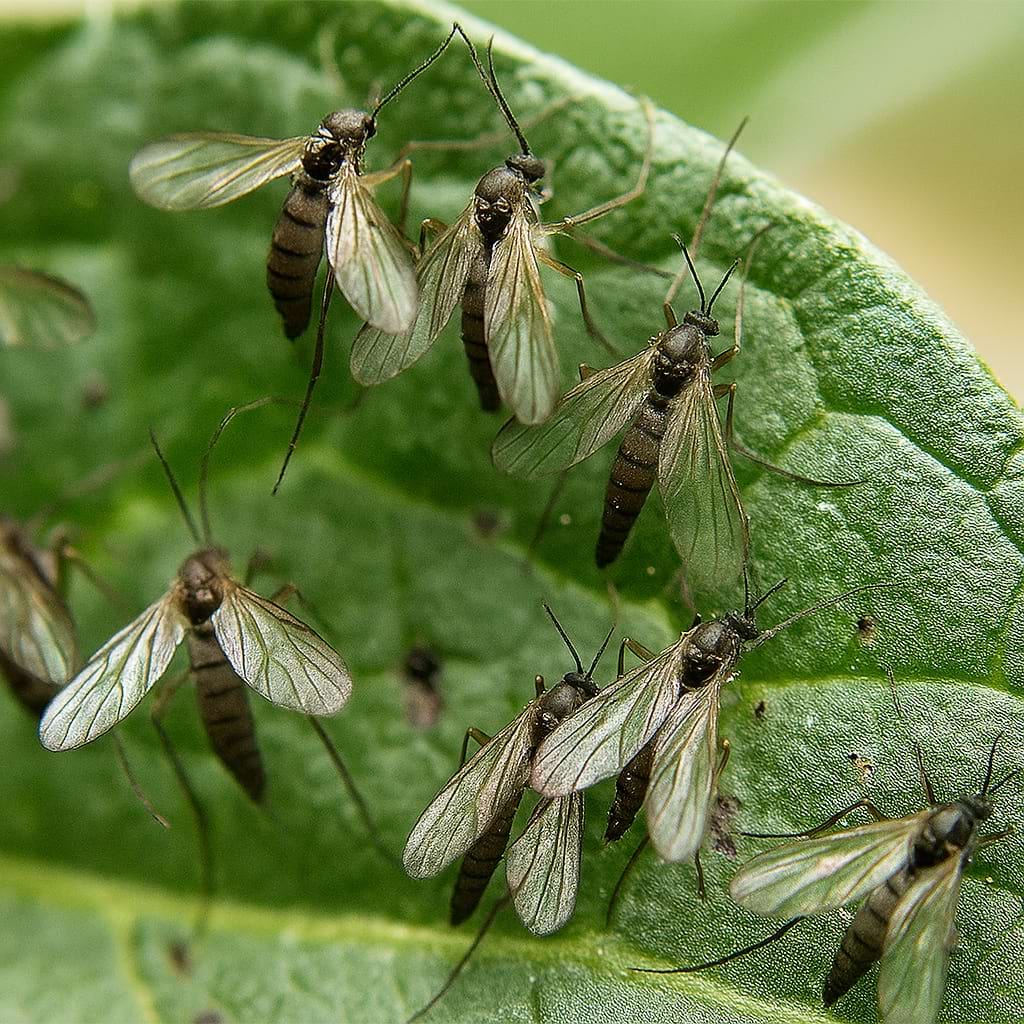
Fungus gnats are less a threat to the plant than a nuisance for the grower. They breed in consistently moist soil. Allow the top inch to dry a bit more between waterings and use yellow sticky traps at soil level to catch the adults.
Pest Prevention
Inspect new plants before bringing them home, check leaf undersides monthly as part of a quick routine, and maintain good humidity (which specifically discourages spider mites). Good air circulation around the plant also helps keep pest pressure low.
🩺 Common Polka Dot Plant Problems
Leggy and Sparse Growth
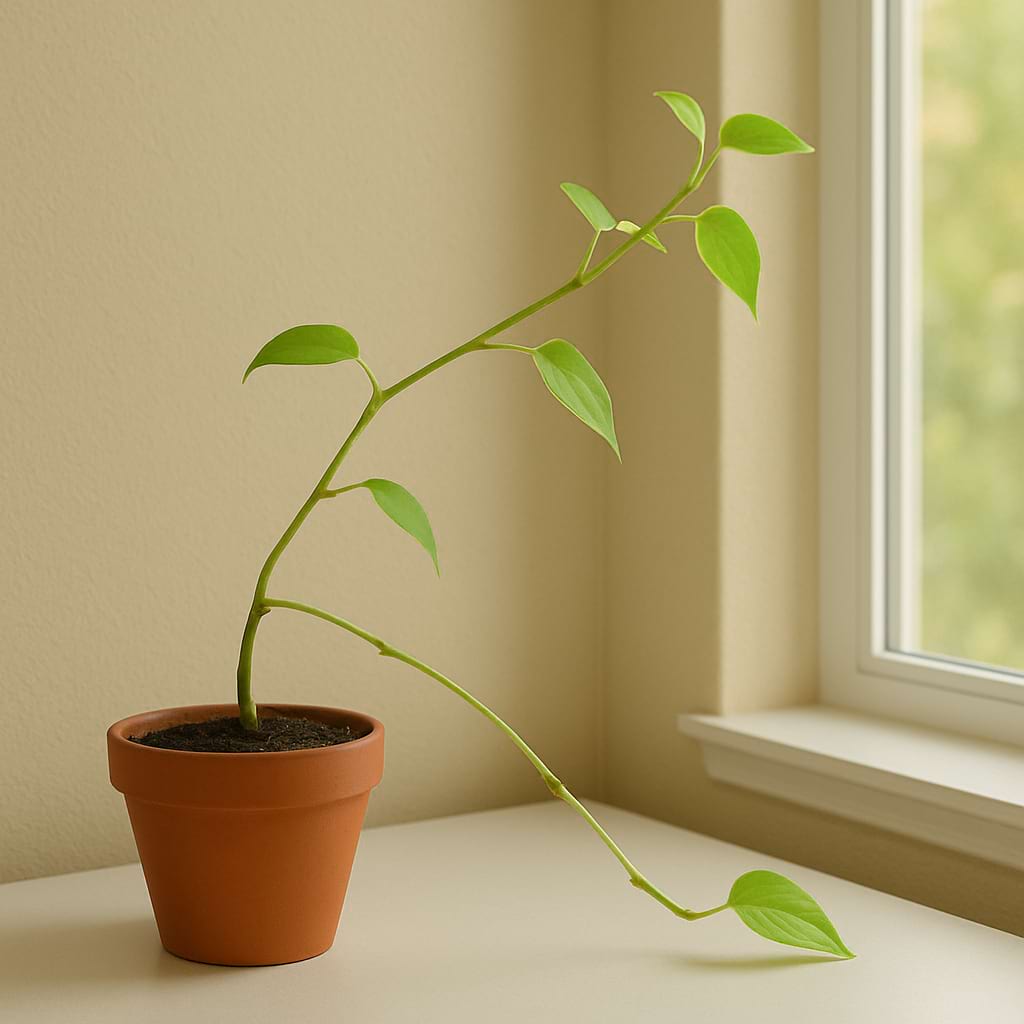
This is by far the most common Polka Dot Plant complaint. The plant stretches toward the light, stems elongate, and leaves become widely spaced. The fix is twofold: move the plant to brighter light and start pinching the stem tips regularly. For a plant that has already become very leggy, cut it back by a third to a half and let it regenerate. More detail is available in the leggy growth guide.
Yellowing Leaves
Yellowing leaves on a Polka Dot Plant are usually a watering problem. If lower leaves are yellowing and the soil has been consistently wet, you are likely overwatering, ease back and verify your drainage is working. If the soil was dry when you noticed the yellowing, the plant may have been too dry for too long. Some lower-leaf yellowing as the plant grows is normal and expected, but widespread yellowing is a signal to investigate.
Faded or Pale Spots
When the vivid spots fade and the leaves look washed out and mostly green, the cause is almost always insufficient light. Move the plant to a brighter spot, and within two to four weeks new growth will emerge with vivid color. The already-faded leaves will not recover their spots, but new ones will be bright.
Brown and Crispy Leaf Edges
Brown tips and edges are typically a humidity problem (dry air) or fertilizer salt buildup. If you have been fertilizing regularly, flush the soil with plain water and ease back on feeding. If the soil is fine but the air is dry (especially in winter), use a pebble tray or humidifier to raise humidity around the plant. More on this in the brown crispy edges guide.
Root Rot
Persistently wet soil, especially in a pot without drainage or in a heavy mix, leads to root rot. Signs include soft or mushy stems at the base, a sour smell from the soil, and rapid yellowing or wilting that does not improve after watering. If caught early, unpot the plant, trim away blackened roots, let them air-dry briefly, and repot in fresh dry mix. Dispose of the old contaminated soil.
Wilting Despite Watering
If the plant wilts right after watering and does not recover, root rot may have already damaged the root system's ability to absorb water. Unpot and inspect. Healthy roots are white or light tan; rotted roots are dark, mushy, and may smell unpleasant. See the full wilting and drooping guide if you need to work through the diagnosis step by step.


🖼️ Polka Dot Plant Display and Styling Ideas
Where to Display Polka Dot Plant
Polka Dot Plants are compact enough to live on desks, windowsills, bathroom counters, and shelves. Their vivid leaf color makes them natural focal points, a single plant in a neutral or dark pot can anchor an entire shelf display.
Because they need bright light, placement near a window is where they will perform best. An east-facing bedroom windowsill with morning light is an ideal and practical spot. A well-lit bathroom shelf works beautifully too, combining good light with naturally elevated humidity.
Styling Polka Dot Plant with Other Plants
The spotted pattern works well as a contrast element alongside solid-colored or textured foliage plants.
- Pair pink Polka Dot with a deep-green Maranta Leuconeura for a color and pattern combination that looks intentional and collected.
- Group with a trailing Golden Pothos for easy height contrast, with the pothos's simple green leaves balancing the more attention-seeking spotted foliage.
- Combine with a Chinese Evergreen in a deep-toned variety for a two-plant statement where both plants share similar humidity and light needs.
- In a terrarium, pair with Nerve Plant and a small moss layer for a compact living humidity-loving ecosystem where both plants genuinely thrive together.
- If you have a Polka Dot Begonia nearby, the two plants play nicely off each other's spotted aesthetic while being entirely different in size, shape, and care.
Container Choices
Dark green, charcoal, or terracotta pots let the spotted foliage take center stage. Avoid pots with their own competing patterns, as the visual result gets busy quickly. The contrast between bold leaf color and a simple container is where the plant really shines.
For a cohesive plant shelf, use matching pots across multiple plants and let the variety of foliage textures and colors create the visual interest rather than the containers.
🌟 Polka Dot Plant Pro Care Tips
1. Pinch Early, Pinch Often
Start pinching as soon as you bring the plant home. Do not wait until it gets leggy, the point of pinching is to prevent it from happening in the first place. A plant that has been pinched since its early days develops a much stronger branch structure and recovers better from any future stress.
2. Use a Moisture Meter
Overwatering is a consistent issue with Polka Dot Plants. A cheap moisture meter removes all the guesswork. Push the probe into the soil at the root zone, water when it reads 3-4 (slightly moist), not when it reads 7-9 (wet). This single tool prevents the majority of root rot cases.
3. Treat It as a Short-Lived Plant (Or Propagate Constantly)
Polka Dot Plants are beautiful but finite. After one to two years, especially post-blooming, they tend to decline no matter what you do. The savvy approach is to treat cuttings as insurance: take two or three cuttings every few months, root them in water, and pot them up. When the parent plant starts to look tired, a young, fresh replacement is already ready.
4. Give It a Summer Vacation Outside
In warmer months, a protected outdoor spot with dappled shade or morning sun transforms these plants. The natural humidity, air movement, and light quality outside leads to noticeably faster, fuller growth. Acclimate it gradually (a few hours outside per day for a week) and bring it back before temperatures drop below 60°F.
5. Blooming Is a Cue to Take Cuttings
When you notice small lavender flower spikes forming, treat it as a prompt to take fresh cuttings immediately, before the plant fully commits to its reproductive phase and starts declining. Pinch the spikes and root the cuttings, and you extend the plant's useful life considerably.
6. Match Fertilizer to Season
The biggest fertilizer mistake is continuing to feed in late autumn and winter. Fertilizing in slow-growth periods pushes weak, etiolated new growth and builds up salts in the soil. Fertilize actively from March through September, then stop until growth picks up again in spring.
❓ Frequently Asked Questions
Is Polka Dot Plant toxic to cats and dogs?
No, Polka Dot Plant (Hypoestes phyllostachya) is considered non-toxic to cats, dogs, and horses according to the ASPCA. It is a pet-safe option for households with curious animals, though eating large amounts of any plant material can still cause mild stomach upset in pets.
Why is my Polka Dot Plant losing its color?
Color loss is almost always caused by insufficient light. Polka Dot Plants produce their vivid spots via pigment cells that require bright conditions to stay dominant over the green chlorophyll. Move the plant to a spot with brighter indirect light and you will see new growth emerge with vivid color within two to four weeks.
How often should I pinch my Polka Dot Plant?
During the growing season (spring through early autumn), pinching every one to two weeks keeps the plant compact and bushy. In winter when growth slows, you can pinch less frequently. Stems should not be left to elongate for more than three to four weeks without pinching during active growth.
Why are the leaves of my Polka Dot Plant curling?
Leaf curl is usually a sign of low humidity or too much direct sun. If the edges curl inward along the length of the leaf, the air around the plant is likely too dry, use a pebble tray or humidifier. If leaf tips curl and there are bleached patches, the plant may be getting too much direct sun; move it slightly back from the window or add a sheer curtain.
Can Polka Dot Plant grow in low light?
It will survive in medium-low light, but the vivid spot colors fade significantly and the plant grows slowly and leggy as it stretches toward any available light. For the plant to look its best, bright indirect light is genuinely needed. If your space lacks natural bright light, a grow light placed 6-12 inches above the plant for 10-12 hours a day is an effective substitute.
How long does a Polka Dot Plant live?
With regular care, a single plant can last two to three years indoors before it declines, often triggered by the blooming phase. Since these plants propagate so easily from cuttings, most experienced growers maintain a continuous cycle: taking cuttings every few months and replacing the parent plant once it starts to look past its prime. If you propagate regularly, you can maintain a Polka Dot Plant indefinitely.
Should I let my Polka Dot Plant bloom?
This is personal preference. The flowers are small but pretty. The trade-off is that blooming signals the beginning of the plant's natural decline phase, so if you want to extend the plant's life, it is better to remove the flower spikes as they form. If you let it bloom, collect seeds from the spent flowers, they germinate readily and give you a new generation of compact, colorful plants.
Can Polka Dot Plant grow outdoors?
Yes, in USDA zones 10-11 it can grow as a perennial outdoor ground cover or container plant. In cooler climates it is commonly used as a colorful annual in summer container gardens. It thrives in partially shaded outdoor spots during warm months but cannot tolerate frost and should be brought back indoors before temperatures fall below 55°F.
ℹ️ Polka Dot Plant Info
Care and Maintenance
🪴 Soil Type and pH: Peat or coco-coir based, moisture-retentive but well-draining with added perlite.
💧 Humidity and Misting: Prefers 50-60%+ humidity; thrives in humid rooms or near a pebble tray.
✂️ Pruning: Pinch stem tips every 1-2 weeks to keep the plant bushy and compact.
🧼 Cleaning: Wipe leaves gently with a damp cloth to remove dust; avoid misting the crown directly.
🌱 Repotting: Every 1-2 years or when roots emerge from drainage holes, preferably in spring.
🔄 Repotting Frequency: Every 1-2 years
❄️ Seasonal Changes in Care: Reduce fertilizing in winter and keep away from cold drafts. Pinch more aggressively in spring to shape new growth. Move closer to a window in winter to maintain leaf color.
Growing Characteristics
💥 Growth Speed: Fast
🔄 Life Cycle: Perennial (often treated as an annual outdoors)
💥 Bloom Time: Late summer to autumn; small lavender-pink tubular flowers. Usually pinched off to keep the plant's energy in foliage production.
🌡️ Hardiness Zones: 10-11 (outdoors)
🗺️ Native Area: Madagascar
🚘 Hibernation: No
Propagation and Health
📍 Suitable Locations: Bright windowsills, terrariums, tabletops, humid bathrooms, desks.
🪴 Propagation Methods: Very easy from stem cuttings rooted in water or moist soil.
🐛 Common Pests: Spider Mites, Mealybugs, Whiteflies, Aphids, Fungus Gnats
🦠 Possible Diseases: Root rot, powdery mildew, botrytis.
Plant Details
🌿 Plant Type: Herbaceous Perennial
🍃 Foliage Type: Evergreen
🎨 Color of Leaves: Green with pink, red, white, or purple spots and splashes depending on variety.
🌸 Flower Color: Lavender to pale pink tubular flowers
🌼 Blooming: Late summer to autumn; not the main attraction
🍽️ Edibility: Not edible
📏 Mature Size: 12-24 inches
Additional Info
🌻 General Benefits: Vibrant color in a small footprint, fast growing, easy to propagate, safe for pets and children.
💊 Medical Properties: None known
🧿 Feng Shui: Brings playful, uplifting energy; said to stimulate creativity when placed in a home office or study.
⭐ Zodiac Sign Compatibility: Gemini
🌈 Symbolism or Folklore: Joy, playfulness, and the beauty of small things.
📝 Interesting Facts: Polka Dot Plants can lose their color intensity within weeks if moved to a darker spot, making them living litmus tests for a home's light levels. The spots are caused by pigment cells that override the green chlorophyll, and more light means the pigments stay dominant rather than the green.
Buying and Usage
🛒 What to Look for When Buying: Look for compact, bushy plants with vivid, high-contrast spots. Avoid leggy specimens with long bare stems between leaves. Check the undersides of leaves for early spider mite webbing before purchase.
🪴 Other Uses: Excellent for terrariums and vivaria alongside other humidity-loving plants. Often used as a colorful annual in outdoor container gardens in summer.
Decoration and Styling
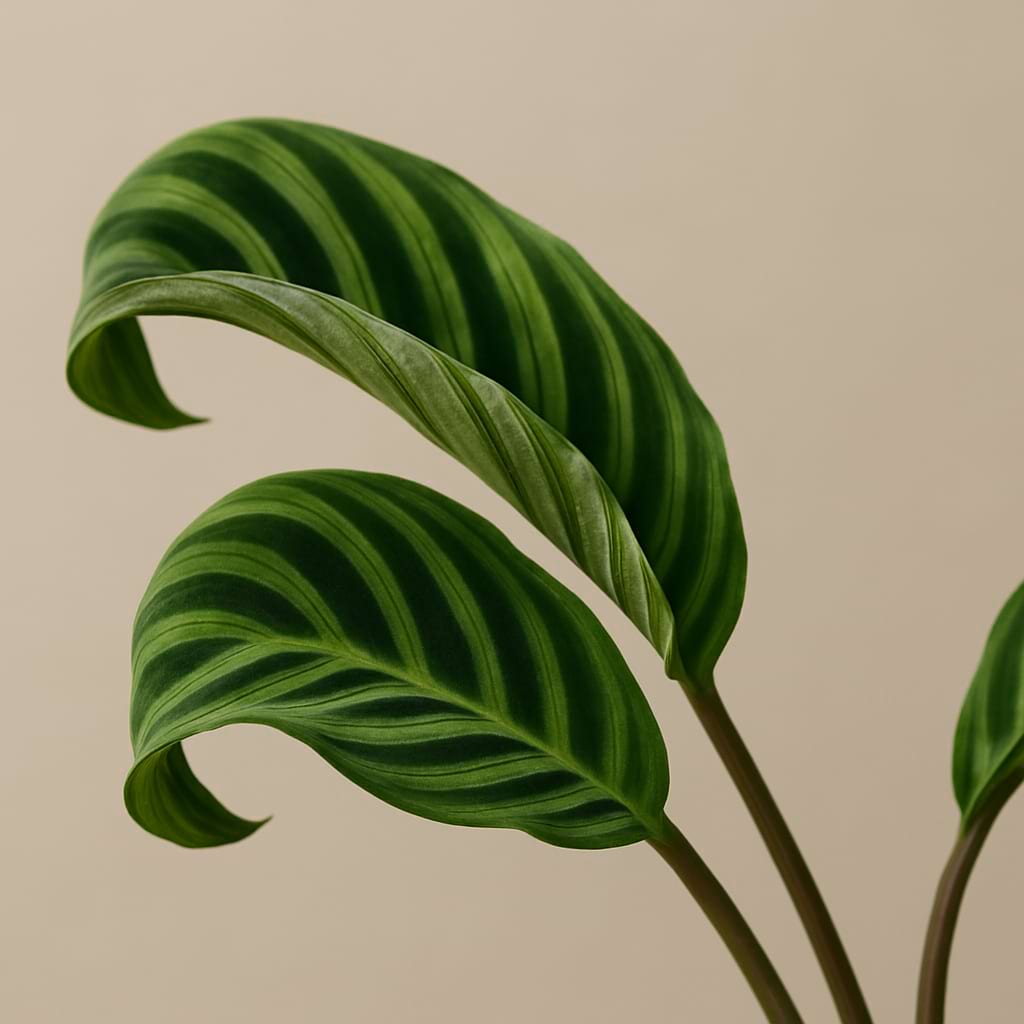
🖼️ Display Ideas: Looks stunning grouped with darker-foliaged plants like Calathea or Maranta as the colorful focal point. A pink variety paired with a dark-pot peperomia on a bathroom shelf is a classic combination.
🧵 Styling Tips: Dark or neutral pots let the spotted foliage star. Avoid bright-colored pots that compete with the leaf patterns. Pairs beautifully with the Nerve Plant for a humidity-loving, compact foliage duo.
Houseplant101 Forum
Questions & Comments
Ask a question, share your plant experience, or help other plant owners.
Comments are temporarily unavailable.
Open the Houseplant101 ForumNo comments yet
Be the first to ask a question or share your experience about this page.
Log in or create an account
Comments use your Houseplant101 Forum account, but you can stay on this page.
Create a new account