🪴 In This Guide 🪴
🔎 What Are Mealybugs? A Closer Look
Understanding the Pest
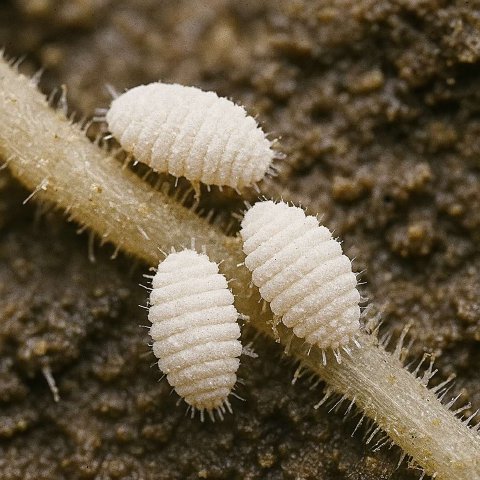
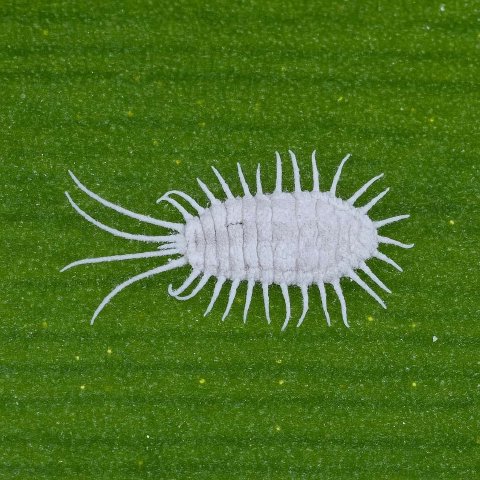
Mealybugs are one of the most common and frustrating houseplant pests. These tiny, oval insects are related to scale and use their piercing mouthparts to suck the sap right out of your plant’s tissue. Their waxy, white coating protects them from predators and many topical pesticides, making them particularly difficult to eradicate.
They thrive in warm, humid conditions and are experts at hiding. A female can lay hundreds of eggs in a cottony-looking sac, leading to a rapid population explosion.
How to Identify Mealybugs: Signs & Symptoms
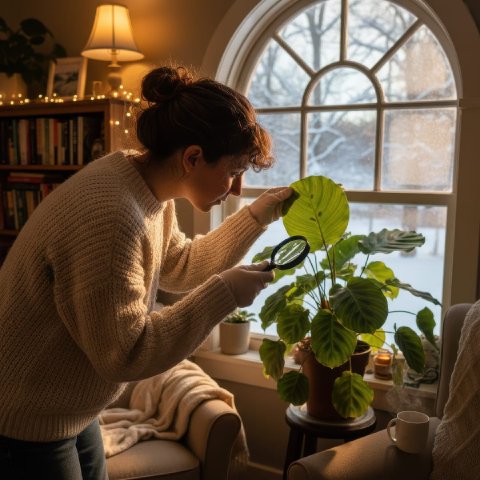
Catching a mealybug infestation early is crucial. Grab a magnifying glass and look for these signs:
- Visible Insects: You’ll see clusters of what looks like white, cottony fluff. On closer inspection, you’ll find individual oval-shaped, white insects (1-4mm) that are slow-moving.
- Common Hiding Spots: Check carefully in leaf axils (where the leaf meets the stem), on the undersides of leaves, in new growth, and along plant stems.
- Sticky “Honeydew”: Like aphids, mealybugs excrete a clear, sticky substance as they feed. This honeydew can make leaves look shiny and feel tacky.
- Sooty Mold: This sticky residue often attracts a black, powdery fungus called sooty mold.
- Plant Decline: A heavy infestation will cause leaves to turn yellow, droop, and eventually fall off. Overall growth will be stunted.
- Ants: Ants are attracted to the sweet honeydew and will “farm” mealybugs, protecting them from predators in exchange for food.
🤔 What Causes a Mealybug Infestation?
How Did They Get Here?
Mealybugs are sneaky and can be introduced in several ways. They are most attracted to plants that are:
- New to Your Home: The most common source is an infested plant brought in from a nursery or store. Always quarantine and inspect new plants!
- Over-fertilized: Too much nitrogen fertilizer creates lush, tender new growth that is a feast for mealybugs.
- Overwatered: A stressed plant is a weak plant, making it an easy target for pests.
- Lacking Airflow: Stagnant air allows pests to settle and multiply without disturbance.
🌿 How to Get Rid of Mealybugs: A Step-by-Step Treatment Plan
Step 1: Isolate the Plant IMMEDIATELY
As soon as you spot mealybugs, move the affected plant far away from your other houseplants. Mealybug “crawlers” (the newly hatched young) can and will travel to nearby plants.Step 2: Manual Removal (First Line of Defense)
This step is incredibly effective for targeting visible adults.
- Spot Treat with Rubbing Alcohol: Dip a cotton swab or Q-tip in 70% isopropyl rubbing alcohol and touch it directly to each individual mealybug and cottony egg sac. The alcohol instantly dissolves their waxy coating, killing them.
- Rinse the Plant: After spot treating, take the plant to a sink or shower and rinse it with a stream of lukewarm water to wash off the alcohol and any dead bugs.
Step 3: Natural & Organic Treatments
After manual removal, follow up with a full spray treatment to kill the tiny, hard-to-see crawlers. Repeat this every 5-7 days.
- Insecticidal Soap: A store-bought, plant-safe insecticidal soap is excellent for mealybugs. It works by suffocating them and breaking down their protective shell. Be sure to spray every surface of the plant, including stems and the undersides of leaves, until it is dripping wet.
- Neem Oil Solution: Neem oil acts as a repellent and growth disruptor.
- Recipe: Mix 1 teaspoon of pure, cold-pressed neem oil and ½ teaspoon of mild dish soap (as an emulsifier) in 1 quart of warm water.
- Application: Shake the mixture constantly as you spray. Coat all parts of the plant thoroughly.
Step 4: Chemical Treatments (Last Resort)
If the infestation is severe and has resisted other treatments, you can consider a systemic insecticide. These are absorbed by the plant, making the plant’s sap poisonous to the mealybugs. Use these with extreme caution, especially indoors, and always follow the label’s instructions.🛡️ How to Prevent Mealybugs from Coming Back
Proactive Plant Care
- Inspect New Plants Meticulously: This is the most important prevention step. Check every new plant for pests before introducing it to your collection.
- Wipe Leaves Regularly: A routine cleaning with a damp cloth not only keeps your plant looking good but also removes any early-stage pests.
- Avoid Over-Fertilizing: Feed your plants according to their needs, but don’t overdo it.
- Prune as Needed: Regularly remove any dead or dying leaves, as these can be hiding spots for pests.
